Make your own Equipment
Updated May 23, 2026
Use this page to create a new equipment item, add it to the required data tables, choose the correct equipment base class, and test it in the world.
Related setup: Customize Your Datatables, Configure Attributes, Set Up Inventory for the Player.
Core Architecture knowledge for Equipment
To make your own equipment, you need to understand three main areas:
- AC_Equipment
- DT_Equipment
- Equipment base classes
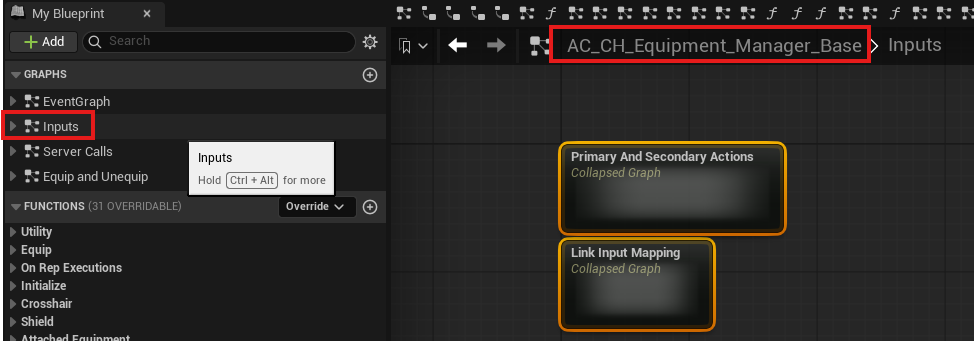
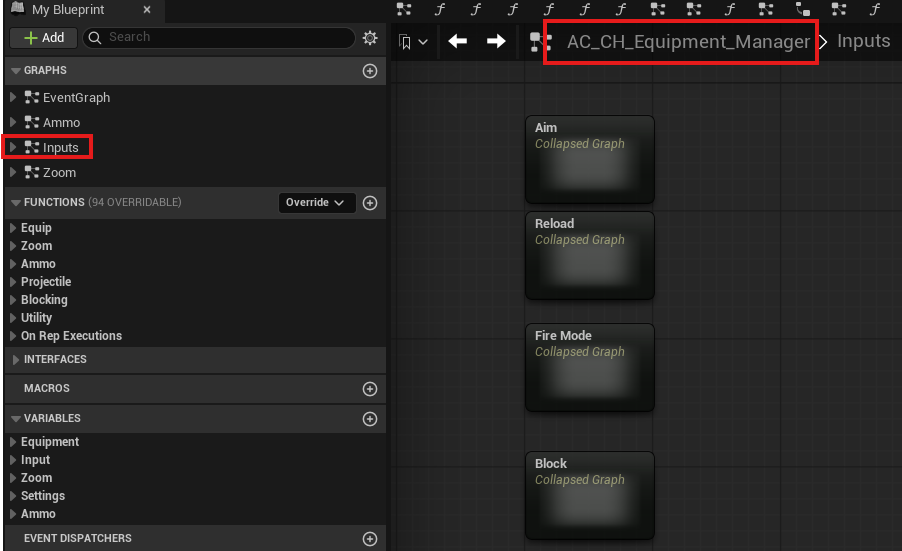
AC_Equipment
AC_Equipment contains the main code for equipping, unequipping, and related equipment behavior.
The most important concept is that equipment uses linked input mappings. A few core inputs are routed into equipment types:
- Primary Input, such as left mouse button.
- Secondary Input, such as right mouse button.
Check the code in AC_CH_Equipment_Manager_Base for the input routing.
Both primary and secondary input can trigger once or on hold. With those two buttons, this gives you four input options. These inputs are routed into BP_Equipment_Base subclasses, where equipment classes can listen to the inputs and perform actions.
For example, BP_Equipment_Melee listens to primary and secondary input and switches the melee option.
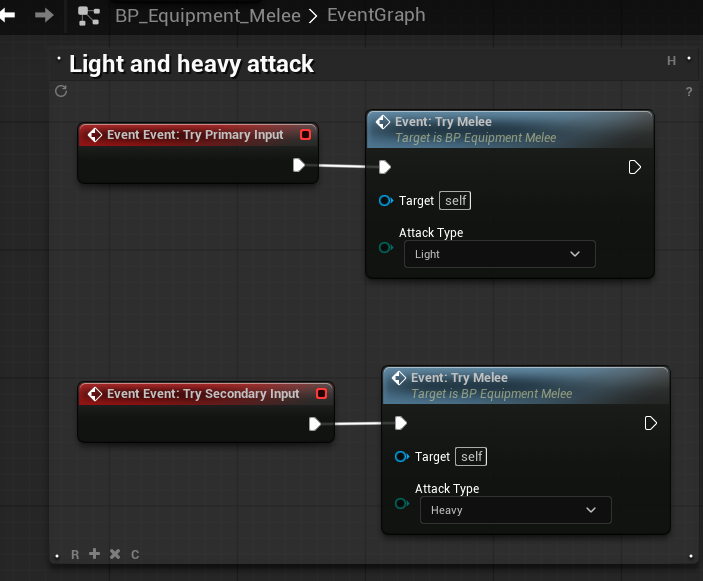
This class also includes extra inputs.
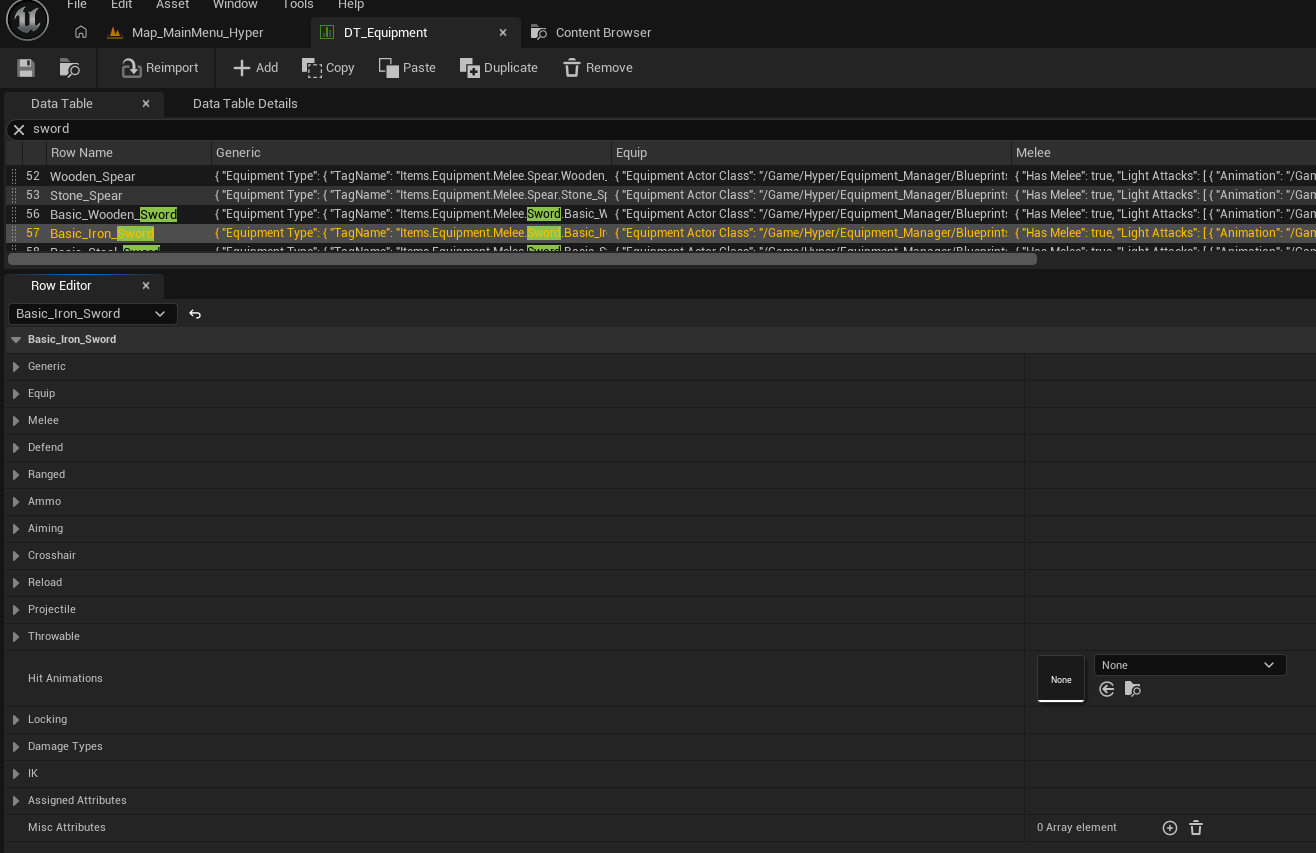
DT_Equipment
DT_Equipment stores shared information that applies to most equipment types, including:
- Which attributes the equipment has, such as damage or fire range.
- Which animation layer to use.
- Which mesh to display.
- Which socket the equipment attaches to.
- Other shared equipment settings.
When you make new equipment, add it to DT_Equipment.
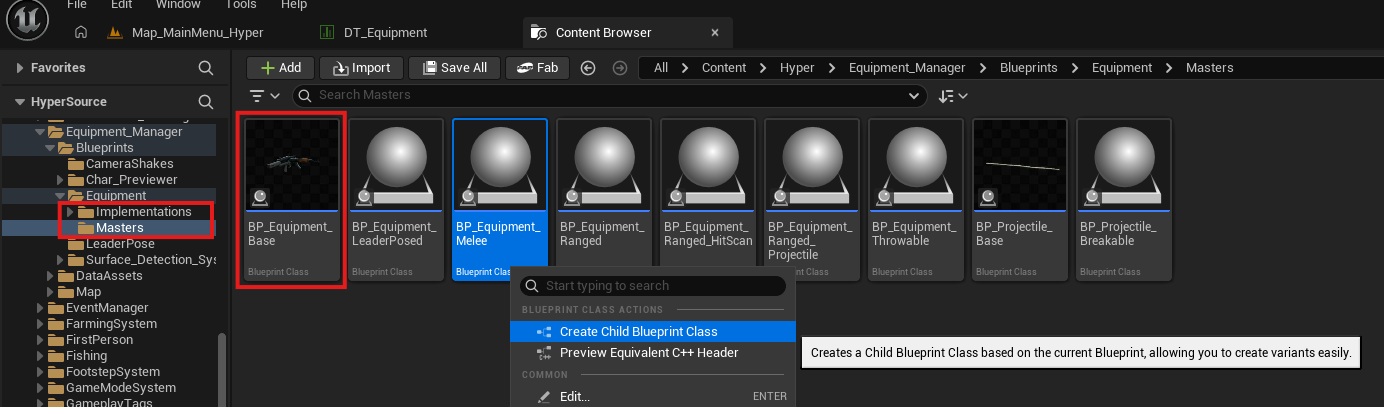
Equipment base classes
Many equipment types share code. Firearms can share line trace code, melee weapons can share melee combo animation code, and similar equipment families can inherit from common base classes. Hyper includes a subset of common equipment classes so you do not need to build these foundations from scratch.
If you want to make a custom melee class with very specific melee behavior, create a child class of BP_Equipment_Melee and implement your custom code there.
How to add equipment
This example adds another melee weapon.
-
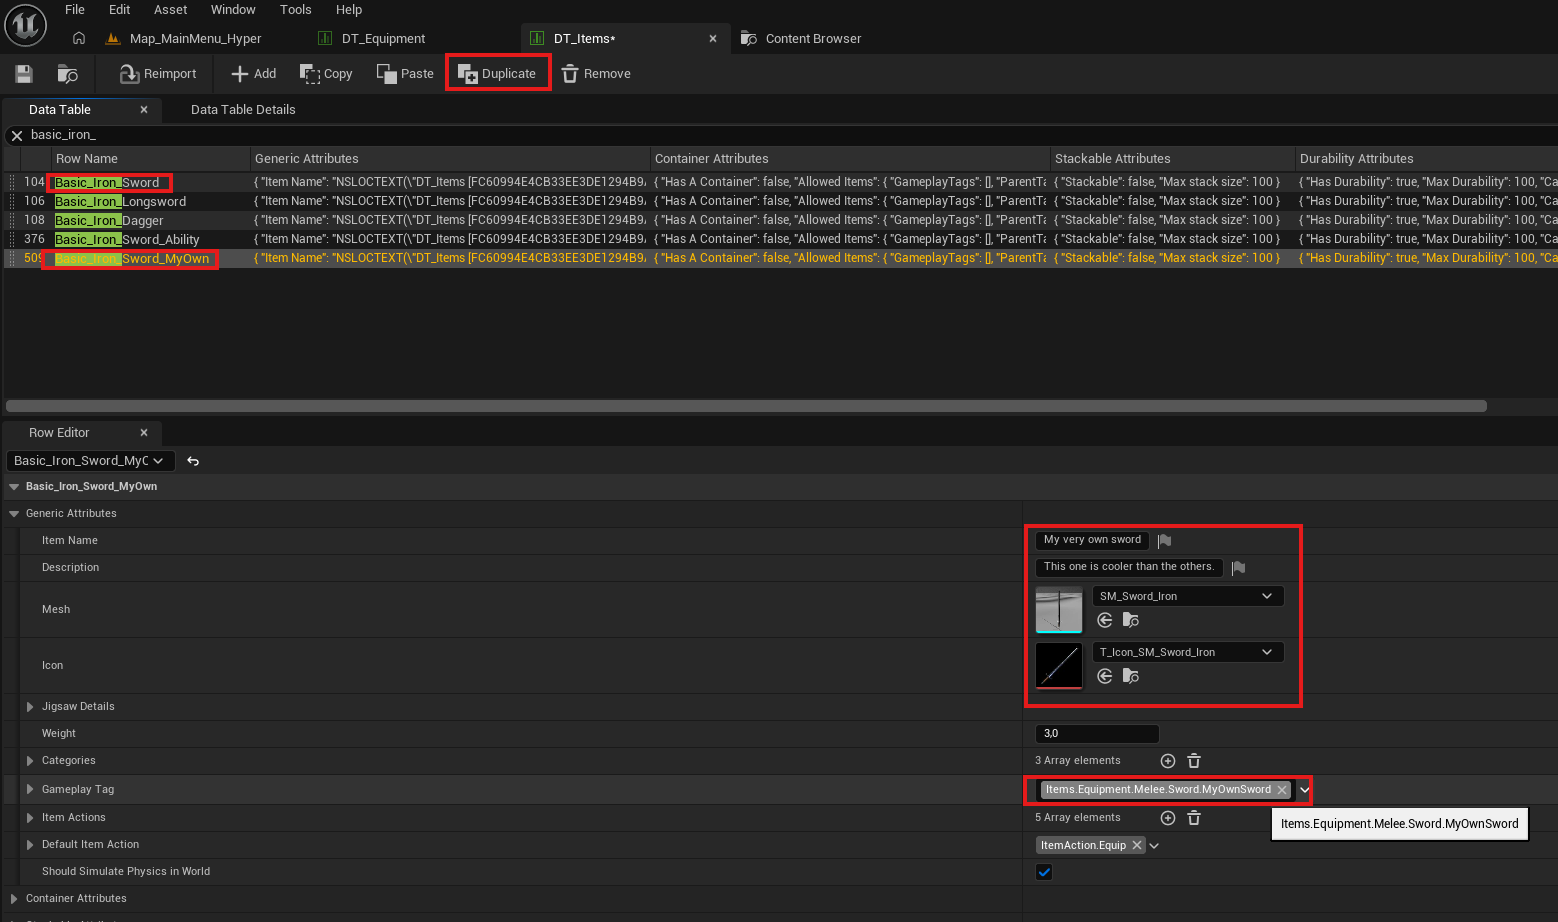
Open DT_Items and DT_Equipment.
- Create an inventory item that represents the equipment.
- For the item workflow, see Customize Your Datatables.
- Tip: duplicate an existing row so the main settings are already close. In this example, the duplicated row is Basic Iron Sword.
-
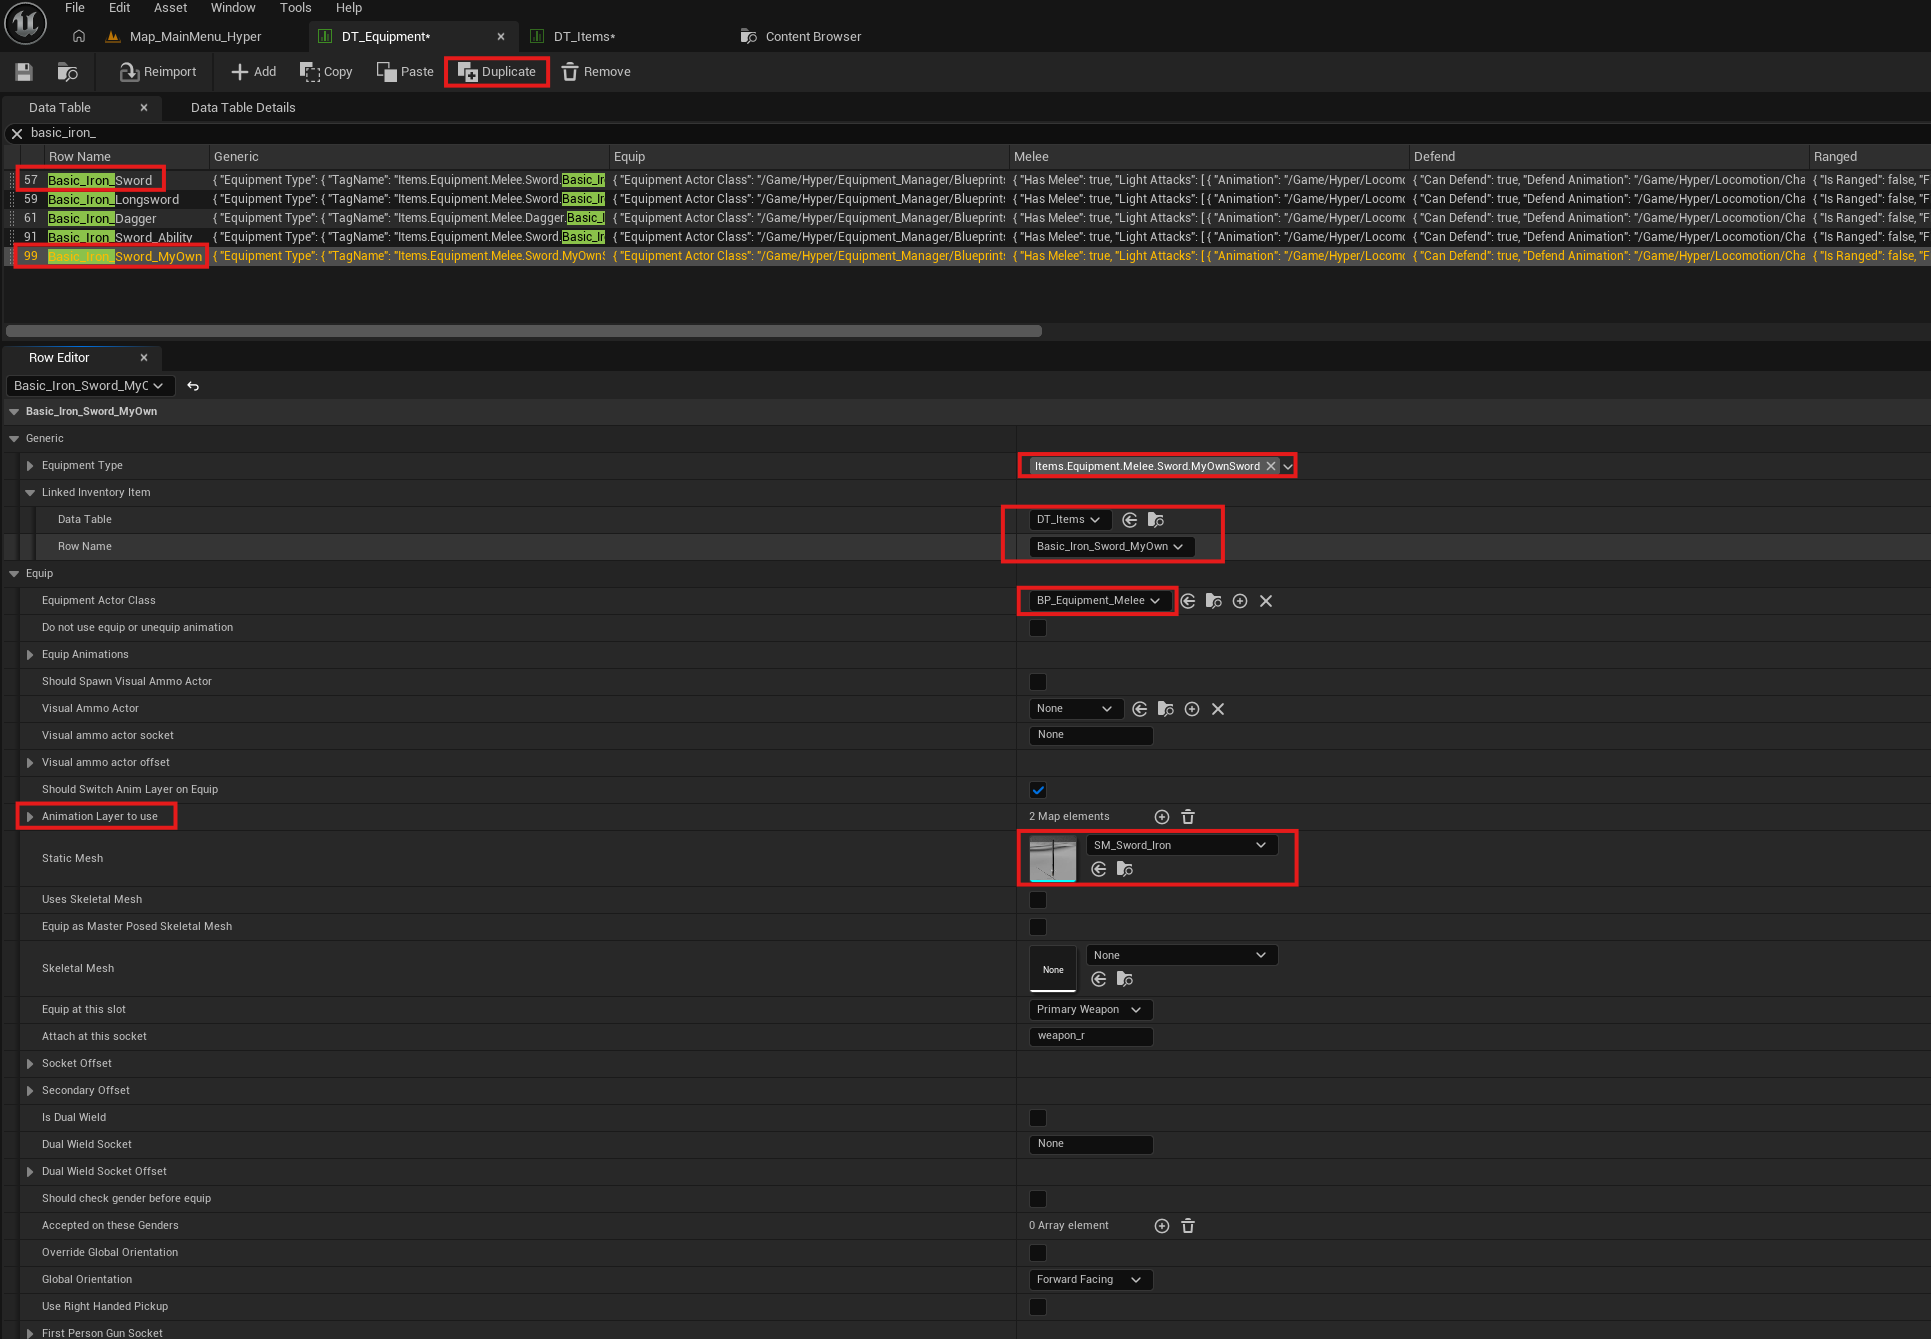
Create the equipment row and select the core information you need.
- In this example, the Iron Sword row is duplicated and core variables are changed.
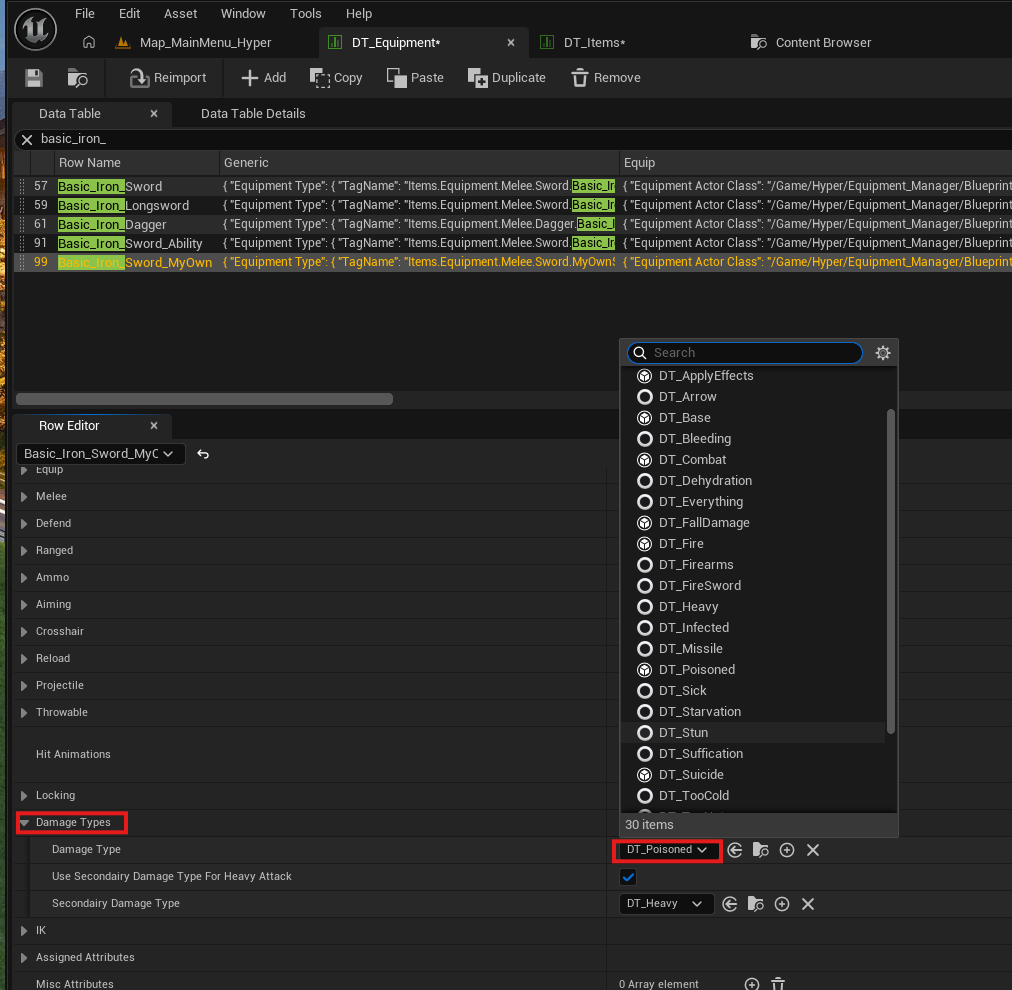
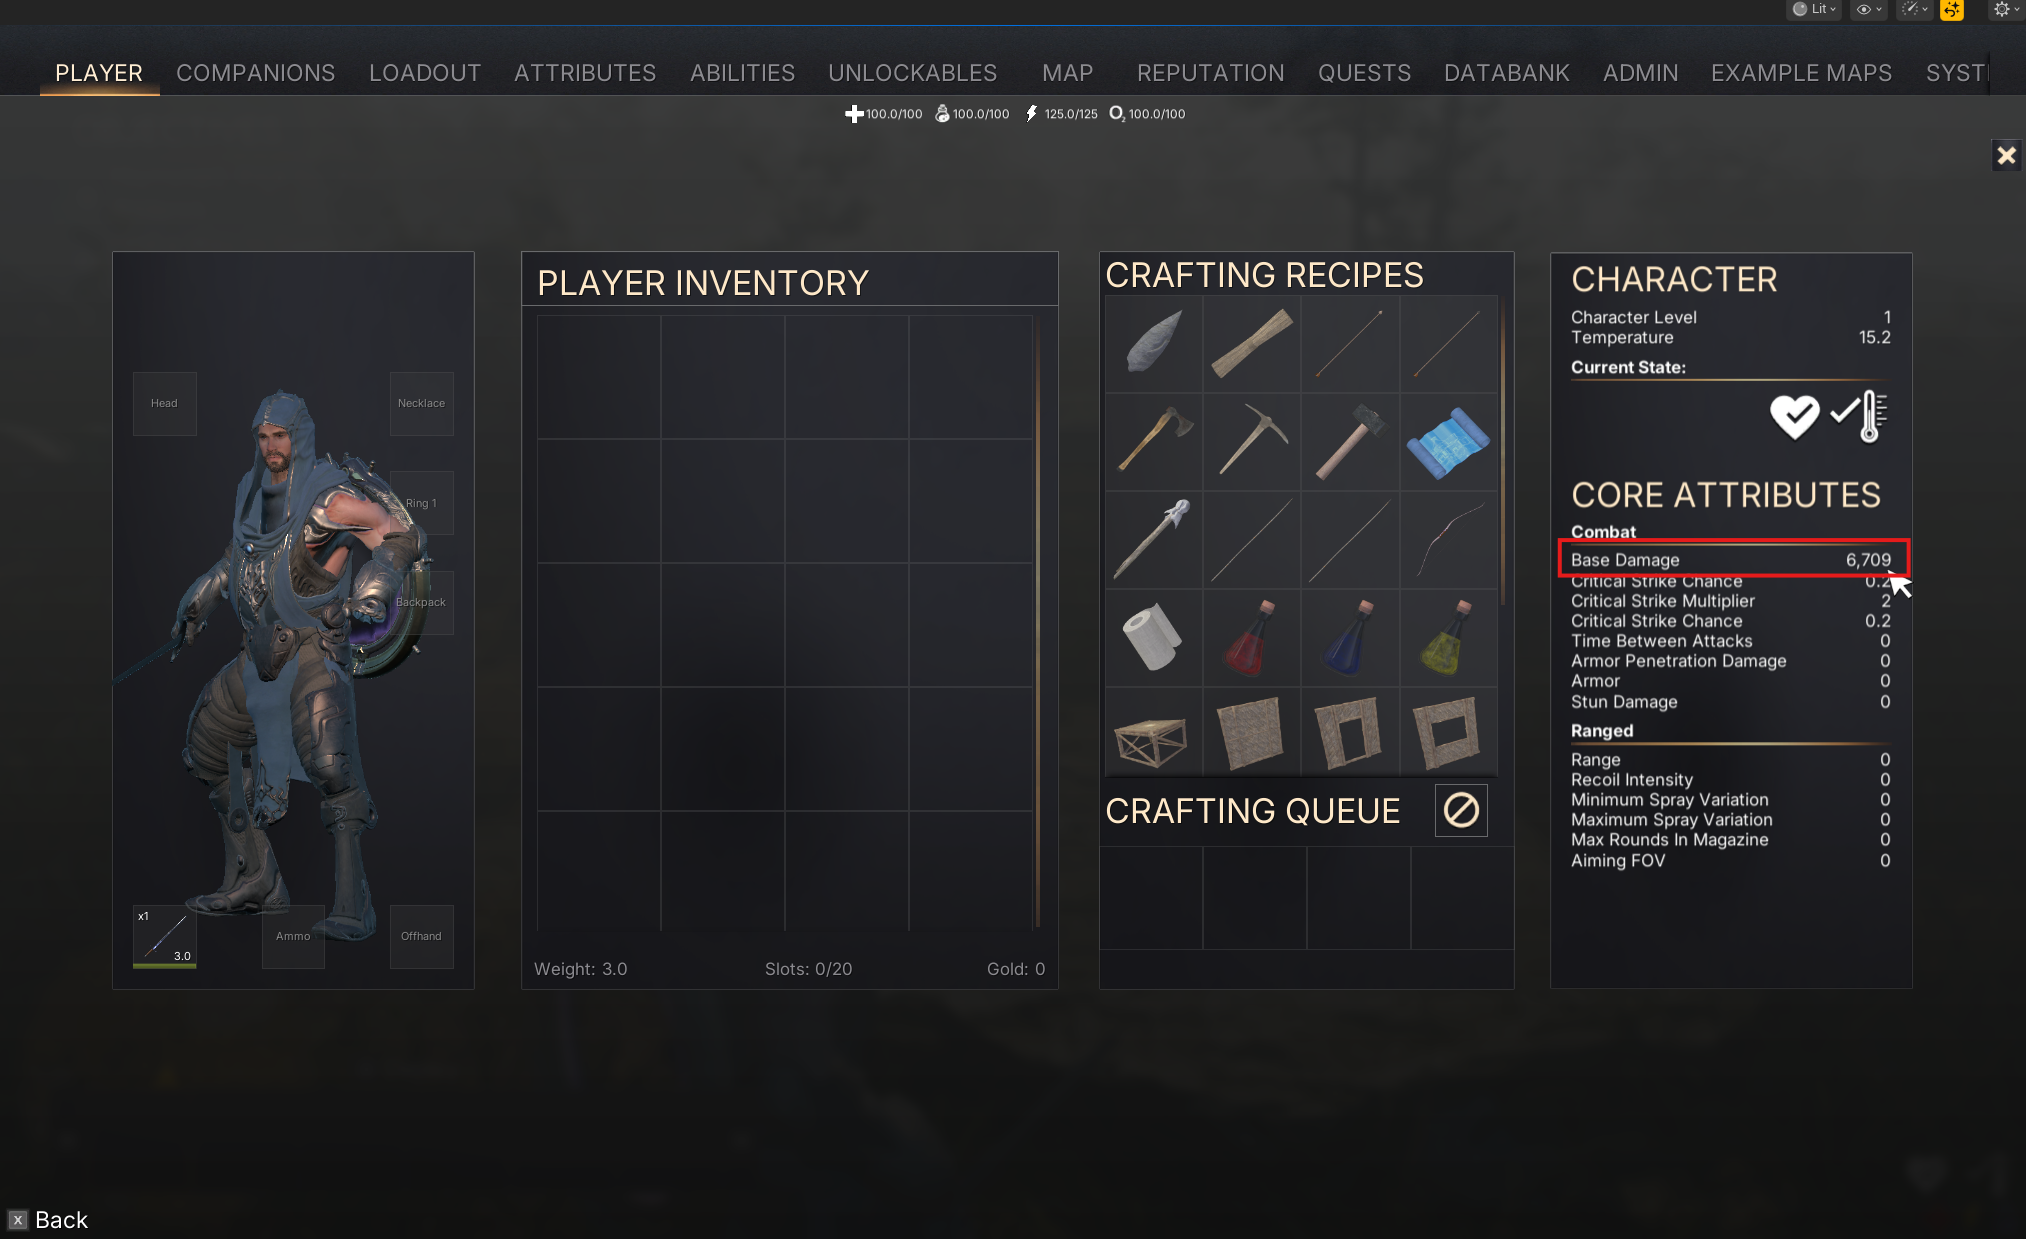
This guide does not cover every equipment setting, but equipment rows can control many things, including:
-
Attribute values, such as damage amounts.

-
State effects through damage types, such as poison.
- Animations.
- Other equipment-specific settings.

Important: the gameplay tag on DT_Items and DT_Equipment must be the same. This is intentional and required.
-
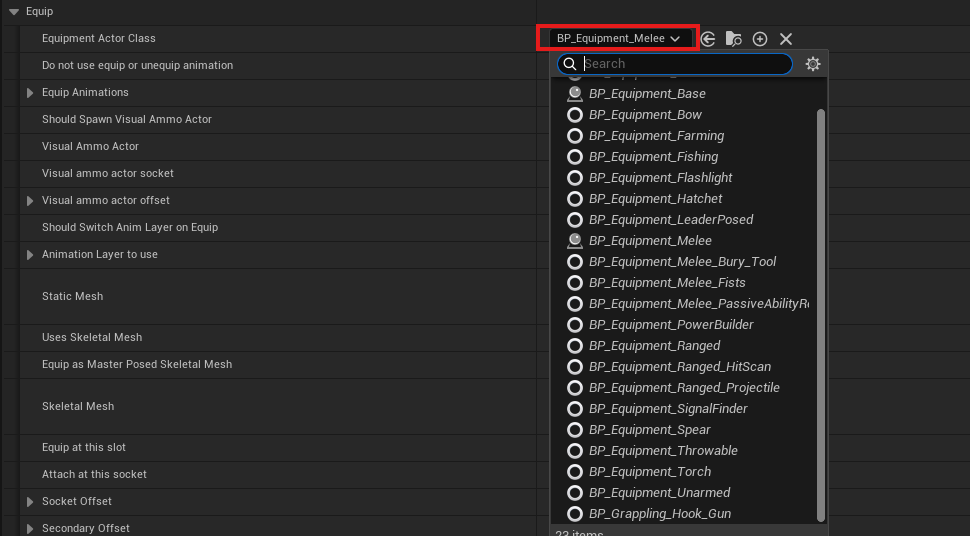
Choose the equipment base class.
- For a new sword, you can use BP_Equipment_Melee and assign it in DT_Equipment.
- If you need a specific implementation, create a child of BP_Equipment_Melee and add your custom code there.
-
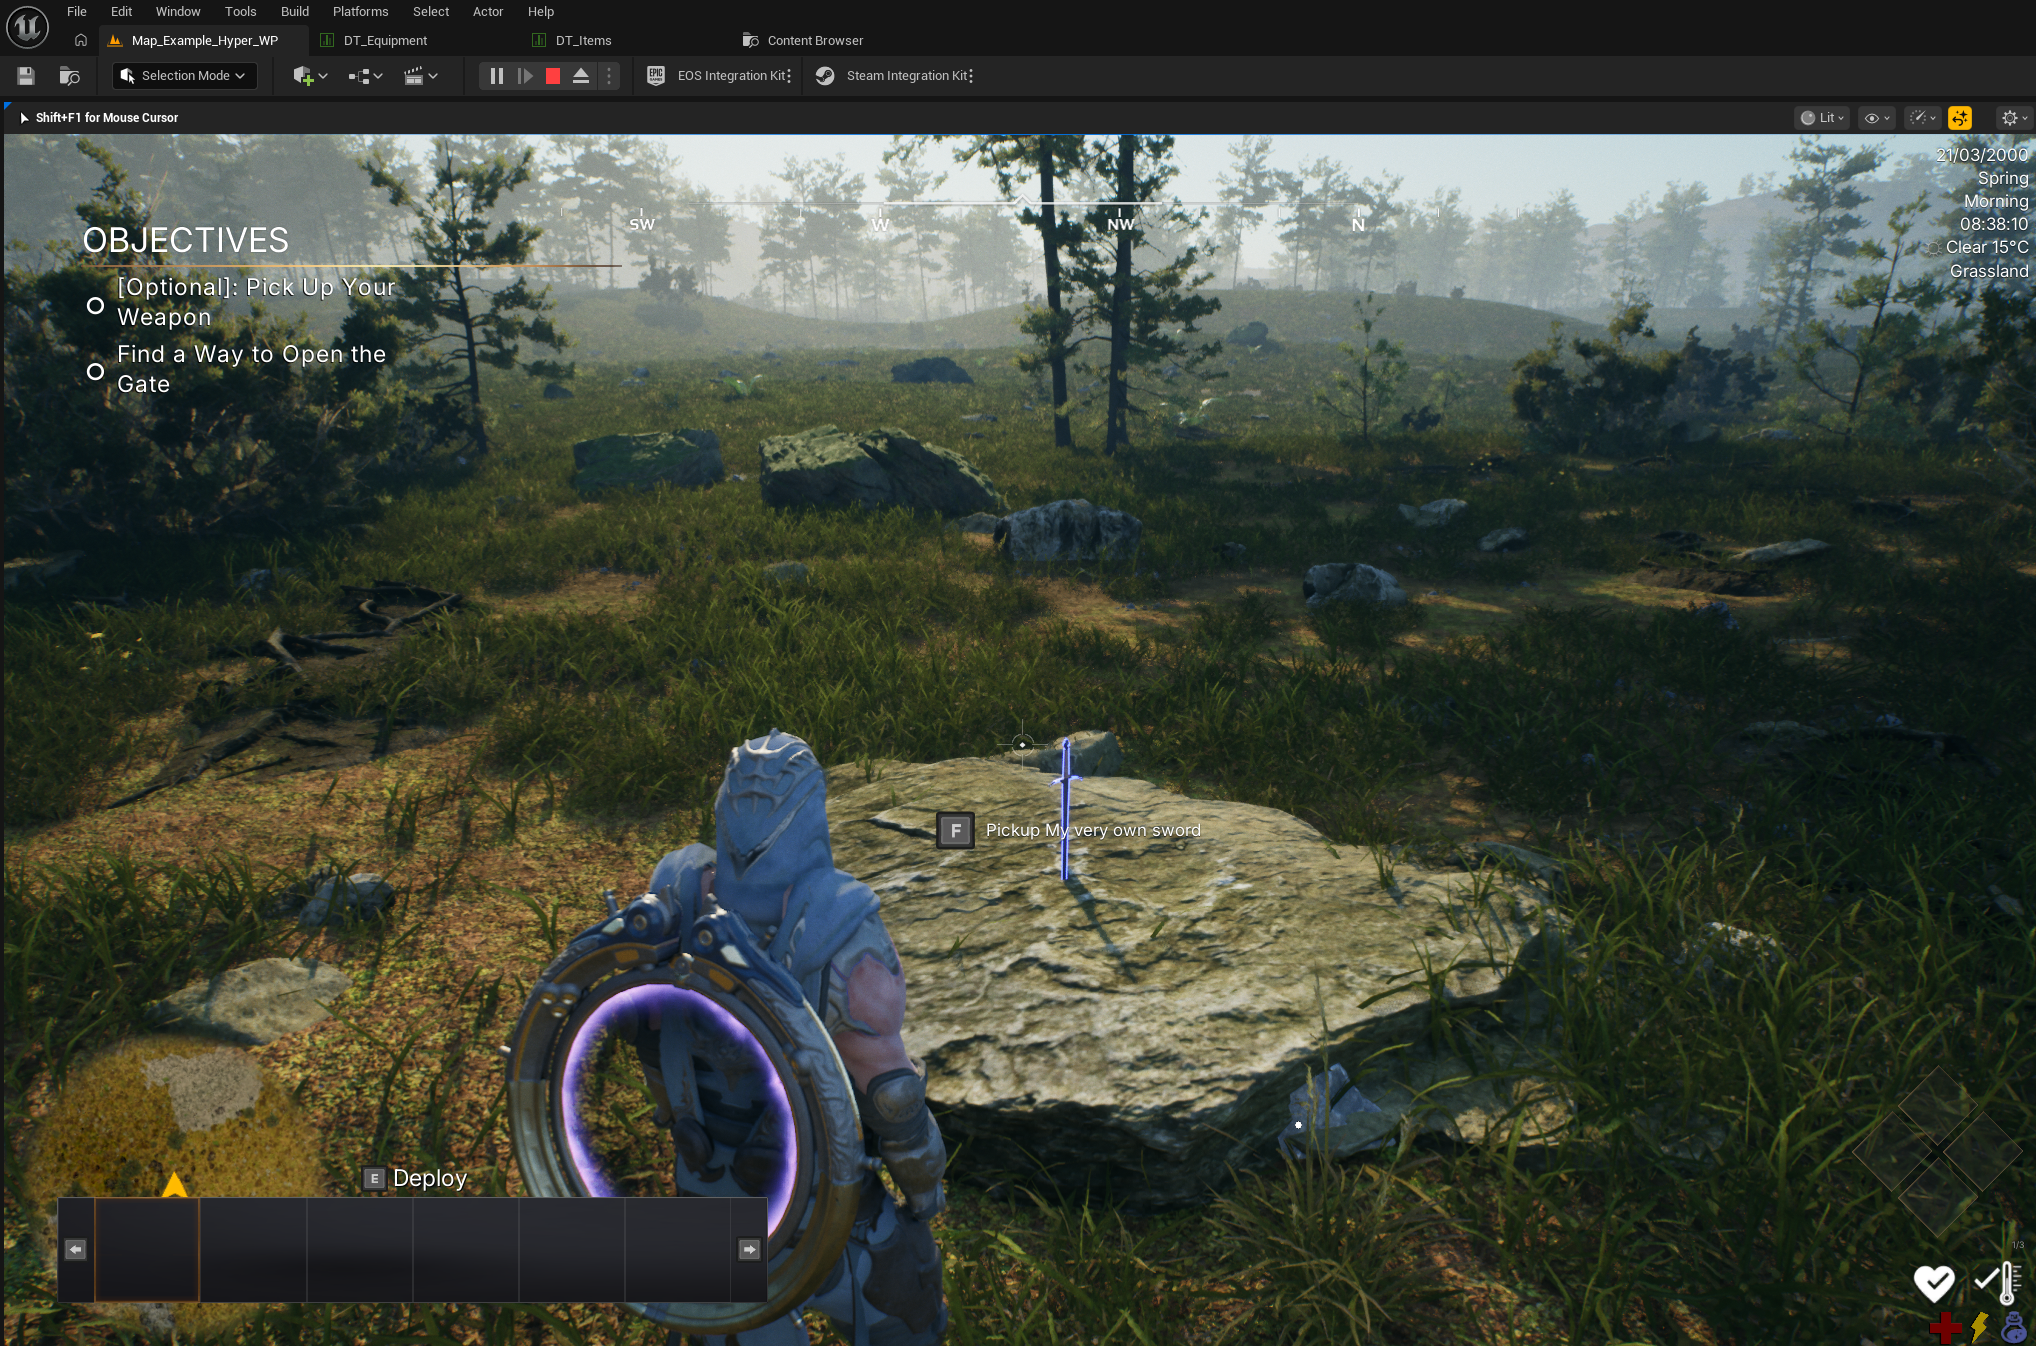
Test the item in the world.
- Drag BP_Pickup_And_Equiop into the world, or use BP_Pickup_Base.
- Select the item in the Inventory Slot row.
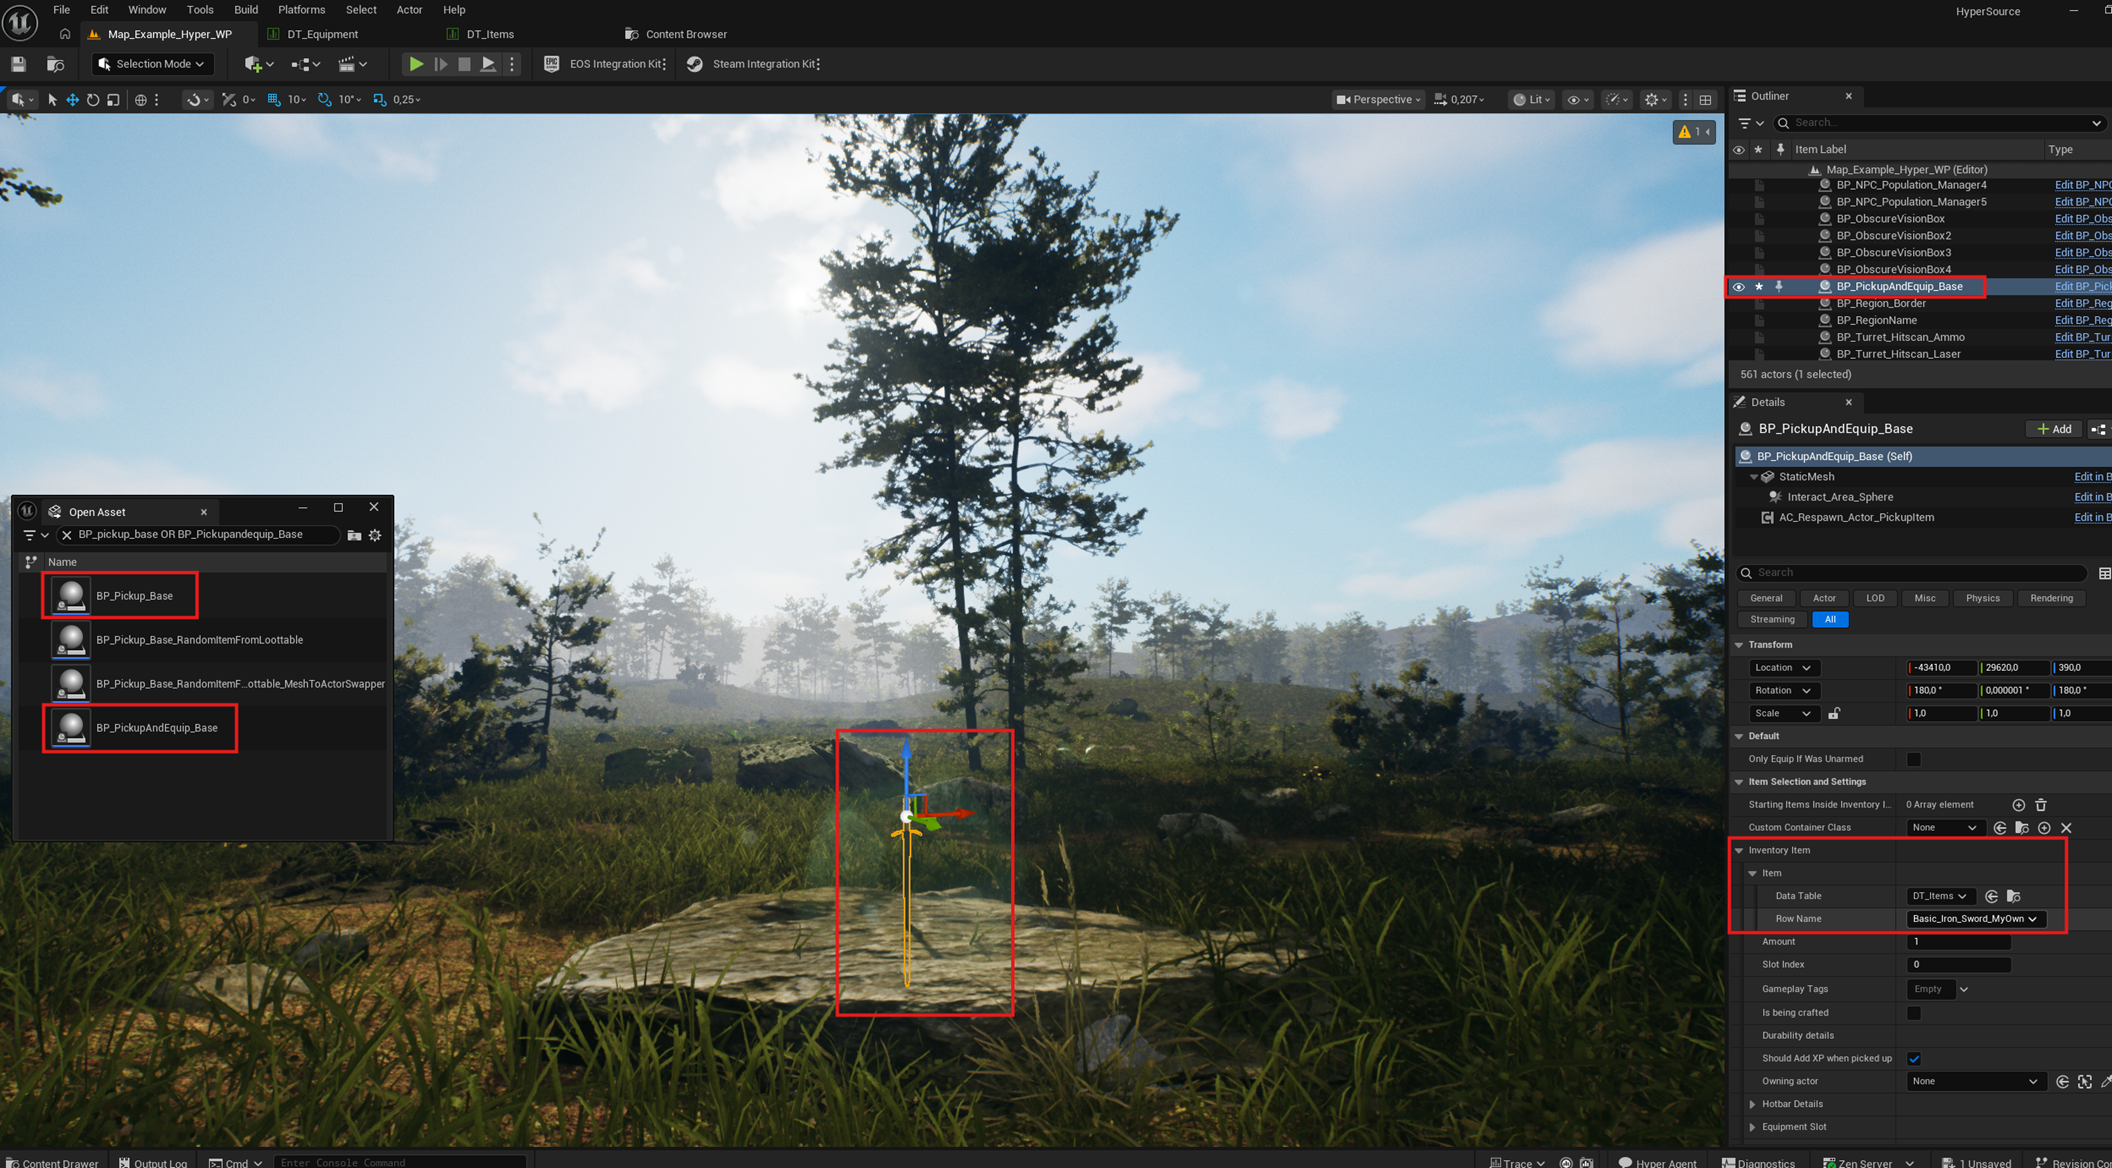
- Press Play and test the equipment.
- Adjust the item, equipment row, or equipment class to your liking.
With this workflow, you can manage many equipment types through data tables and shared equipment base classes.