Customize Modules
Updated May 23, 2026
Use this page to understand the recommended way to customize Hyper systems without editing core framework files directly.
Related setup: Set Up Inventory for the Player, Set Up Your Own Character.
How to manage a framework this large?
Hyper contains thousands of functions and events, many variables, hundreds of actor components, and a large amount of framework code. The practical goal is not to read or edit everything. The goal is to customize the parts you need while keeping your changes manageable for future updates.

The recommended approach is to avoid editing core Hyper Blueprints unless you really need to. Instead, create children or replacement components for your custom logic.
Make child components for your custom logic
You have access to nearly all code, but in many cases you do not need to modify the Hyper Blueprints directly. Because the framework uses dynamic dispatching, you can often create a child component, add your own logic there, and assign that component on your classes.
In short:
- Make child components for anything you want to modify.
- Add your own logic on top.
- Treat the core as framework code that should stay stable.
- If you change core files, you take responsibility for manually merging future updates.
-
To keep updates as smooth as possible:
- Make children.
- Keep your modifications isolated.
- Stay out of the core files where possible.
- Track the places where you override logic.
- You can store custom implementations in your own separate folder, or keep them next to the Hyper classes if that fits your workflow better.
How to add custom logic?
Cursed Treasure Chest
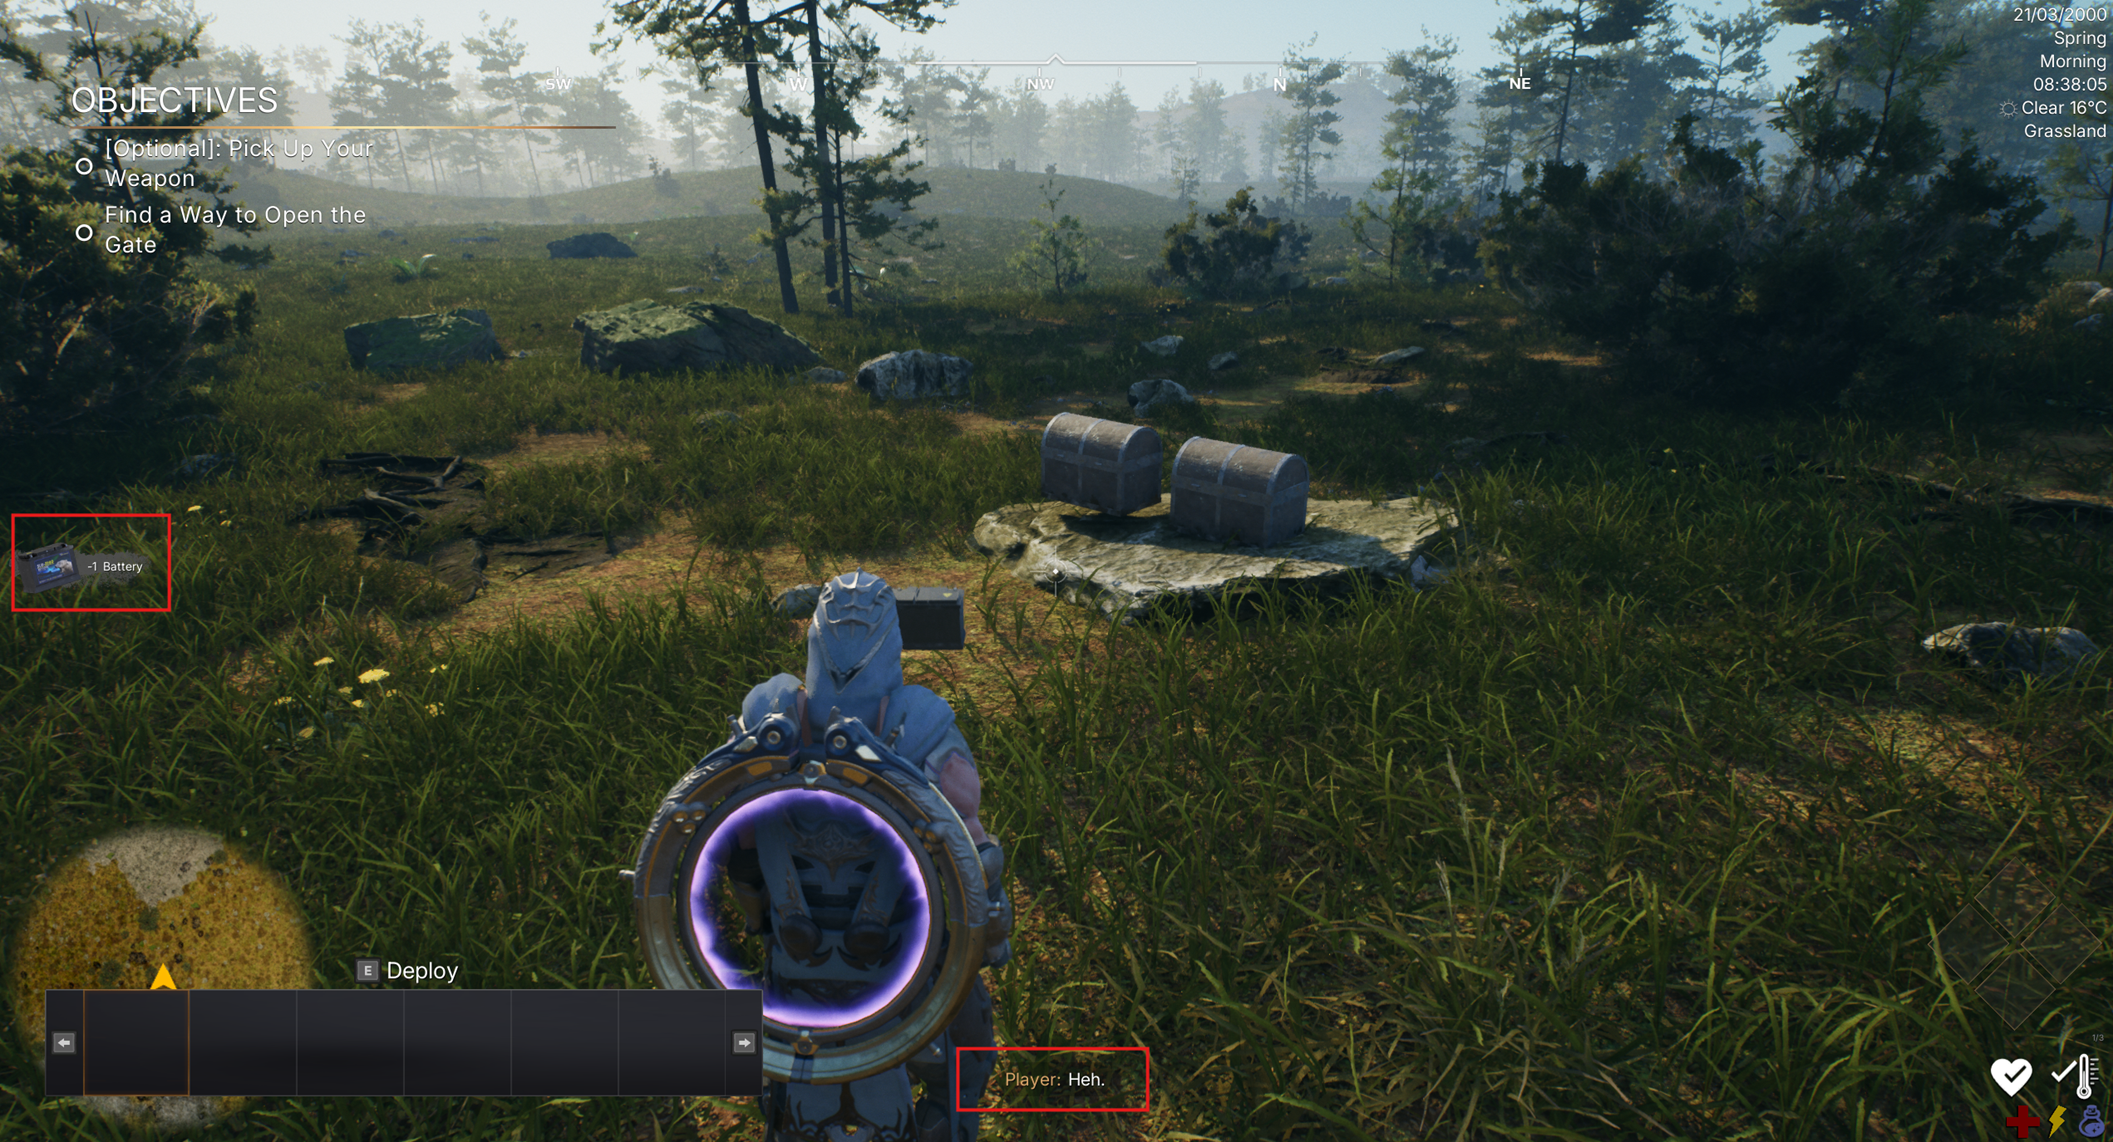
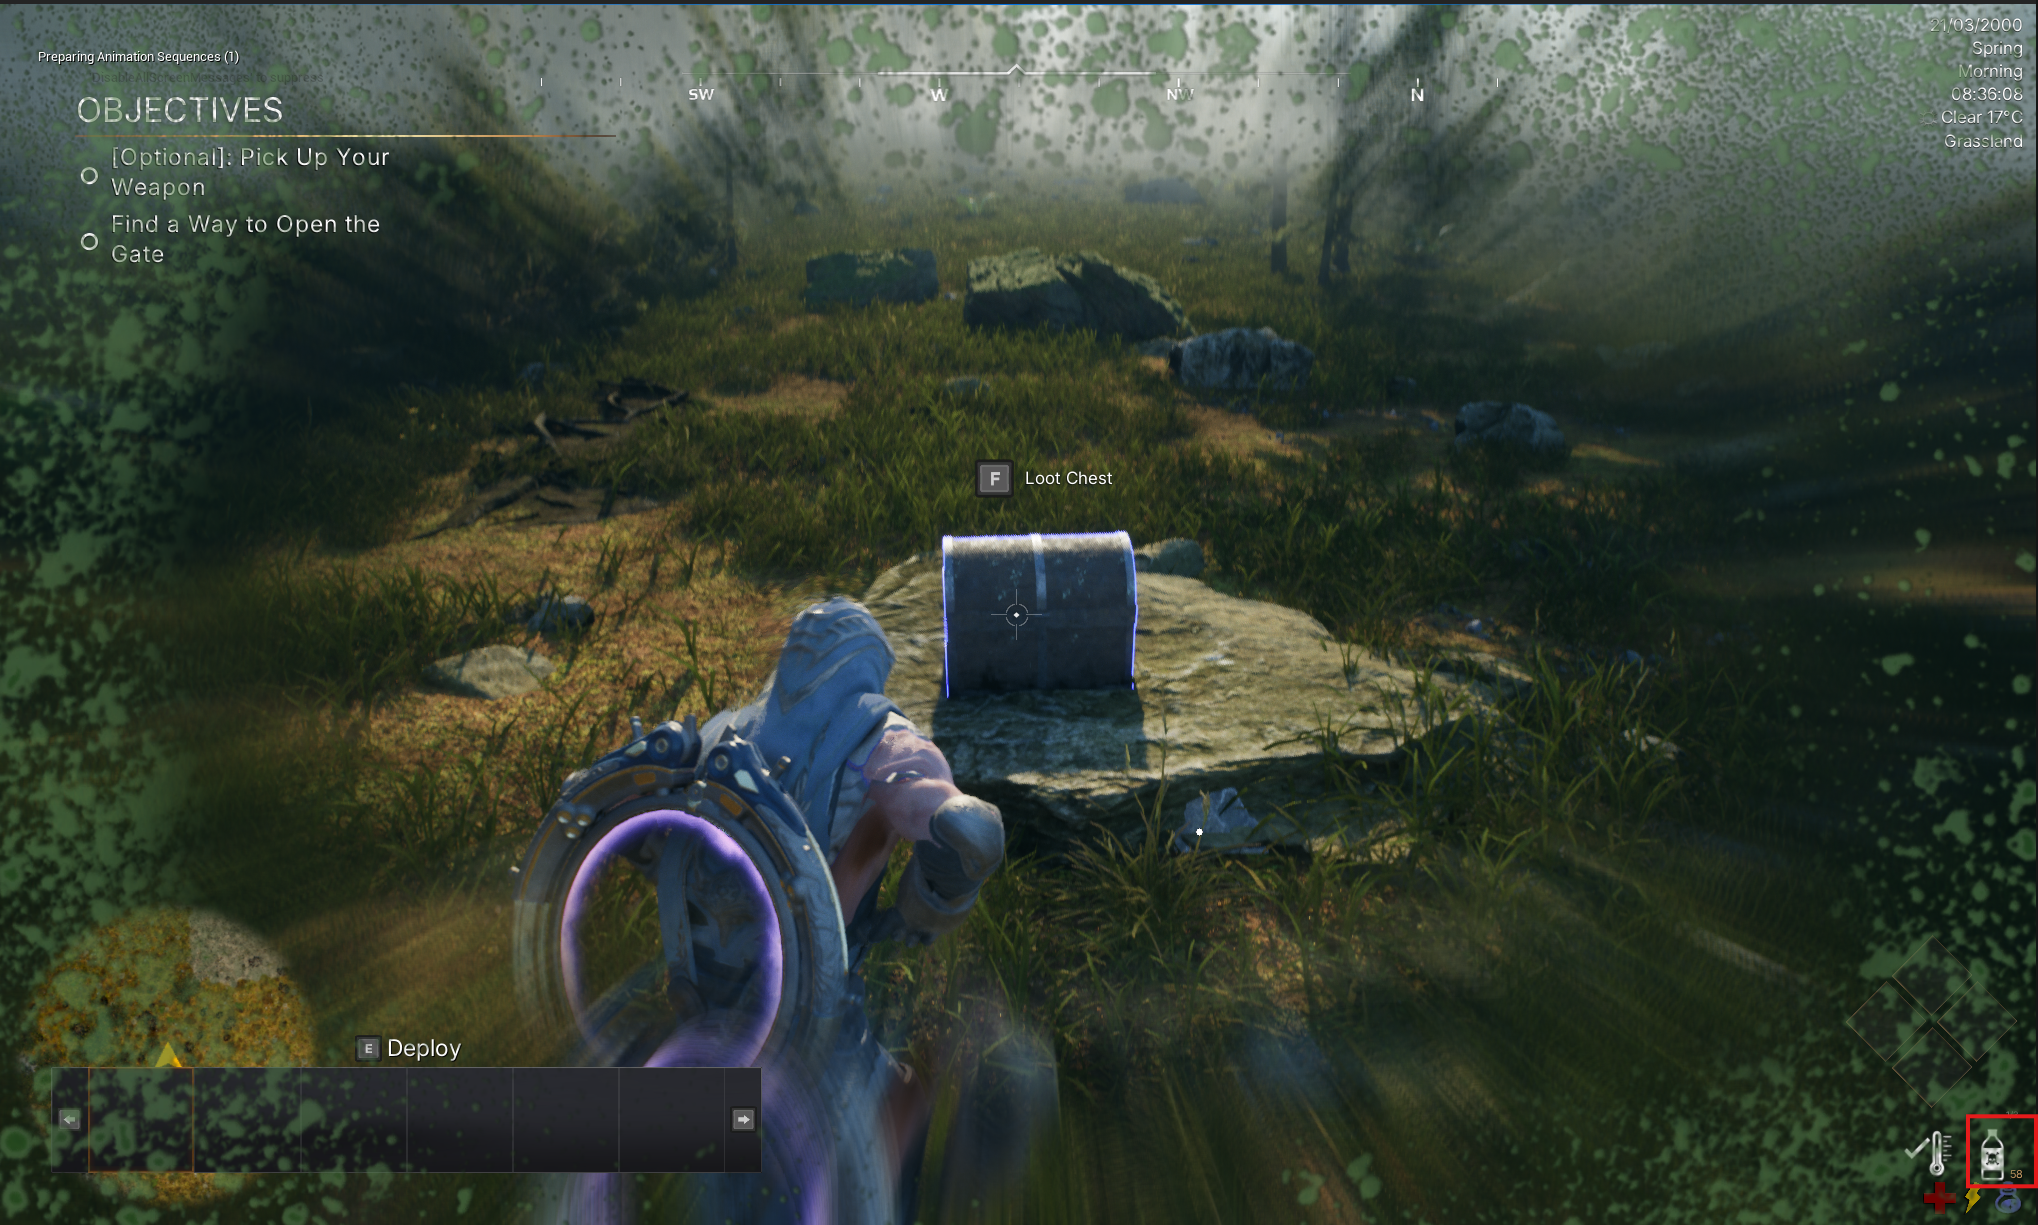
This example adds custom behavior to an interact location: a treasure chest that has a 50% chance to poison the player when opened. You need a system that includes an interact location to follow along directly, but the same customization principle applies elsewhere.
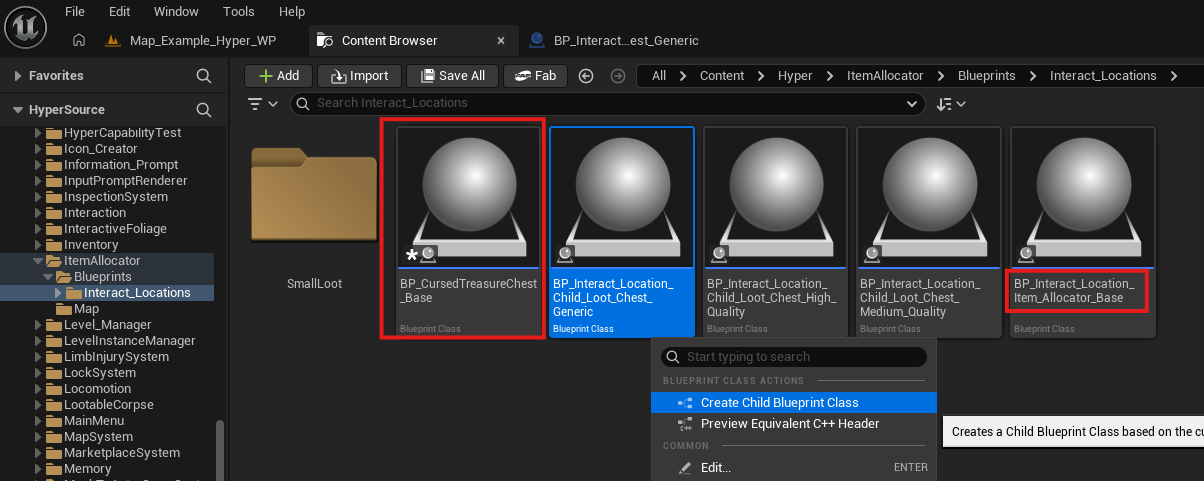
- Navigate to /Game/Hyper/ItemAllocator/Blueprints/Interact_Locations/BP_Interact_Location_Child_Loot_Chest_Generic.
-
Make a child of it.
- You can also make a child of BP_Interact_Location_Item_Allocator_Base.
- In this example, the generic chest is used because it already has variables set up that are useful for the example.
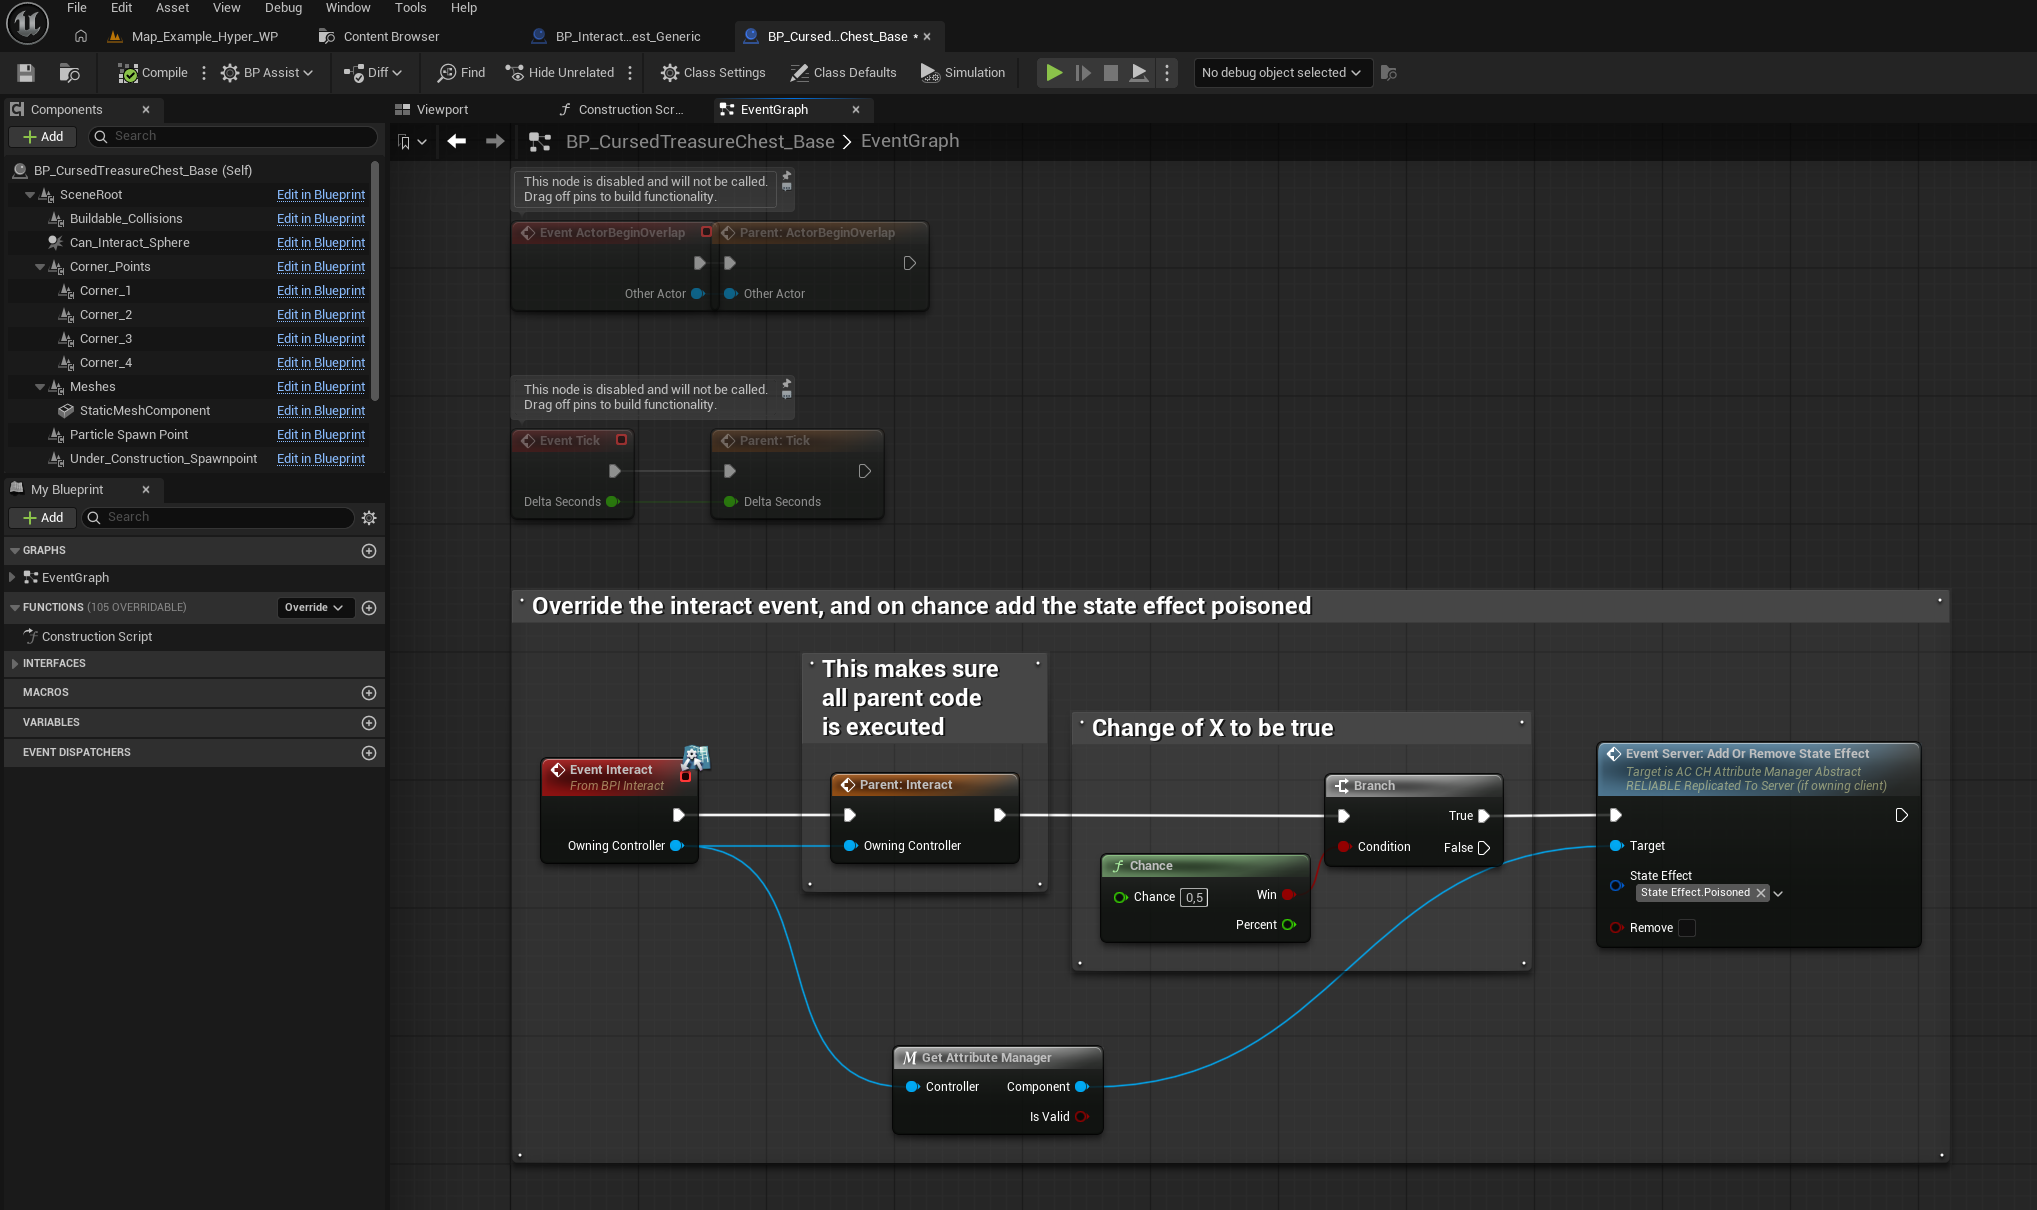
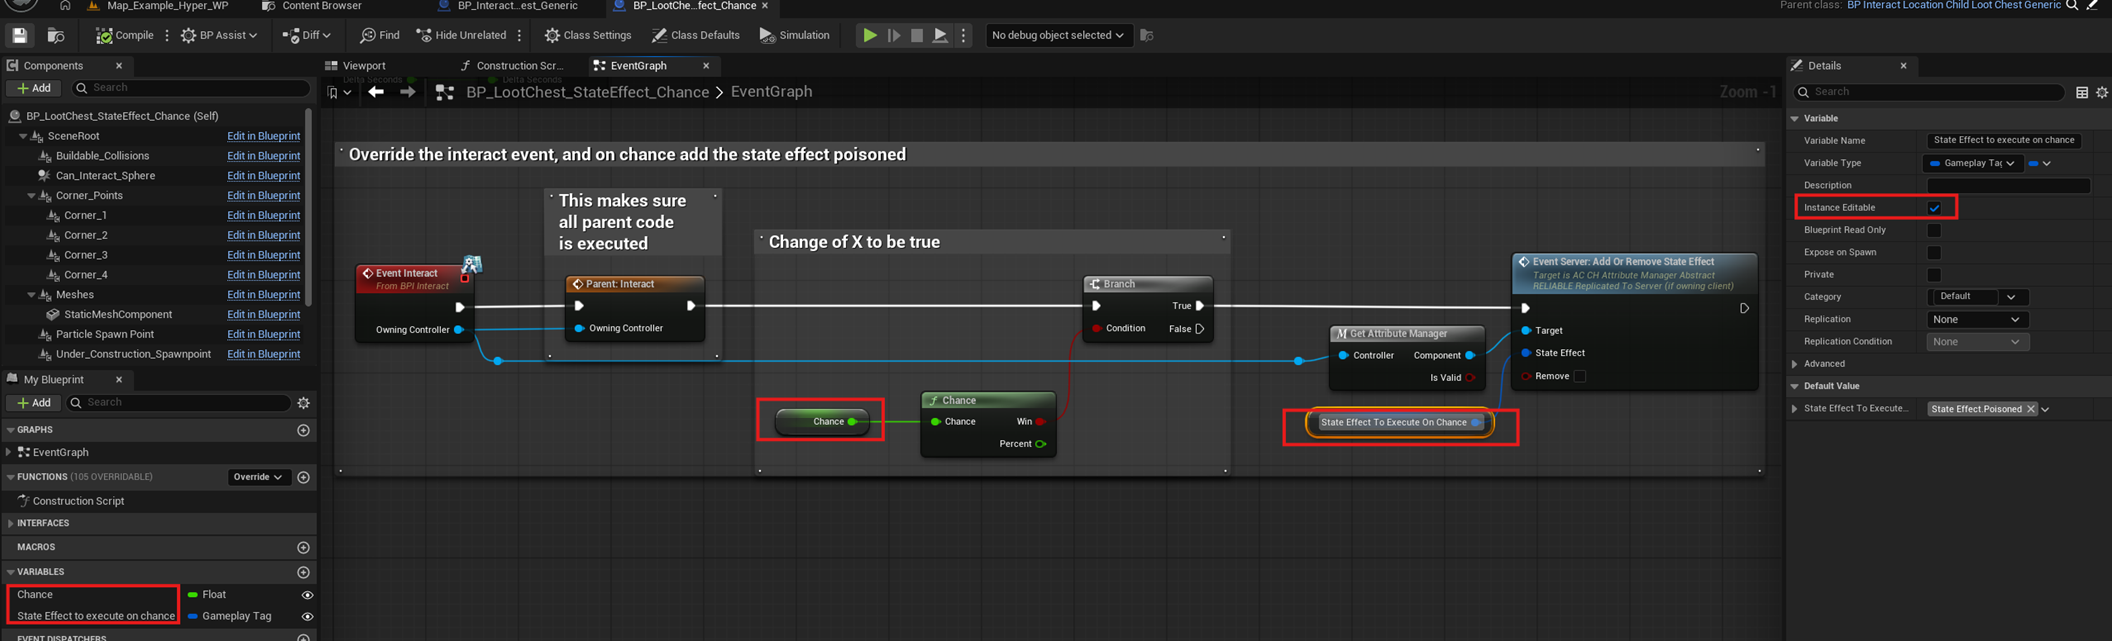
- Override the interact event.
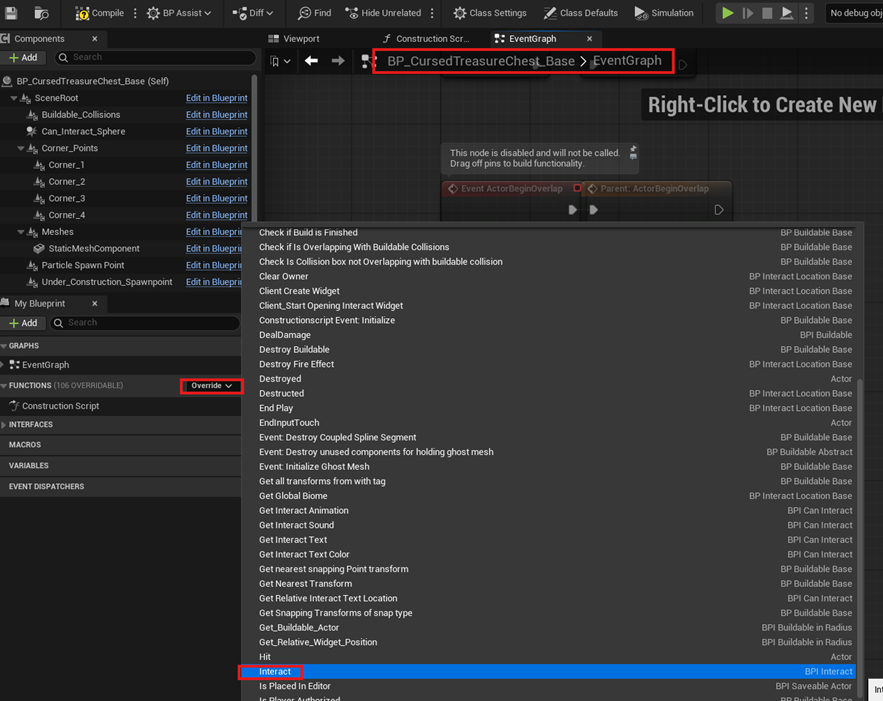
- Add the custom poison-chance code.
- Drag the custom chest into the world.
- Interact with it in Play mode. The chest has a 50% chance to poison the player when opened.
This keeps your code separate from the original chest. If Hyper later updates the interact chest, you can copy the updated core code without overwriting your custom behavior.
There is still a small chance that a function or event is renamed in a future update. For example, if an event changes from On Interact to On Interacted, your child Blueprint may show a small compile error. In that case, select the new event and keep your custom code intact.
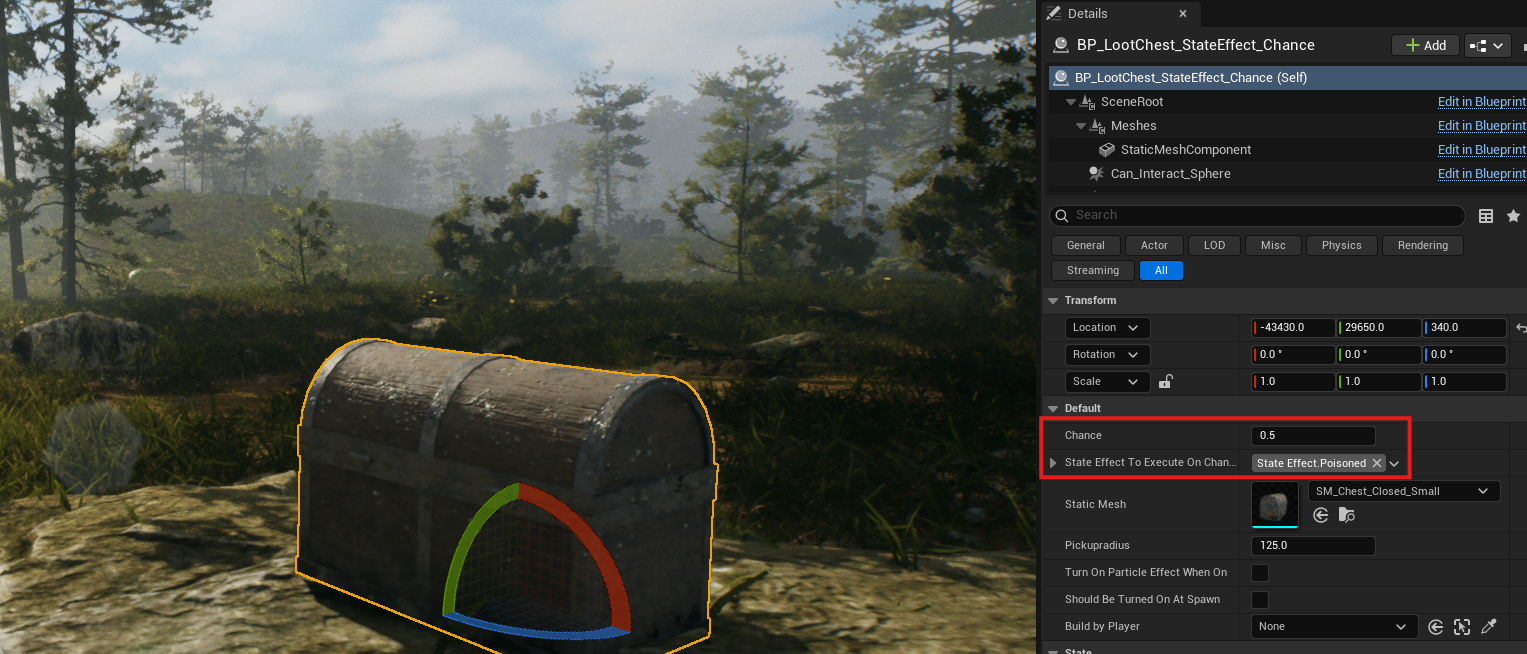
Tip to make the chest more generic
You can also set up the chest in a more generic way so the behavior is easier to reuse or tune. The screenshots below show that process.
Custom voice line on drop item
The treasure chest example customizes an actor placed in the world. This example customizes the inventory system: when the player drops an item, the character says a sentence. For example, the sentence can depend on whether the item is valuable. You need the inventory system and world dialogue system to use this exact example.
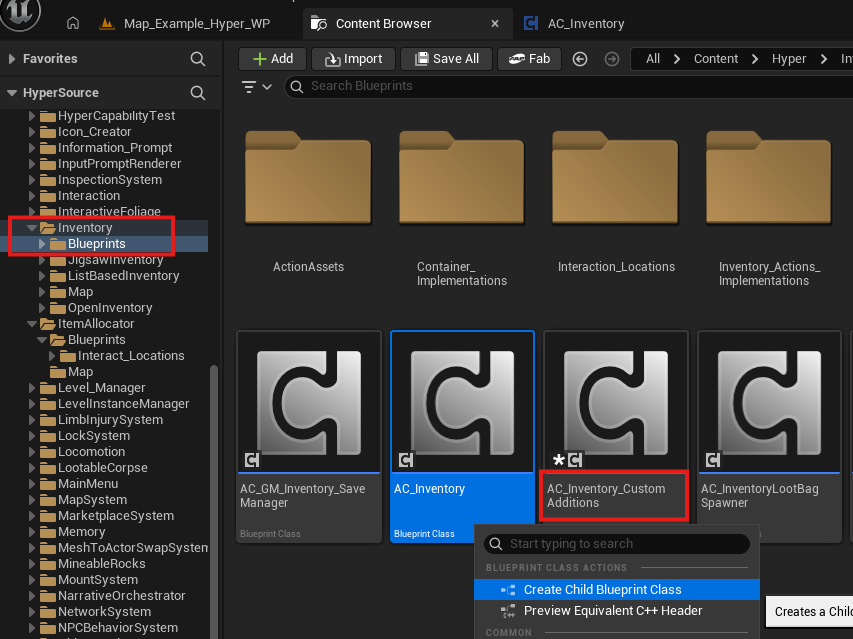
- Navigate to /Game/Hyper/Inventory/Blueprints/AC_Inventory.
- Make a child of it and give it a clear name, such as AC_Inventory_CustomAdditions.
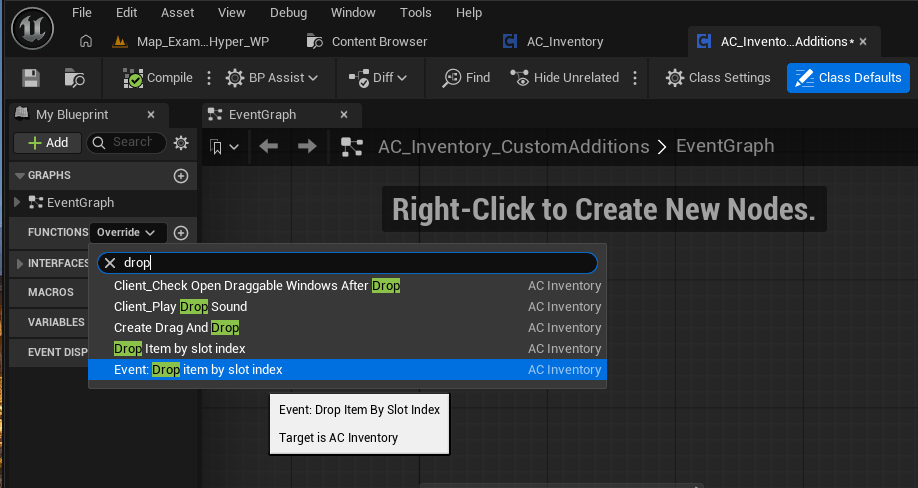
- Override the drop function.
- Create a new function and call it from the drop flow.
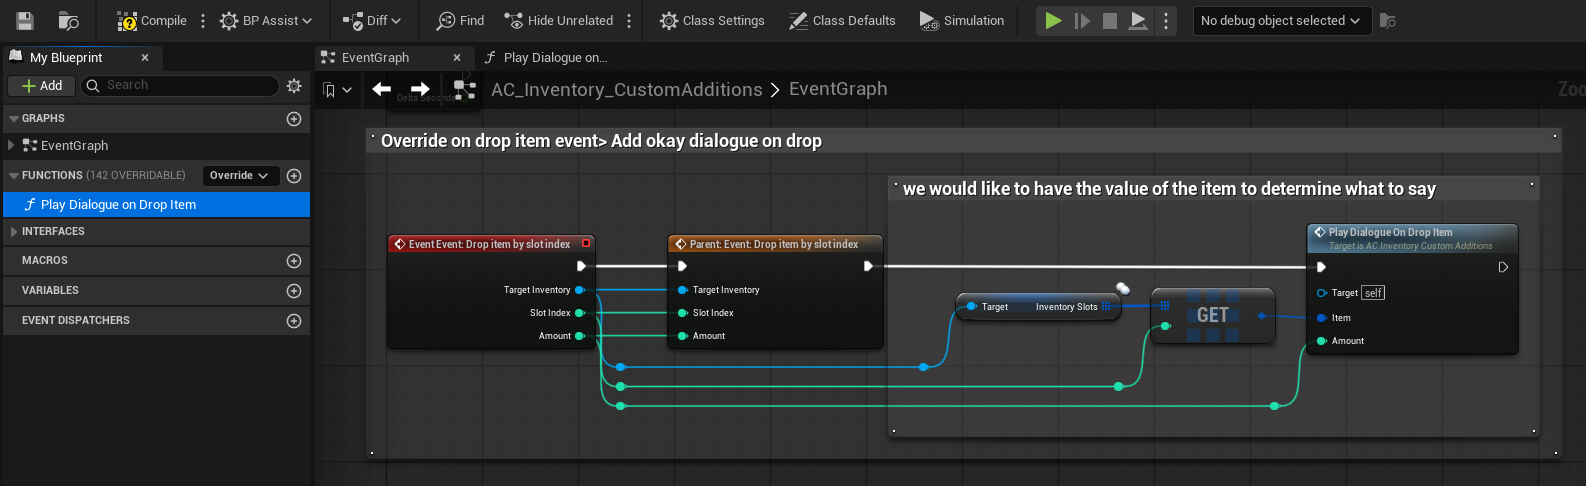
-
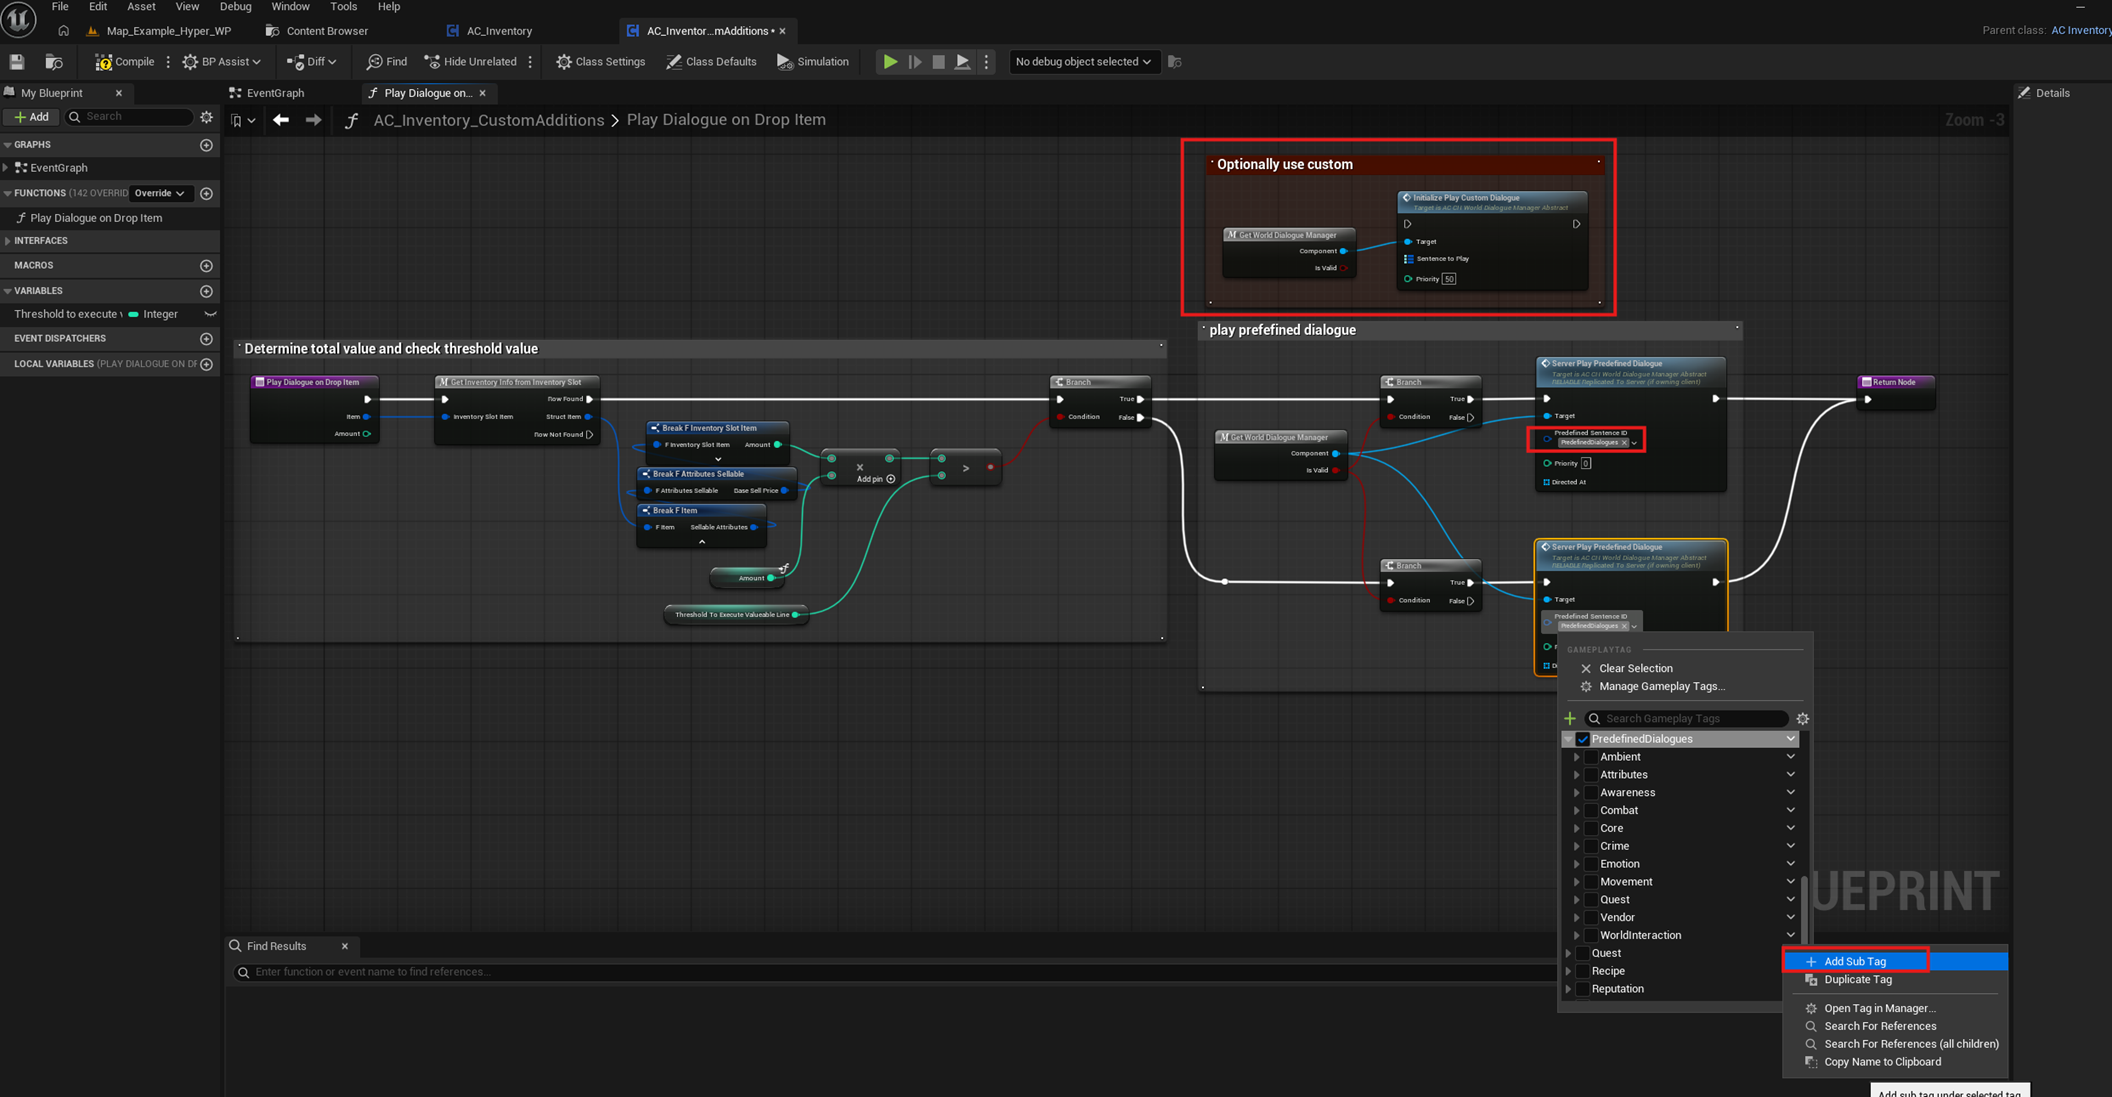
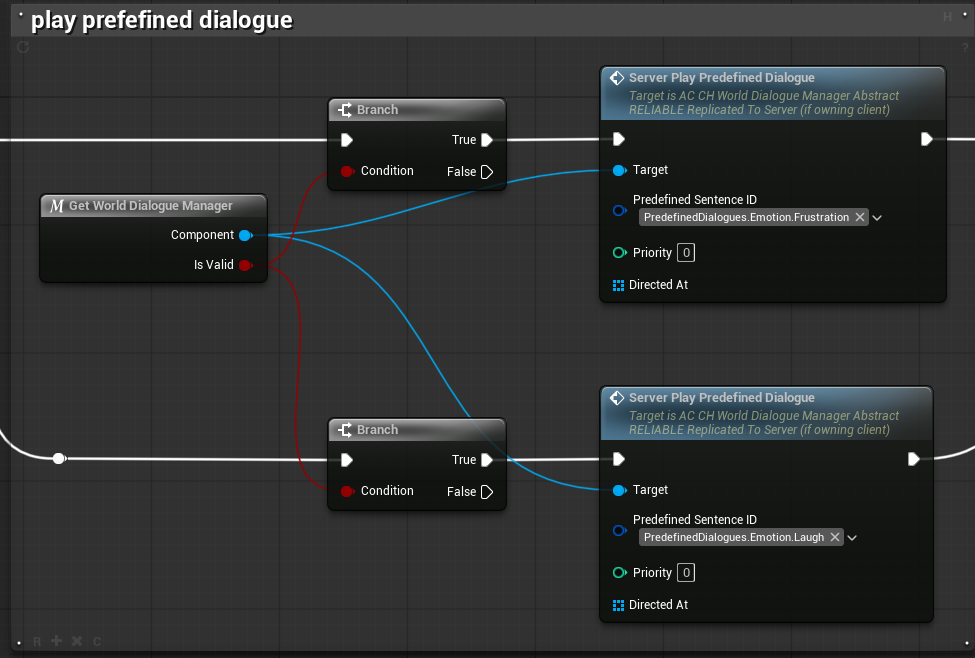
Add your custom logic inside the function.
- In this example, you can select any predefined dialogue or create a new predefined dialogue.
- Creating a new predefined dialogue requires the sentence and audio files to be set up in the predefined dialogue mapping of the player.
- For a quick test, select a fitting sentence, for example from an emotion category.
-
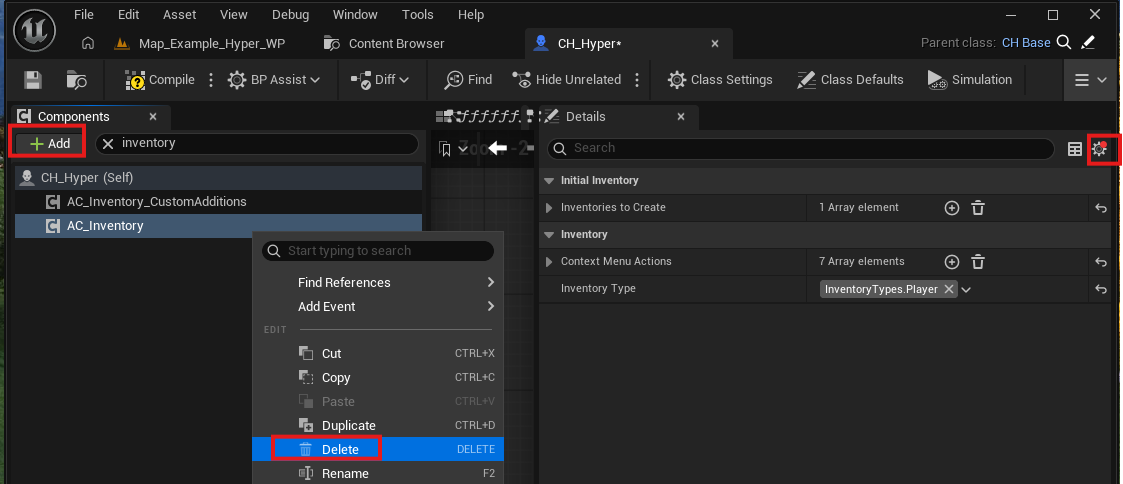
Open your Character Blueprint.
- Remove the existing AC_Inventory component.
- Replace it with AC_Inventory_CustomAdditions.
- Before deleting the old component, make sure the new component has the same settings.
- Test the setup by dropping an item.
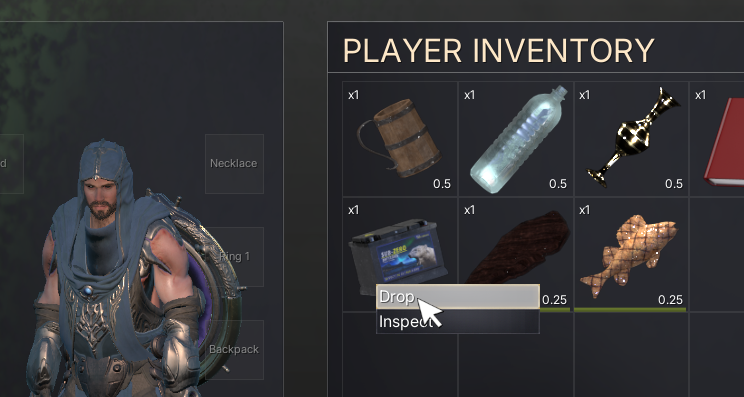
- Confirm that the dialogue and sound play.