Add Your World Map
Updated May 23, 2026
Use this page after the World Map system has been migrated, integrated, and tested in the default project. The goal is to configure the world map for your own map.
Related setup: Migrate and Integrate Hyper, Set Up Your Map to Play In.
Initial Settings
- Open the World Map Manager component assigned on your PlayerController.
-
Adjust the core settings to your project:
- Show Compass
- Show Minimap
- Zoom settings
- Related world map settings

Create Map Texture
Hyper includes two map texture generators:
- /Game/Hyper/MapSystem/Blueprints/MapTextureGenerator/BP_Map_Texture_Generator
- /Game/Hyper/MapSystem/Blueprints/MapTextureGenerator/BP_Map_Texture_Generator_Layered
The layered version creates the map in tiers and grids. This is needed for large maps where a single texture would not provide acceptable resolution.
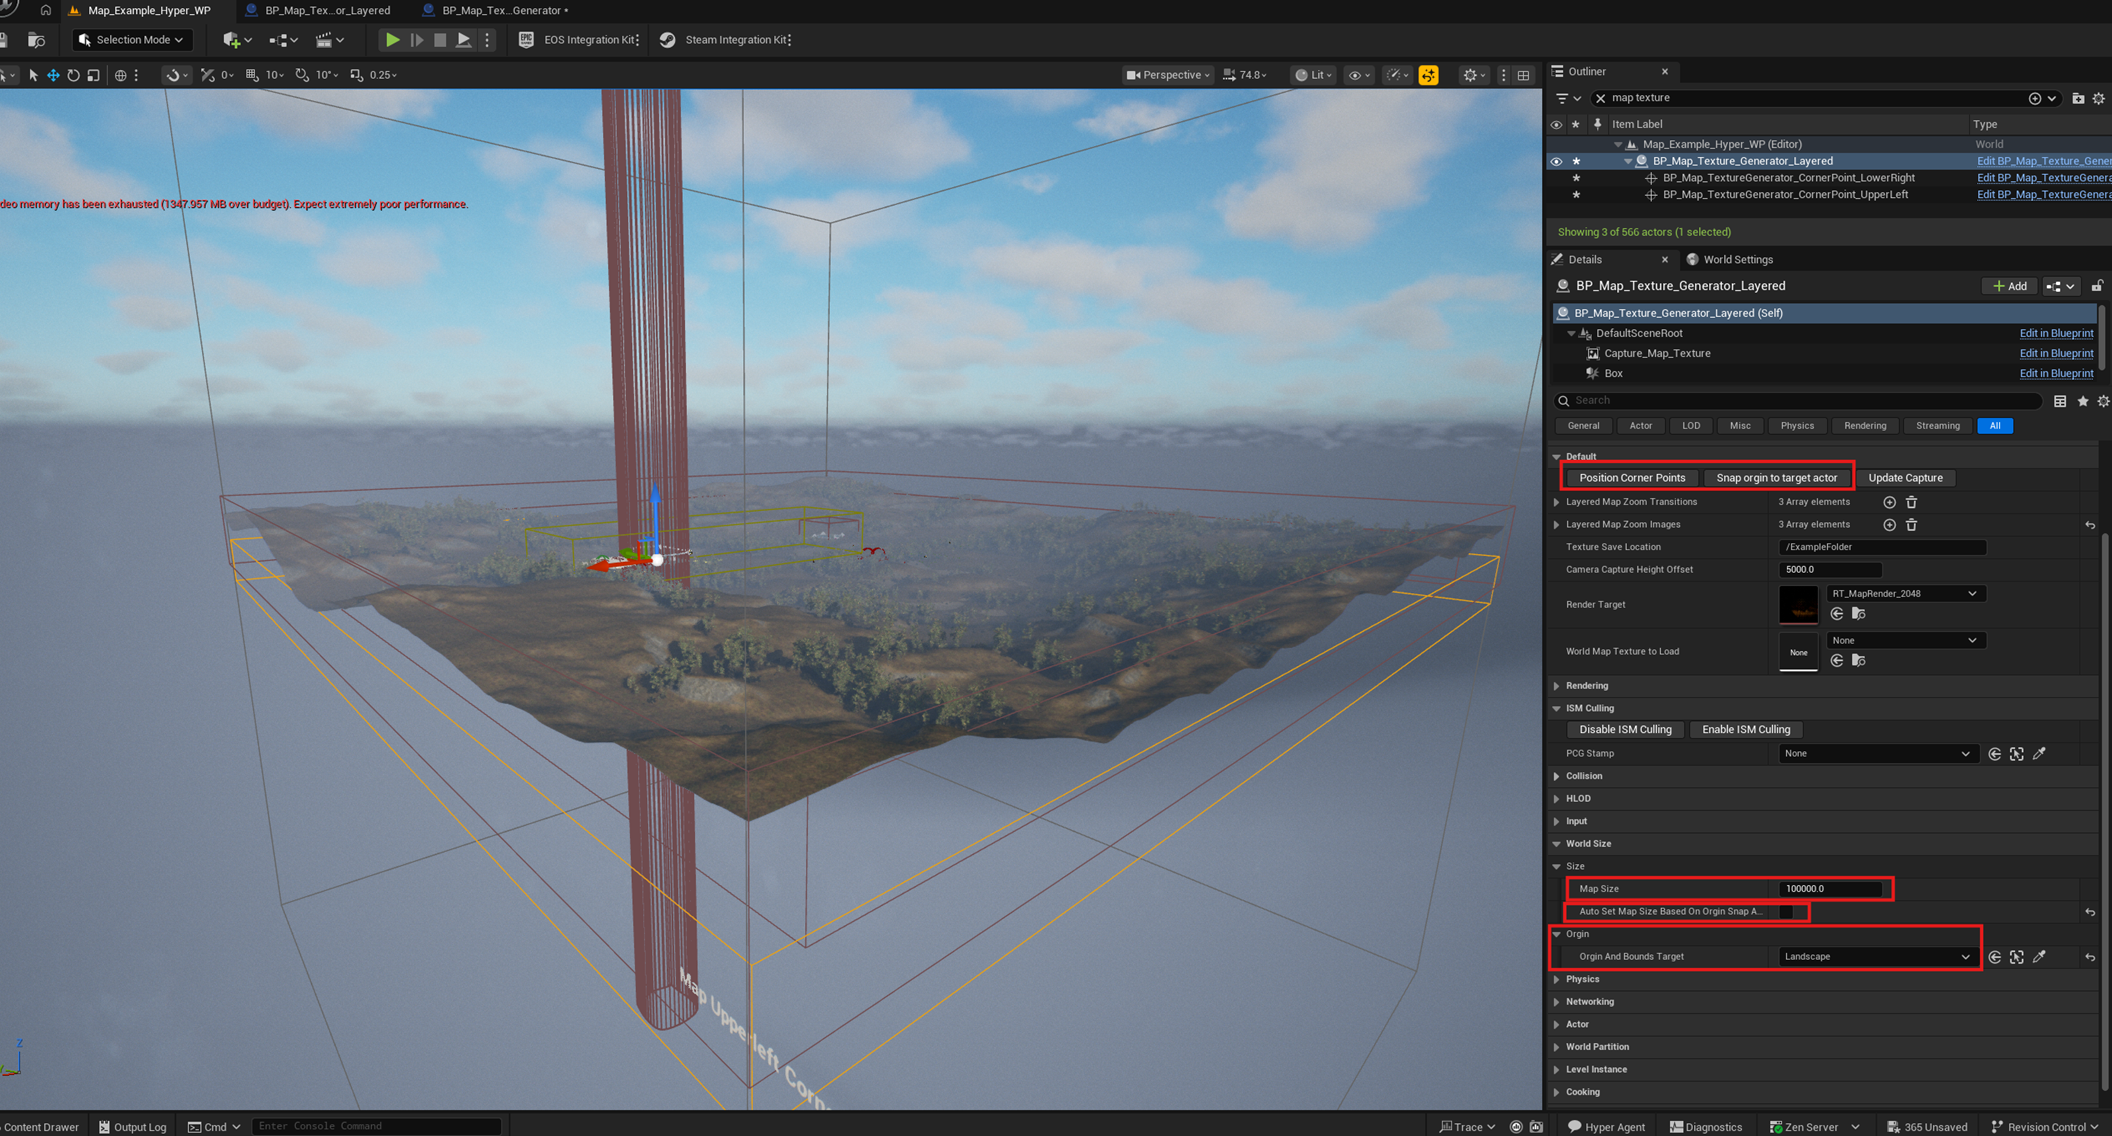
- Drag the world map texture generator into the world.
-
Select the origin bounds target.
- On a world partition map, the bounds may be zero because of the top landscape.
- If that happens, set the map size manually by estimating the number.
- Use Snap Origin To Target Actor once.
- Click Position Corner Points to check how large the bounds are.
-
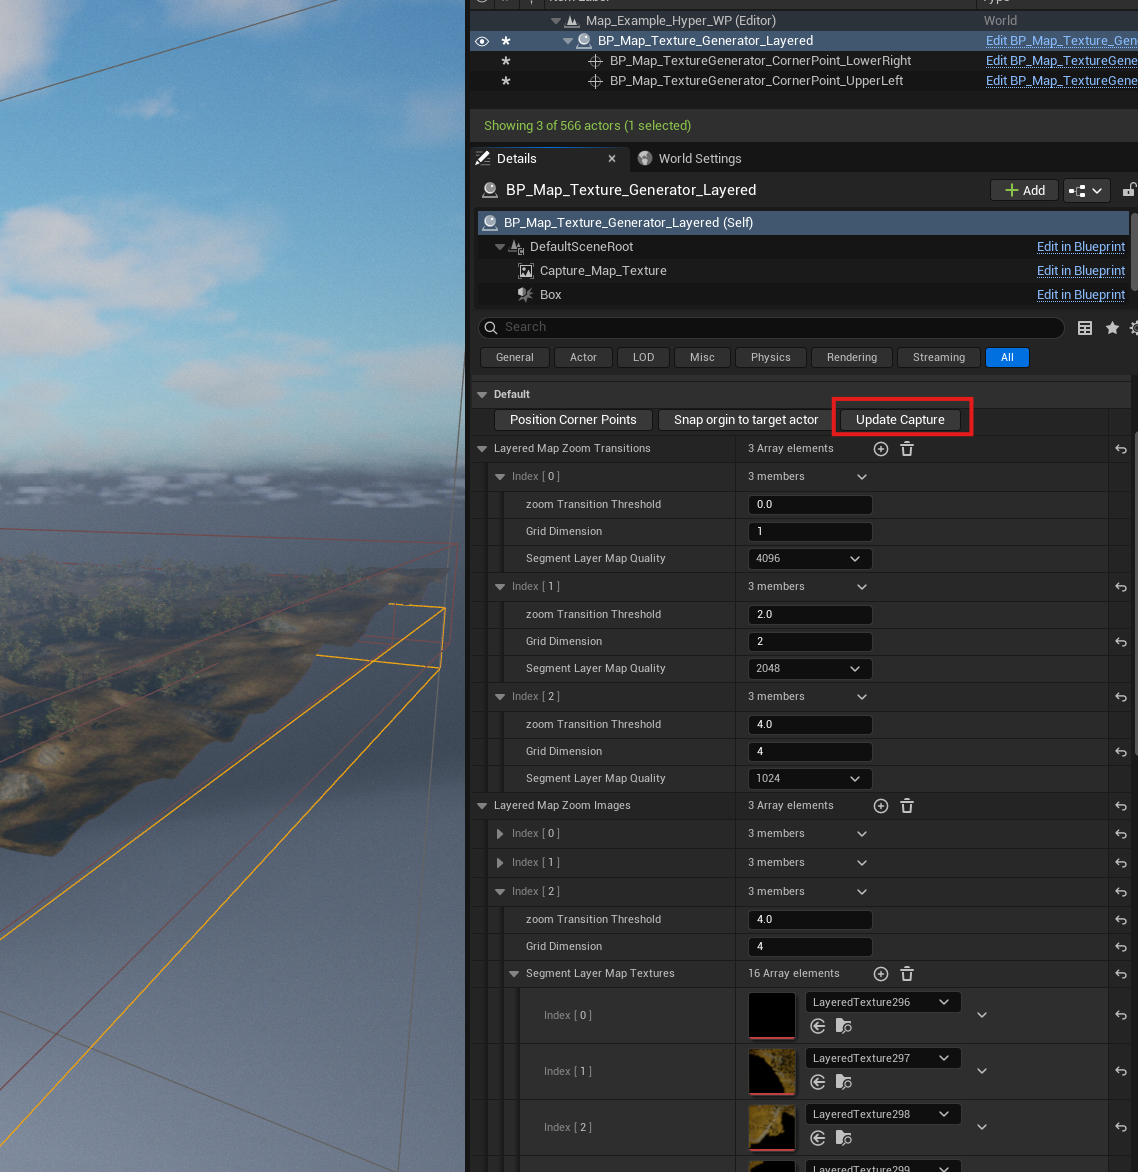
Set the zoom transition settings for the tiered map.
- Configure grid dimensions.
- Configure segment map quality.
- Adjust related tiered map settings as needed.
- Click Update Capture. This generates the textures, assigns them automatically, and saves them in the assigned folder.
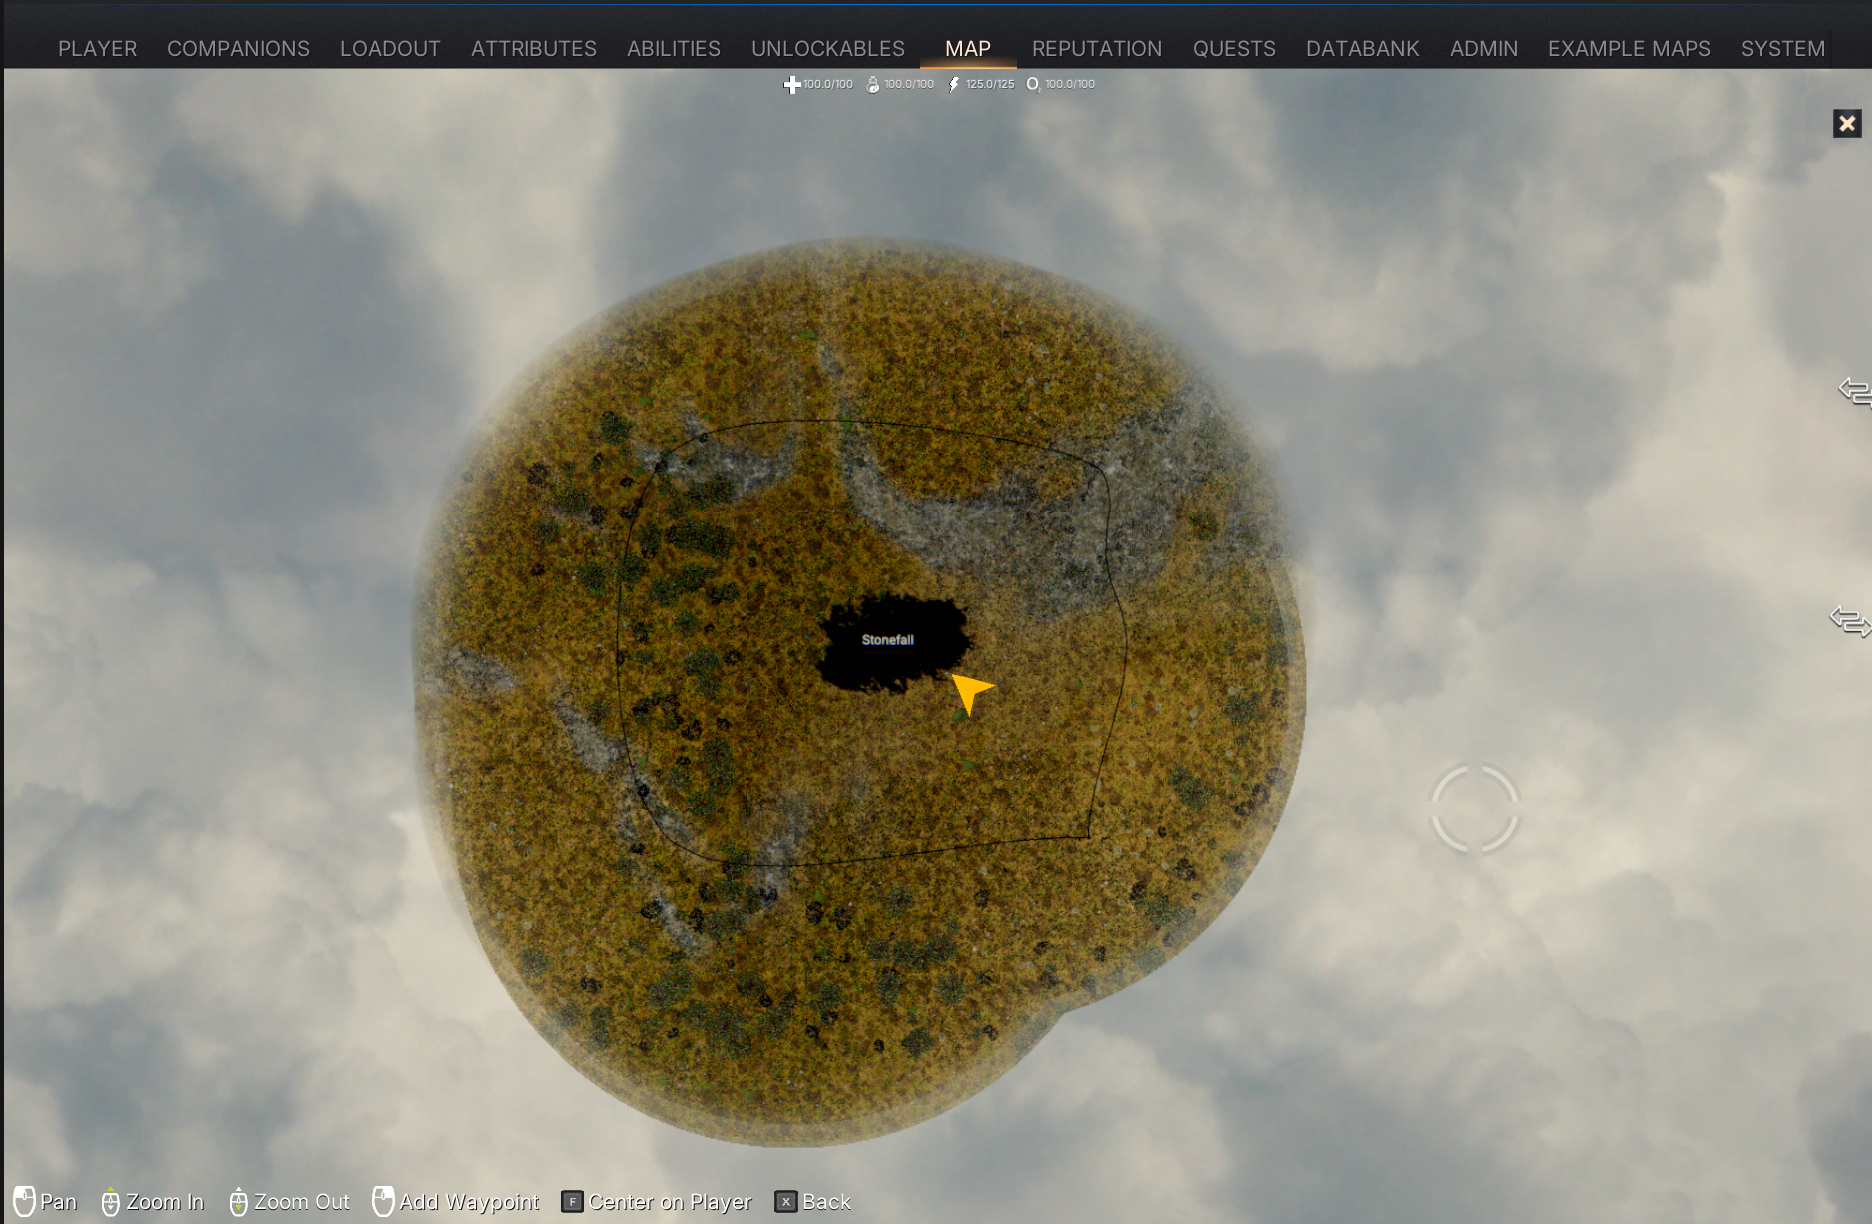
After capture is complete, press Play and check the world map.
Add a region
Regions are useful for NPCs, dynamic region-based music, and the world map. Region setup is based on borders. Each border assigns which direction belongs to which region.
- Drag a border into the world: /Game/Hyper/RegionManager/Blueprints/Actors/BP_Region_Border.
-
Set up the directions of your region.
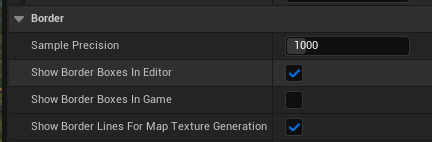
- Enable Show Border Boxes In Editor to make the setup easier to read.
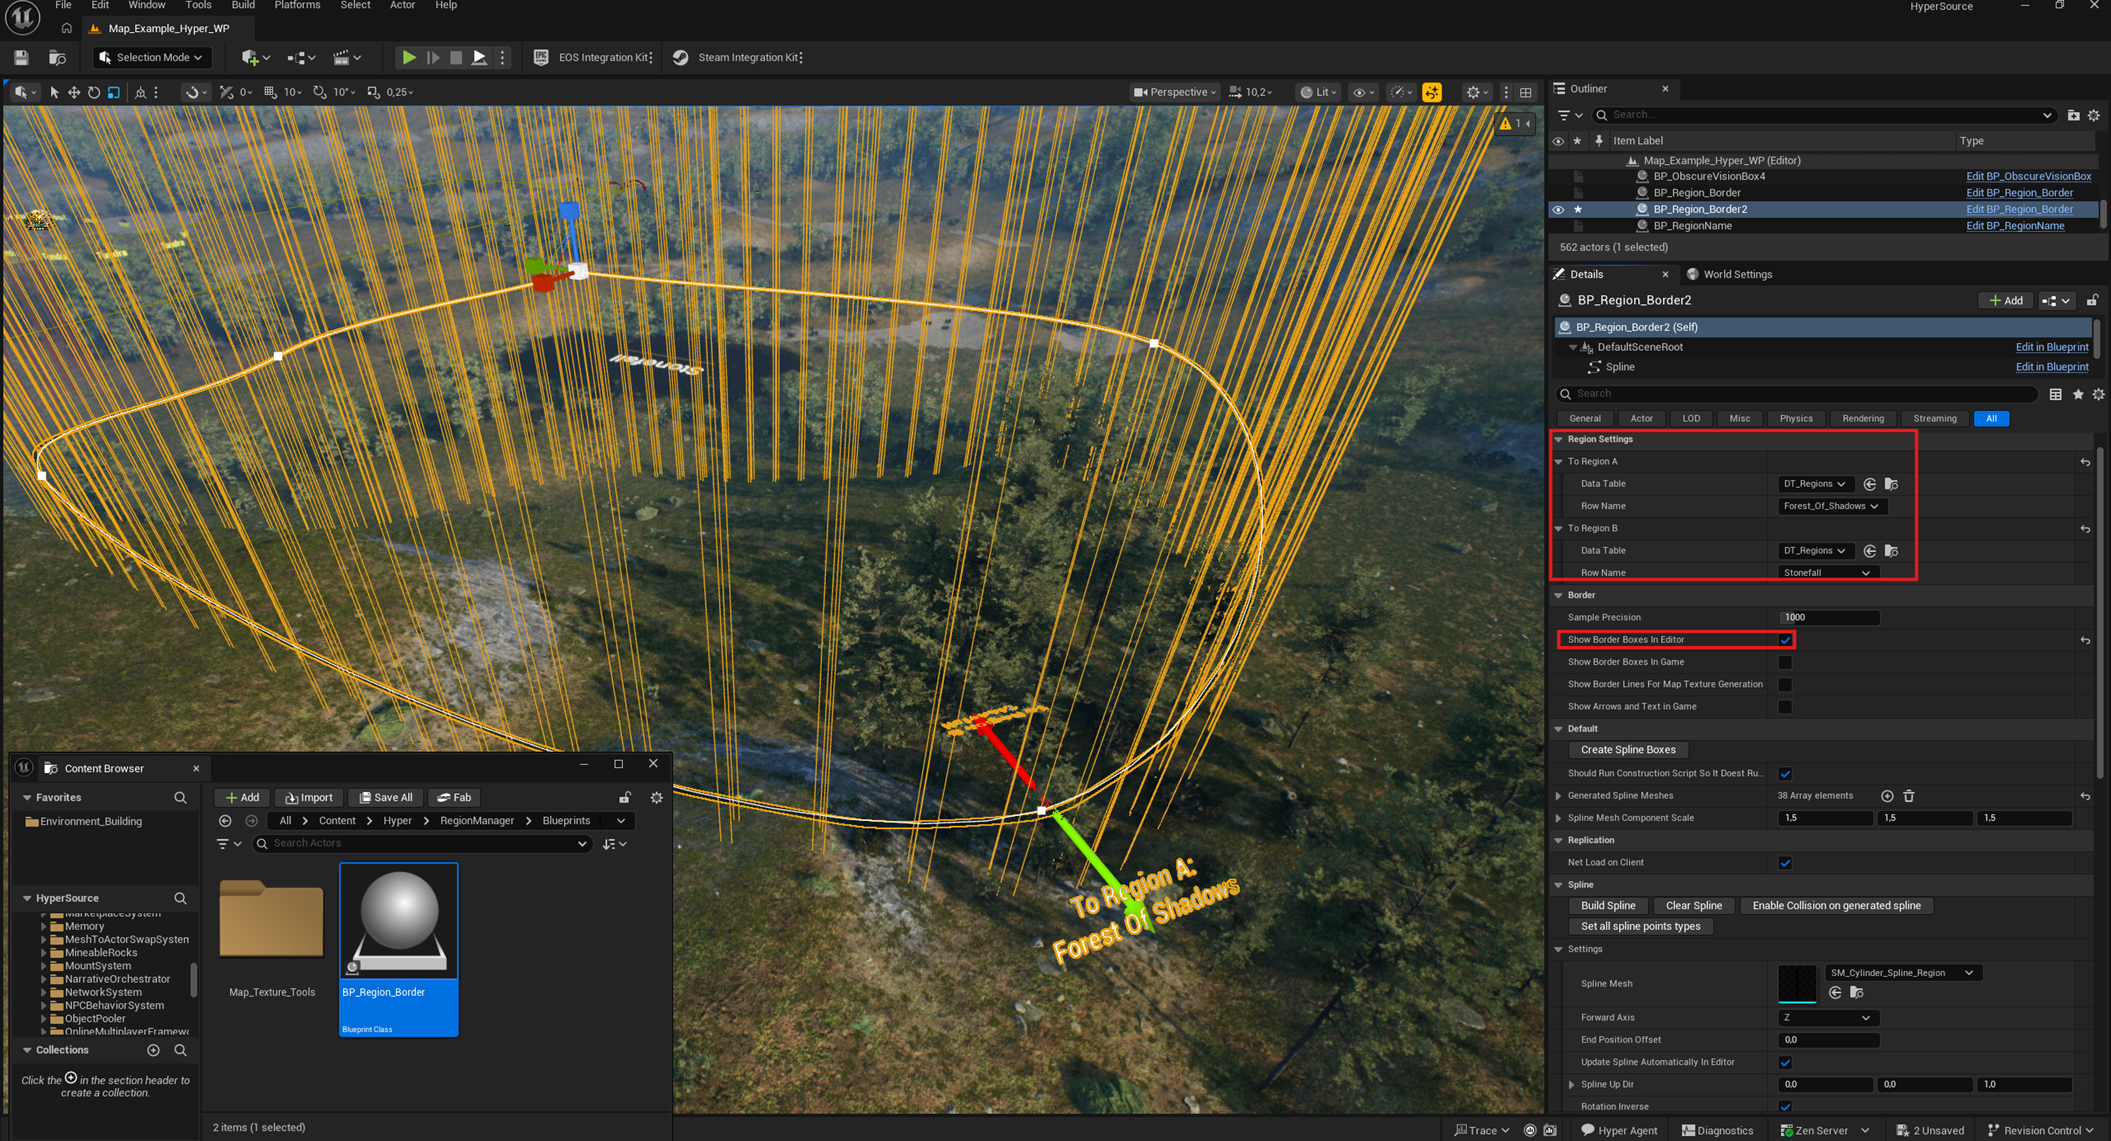
- To make borders visible during map generation, enable Show Border Lines For Map Texture Generation.
- Set up a region name by dragging /Game/Hyper/RegionManager/Blueprints/Actors/Map_Texture_Tools/BP_RegionName into the world.
- Select the required region name settings.
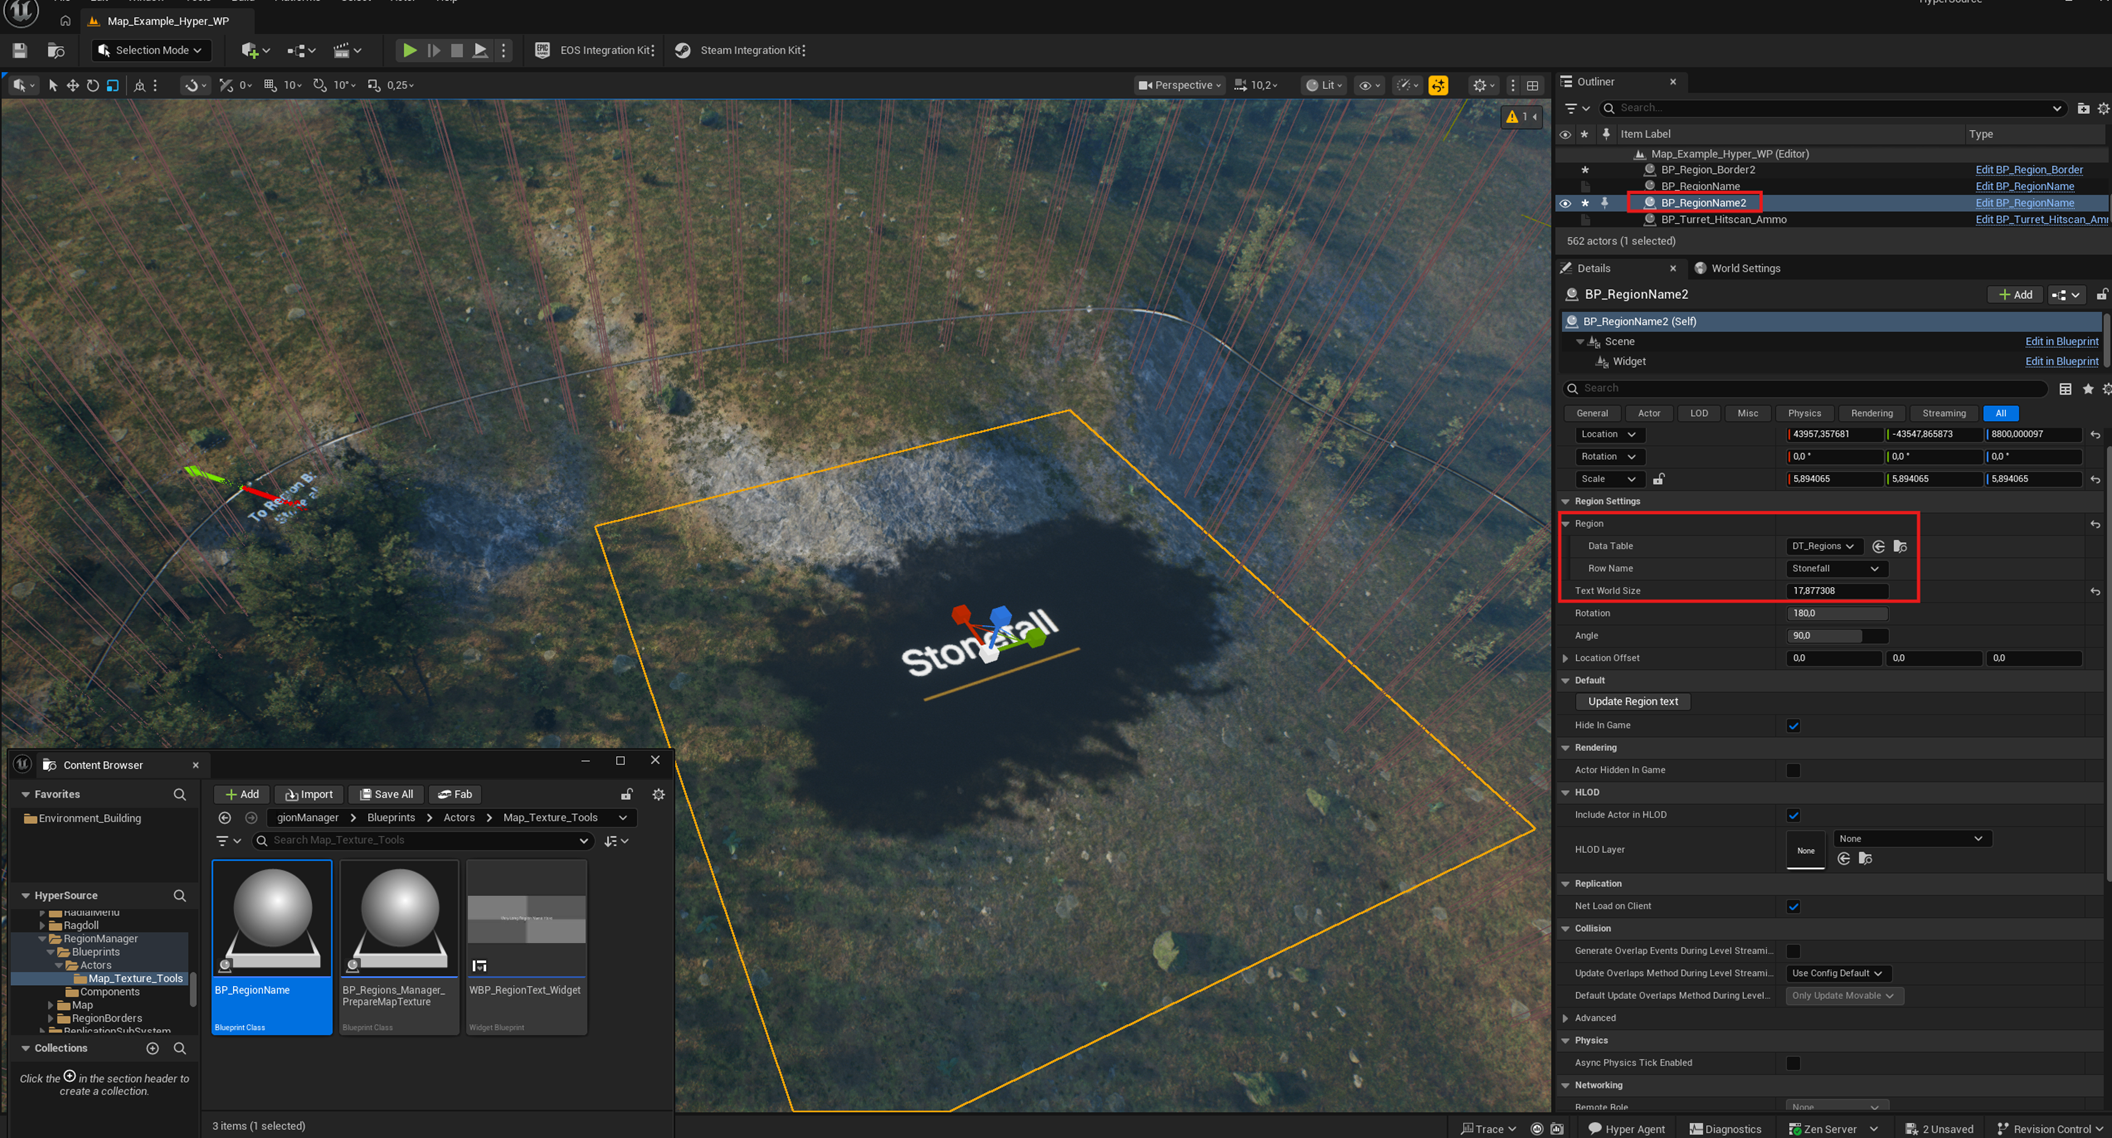
- On the world map generator, click Update Capture.
- Press Play and check the result.
Depending on your resolution and desired look, adjust scale settings, spline mesh settings, colors, and related region display options.