Table of Contents
Abstract Migration Principle #
The migration process of any of the Hyper modules follow the same abstract structure. Please refer to the migration documentation for this process. When this process is understood, the steps to take should be fairly straightforward.
Specific Migration instructions #
On top of the abstract migration process, I also provide some specifics for this specific module.
- Before you migrate, make sure that your target project has the correct settings.
- Also, make sure to back up your project in advance.
- You might overwrite data tables, so please ensure you have a backup of those as well.
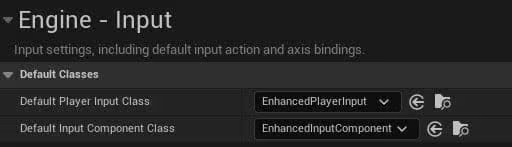
- If you want to use my character, you need to enable the enhanced input plugin. It is optional, but please note that if you do not use my inputs, you will need to set them up yourself. In later engine versions, it is enabled by default.

- If enhanced input is used, make sure it is set in the project settings like this:
- The Common UI plugin is used for all modules that have any widgets.

- In most demo projects, meta sounds are used. This is optional. Please enable the plugin if you desire these sounds.

- To ensure the correct channel on traces for damageables in certain edge cases, I use a damageable trace.
- Check the config file; you will see it has a specific number assigned. That number is important to keep the default responses set as in my demo project. If not, you will need to set them manually to the right response.

- Check the config file; you will see it has a specific number assigned. That number is important to keep the default responses set as in my demo project. If not, you will need to set them manually to the right response.
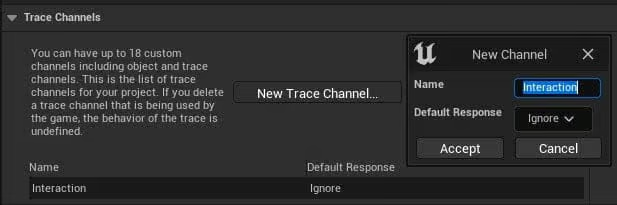
- For every interactable, an interaction trace is used. By default, it should be ignored; only set it manually to block on each item you want to interact with.
- Check the config file; you will see it has a specific number assigned. That number is important to keep the default responses set as in my demo project. If not, you will need to set them manually to the right response.
- Check the config file; you will see it has a specific number assigned. That number is important to keep the default responses set as in my demo project. If not, you will need to set them manually to the right response.
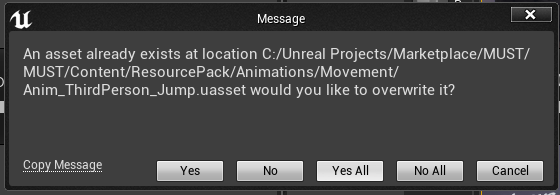
- Migrate from the content folder of the level to the content folder of the target project. When migrating with my other assets, you will be prompted if you want to overwrite existing assets. This is fine, however, you can also choose to only use the existing files. It depends a bit on what you are migrating. When overwriting, it will always overwrite the datatables. If you did, you will need to re-import the datatables. Some key points to consider:
- Always use the Unreal migration tool for migrating. Never copy-paste manually. It ensures that the references are correct.
- The prompt in the lower right corner should say: “Successful, all content migrated” if you have chosen overwrite all.
- Close your target project before migrating.
- Open the Example map and test if everything works without any problems. Do not continue if it does not.
- If you desire minimal file migration, select only the actor component you want, right-click, and select “Migrate” for that specific component.


