Inventory System #
This document covers the inventory system and related components such as crafting, vendor, loot chest, and hotbar. The system is divided into two sections: the free inventory and the additional components.
Inventory #
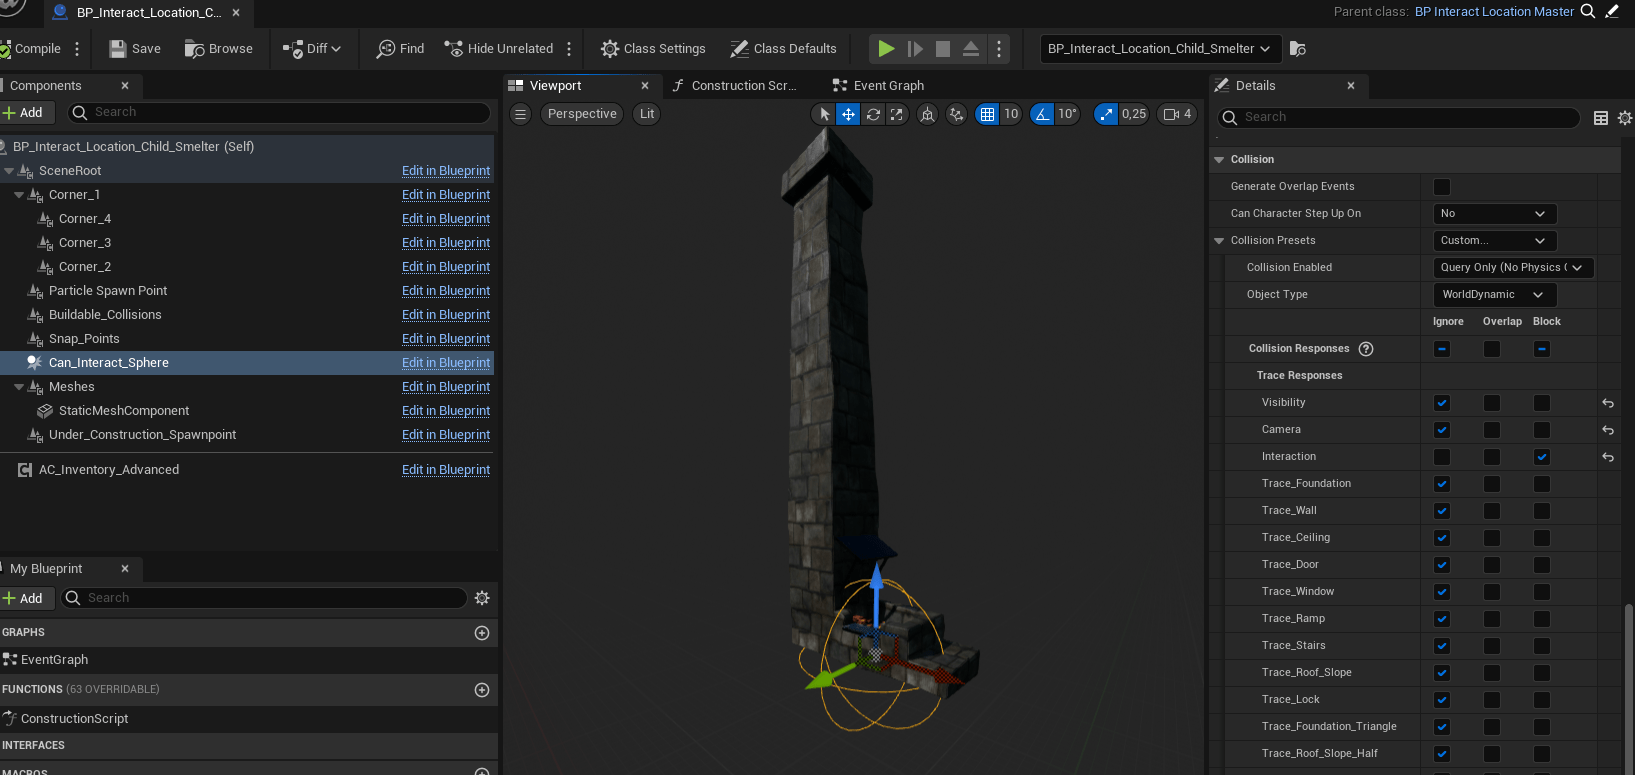
The inventory system includes interaction with items in the world using the Interact_Basic component, which uses a line trace to check for blocking objects in the ‘interaction’ channel. The sphere radius collision box handles the interaction, making it easier to interact with smaller meshes.
Inventory Data Table #
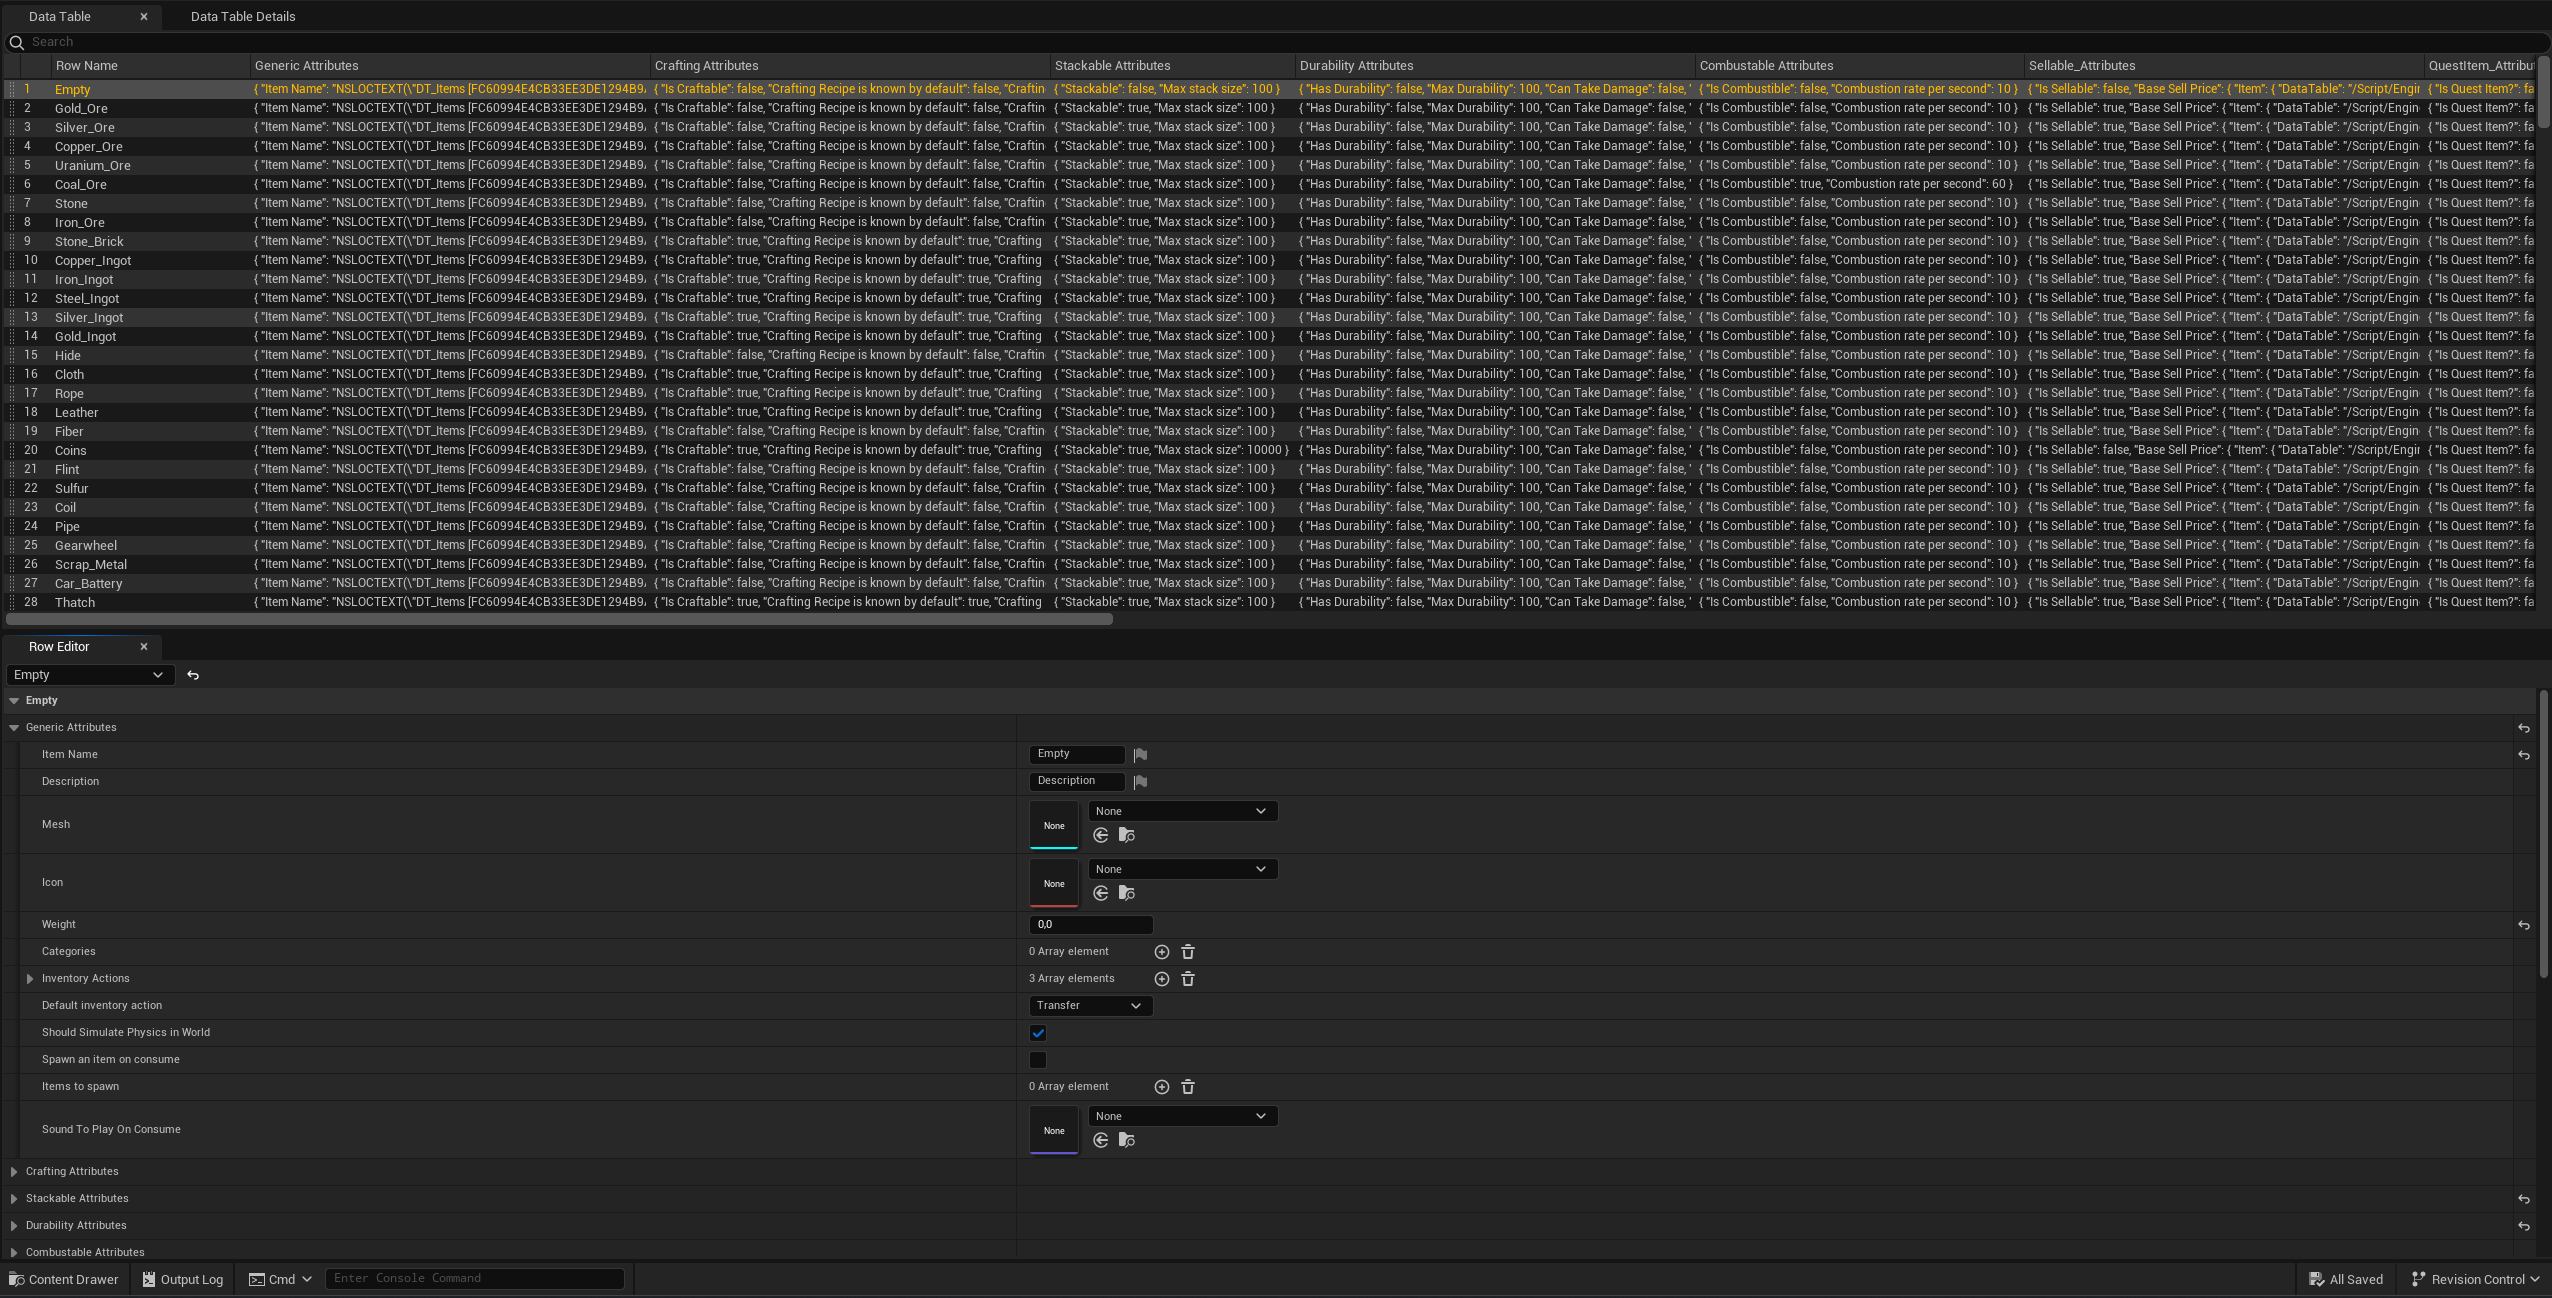
All items that can be held in the inventory are listed in the DT_Items data table. Numerous options are available to customize each item. Use the predefined items as a reference when creating new items.
Inventory UI Creation #
The inventory consists of multiple layers:
- Inventory slot
- Inventory grid
- Inventory panel
The inventory slot holds a reference to the item, using the same struct as DT_Items. The inventory component is responsible for changing these values, not the UI.
![]()
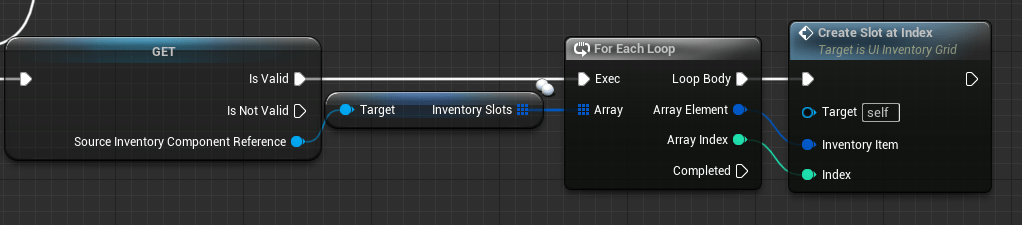
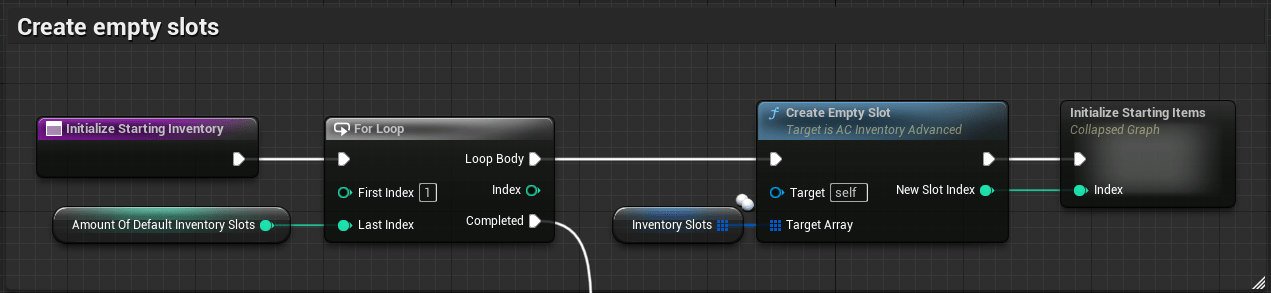
Initialize Inventory #
On begin play, data is provided to the UI to create slots. The Starting Inventory array predefines items in the inventory at startup, filling slots with items from the correct slot index.
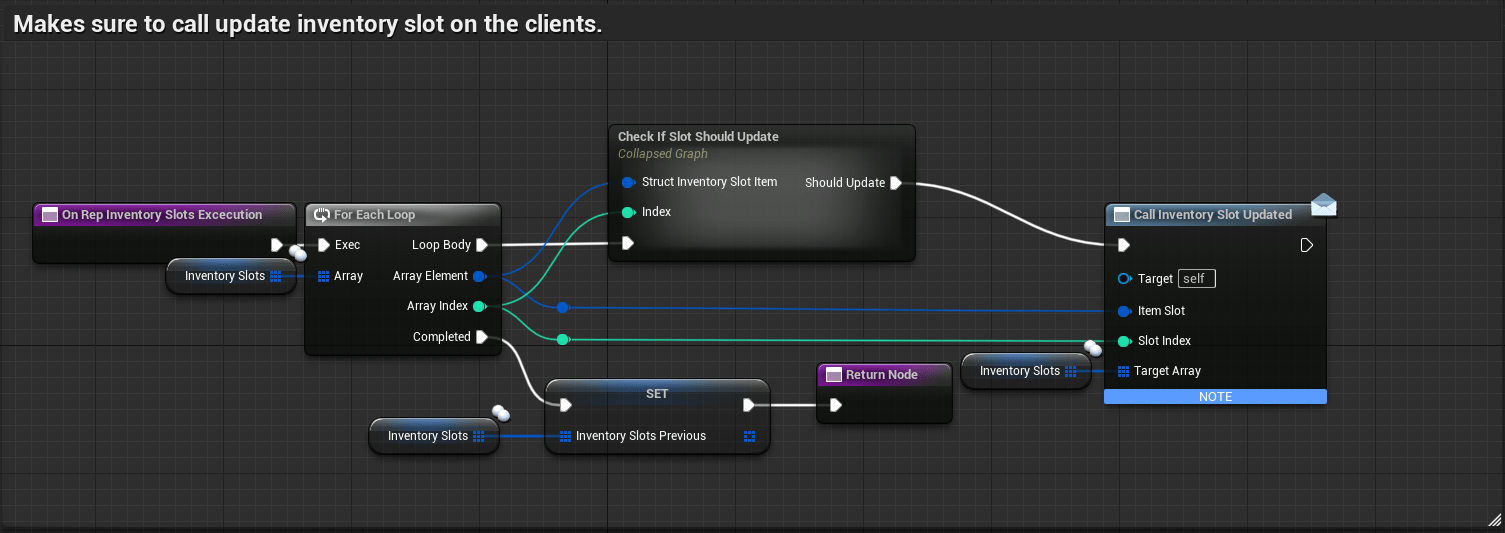
Updating the Inventory #
Each time the inventory array changes, the on-rep function is called due to variable replication. Relevant updates are propagated to the UI and hotbar.
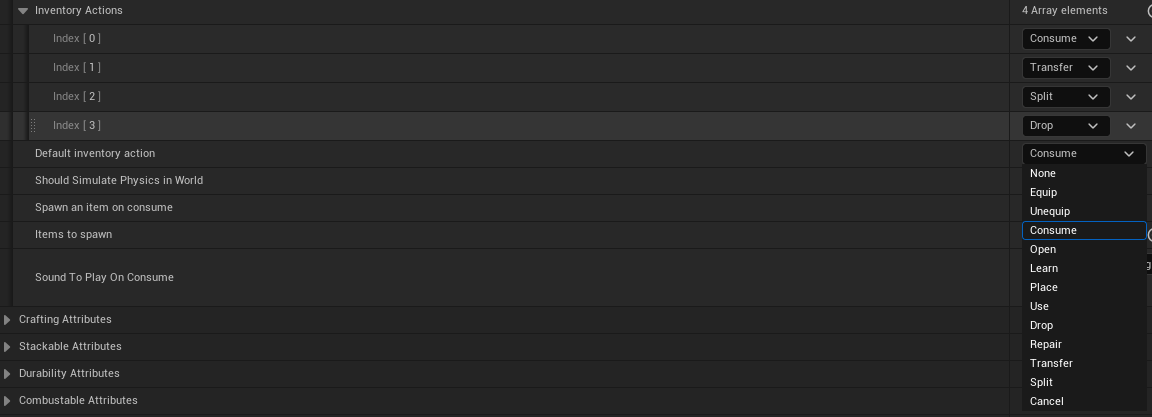
Inventory Actions #
Interactions are context-sensitive, determined via the data table. Double-clicking an item performs the default action, such as consuming meat.

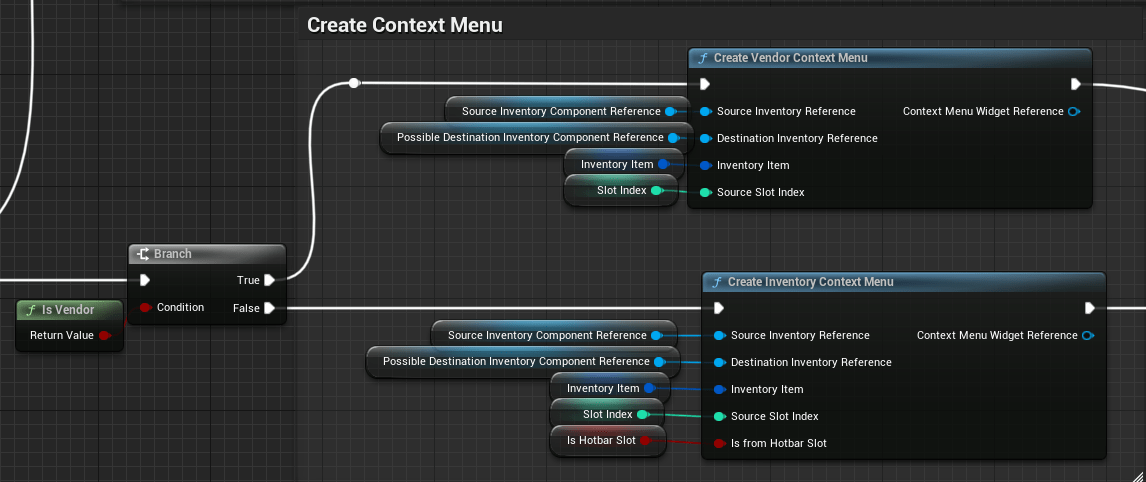
Context Menu #
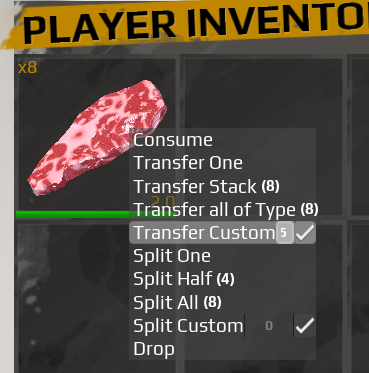
The context menu is created based on defined inventory actions. For example, right-clicking an item in the inventory slot creates a context menu with options like split, transfer, or consume.

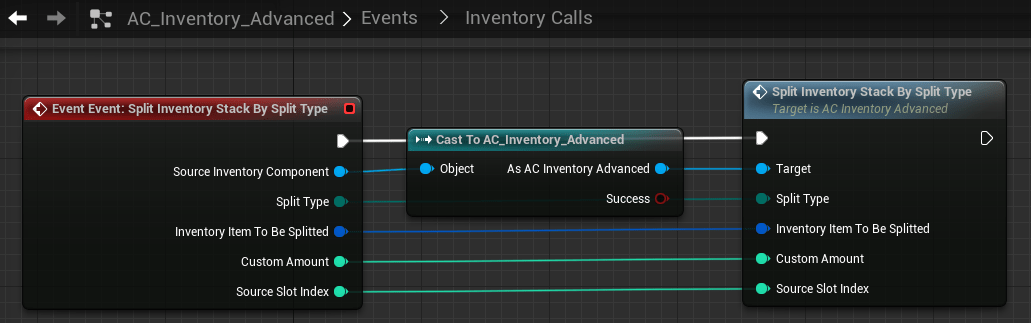
Split #
Stackable items can be split in the inventory, with default options of splitting one, half, or all (with a max override of 100).
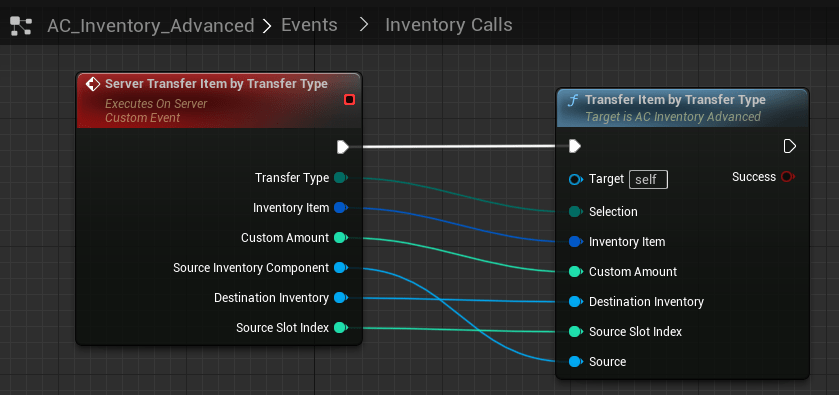
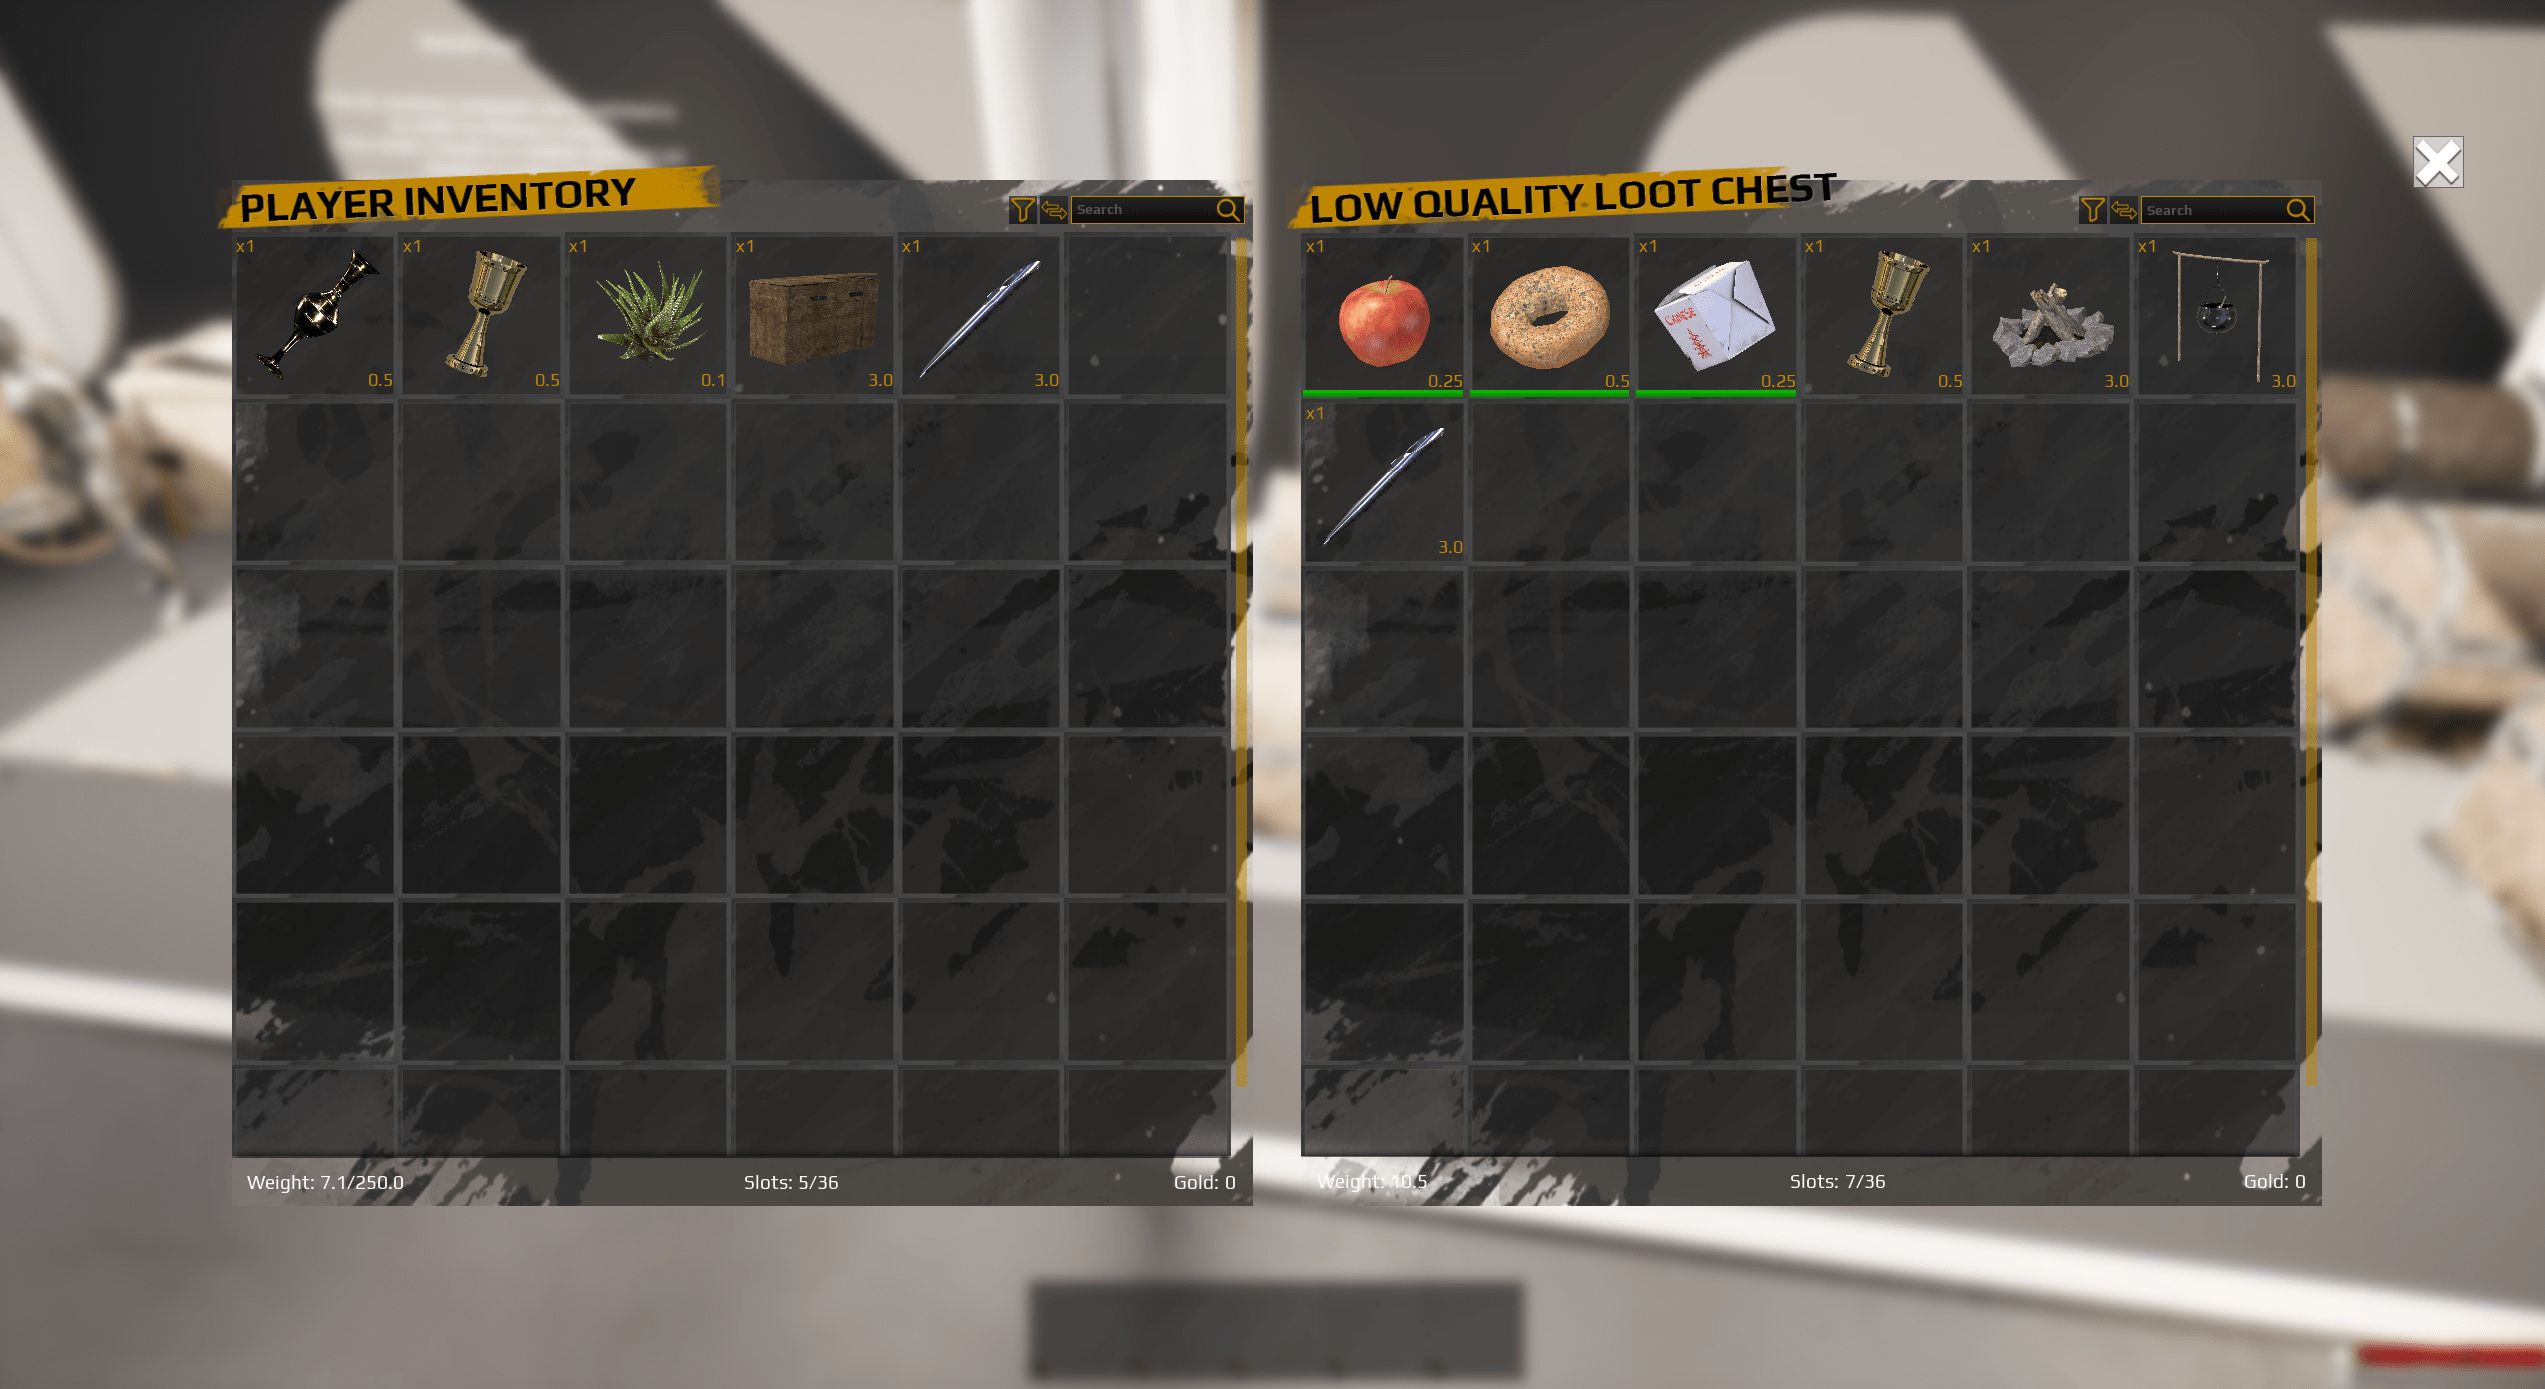
Transfer #
If another inventory is open (e.g., storage chest), items can be transferred. Default options include transferring one, a complete stack, or all of a type.
Custom Amount #
You can specify a custom amount for splitting, transferring, and crafting, allowing precise item management.
Swap Stacks #
Drag and drop a slot in the same inventory to another slot to swap items. This is done via the move item to slot index action.
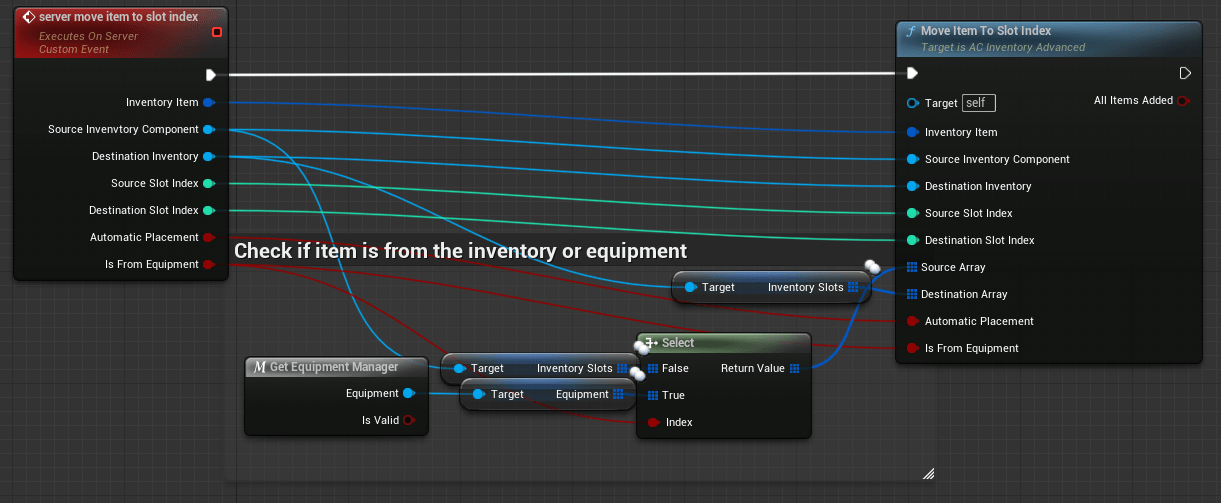
Combine Stacks #
If a slot is dragged onto a same item type, it checks if the stacks should combine before swapping. This is also done via the move item to slot index action.
Default Action #
Each item can have a default quick action set up. Double-click an item for the quick action, such as repair, consume, equip, unequip, place, use, learn, open, drop, transfer, or split. These are processed in the UI slots.
Drop #
Items can be dropped from the right-click menu or by dragging them outside the inventory on the blur area. The drop operation is processed in the UI, detecting if the item should stack or swap based on the target slot.

Source and Destination Inventory Component #
The source inventory component is where the action starts, and the destination is where it ends. For example, moving an apple from a chest (source) to the player inventory (destination).
These references are passed through all UI layers during actions.
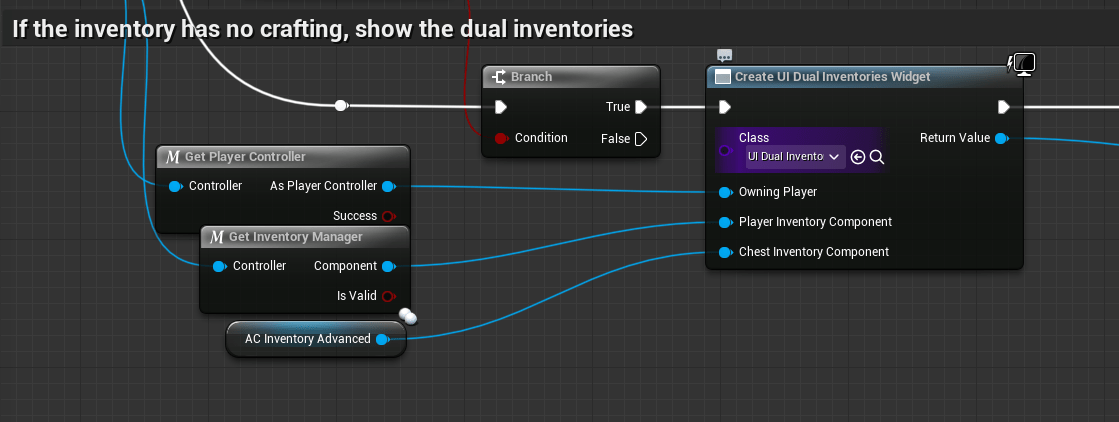
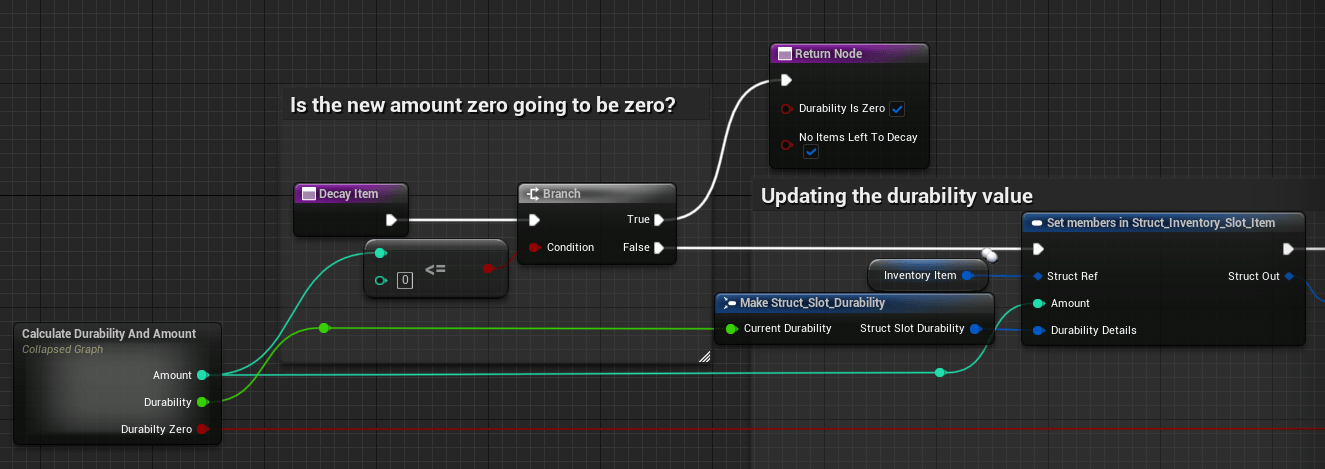
Decay #
Each item can decay in an inventory, with a decay multiplier simulating environments like refrigerators or hot areas. Fully decayed items can be destroyed, rendered unusable, or spawn new items (e.g., spoiled meat).
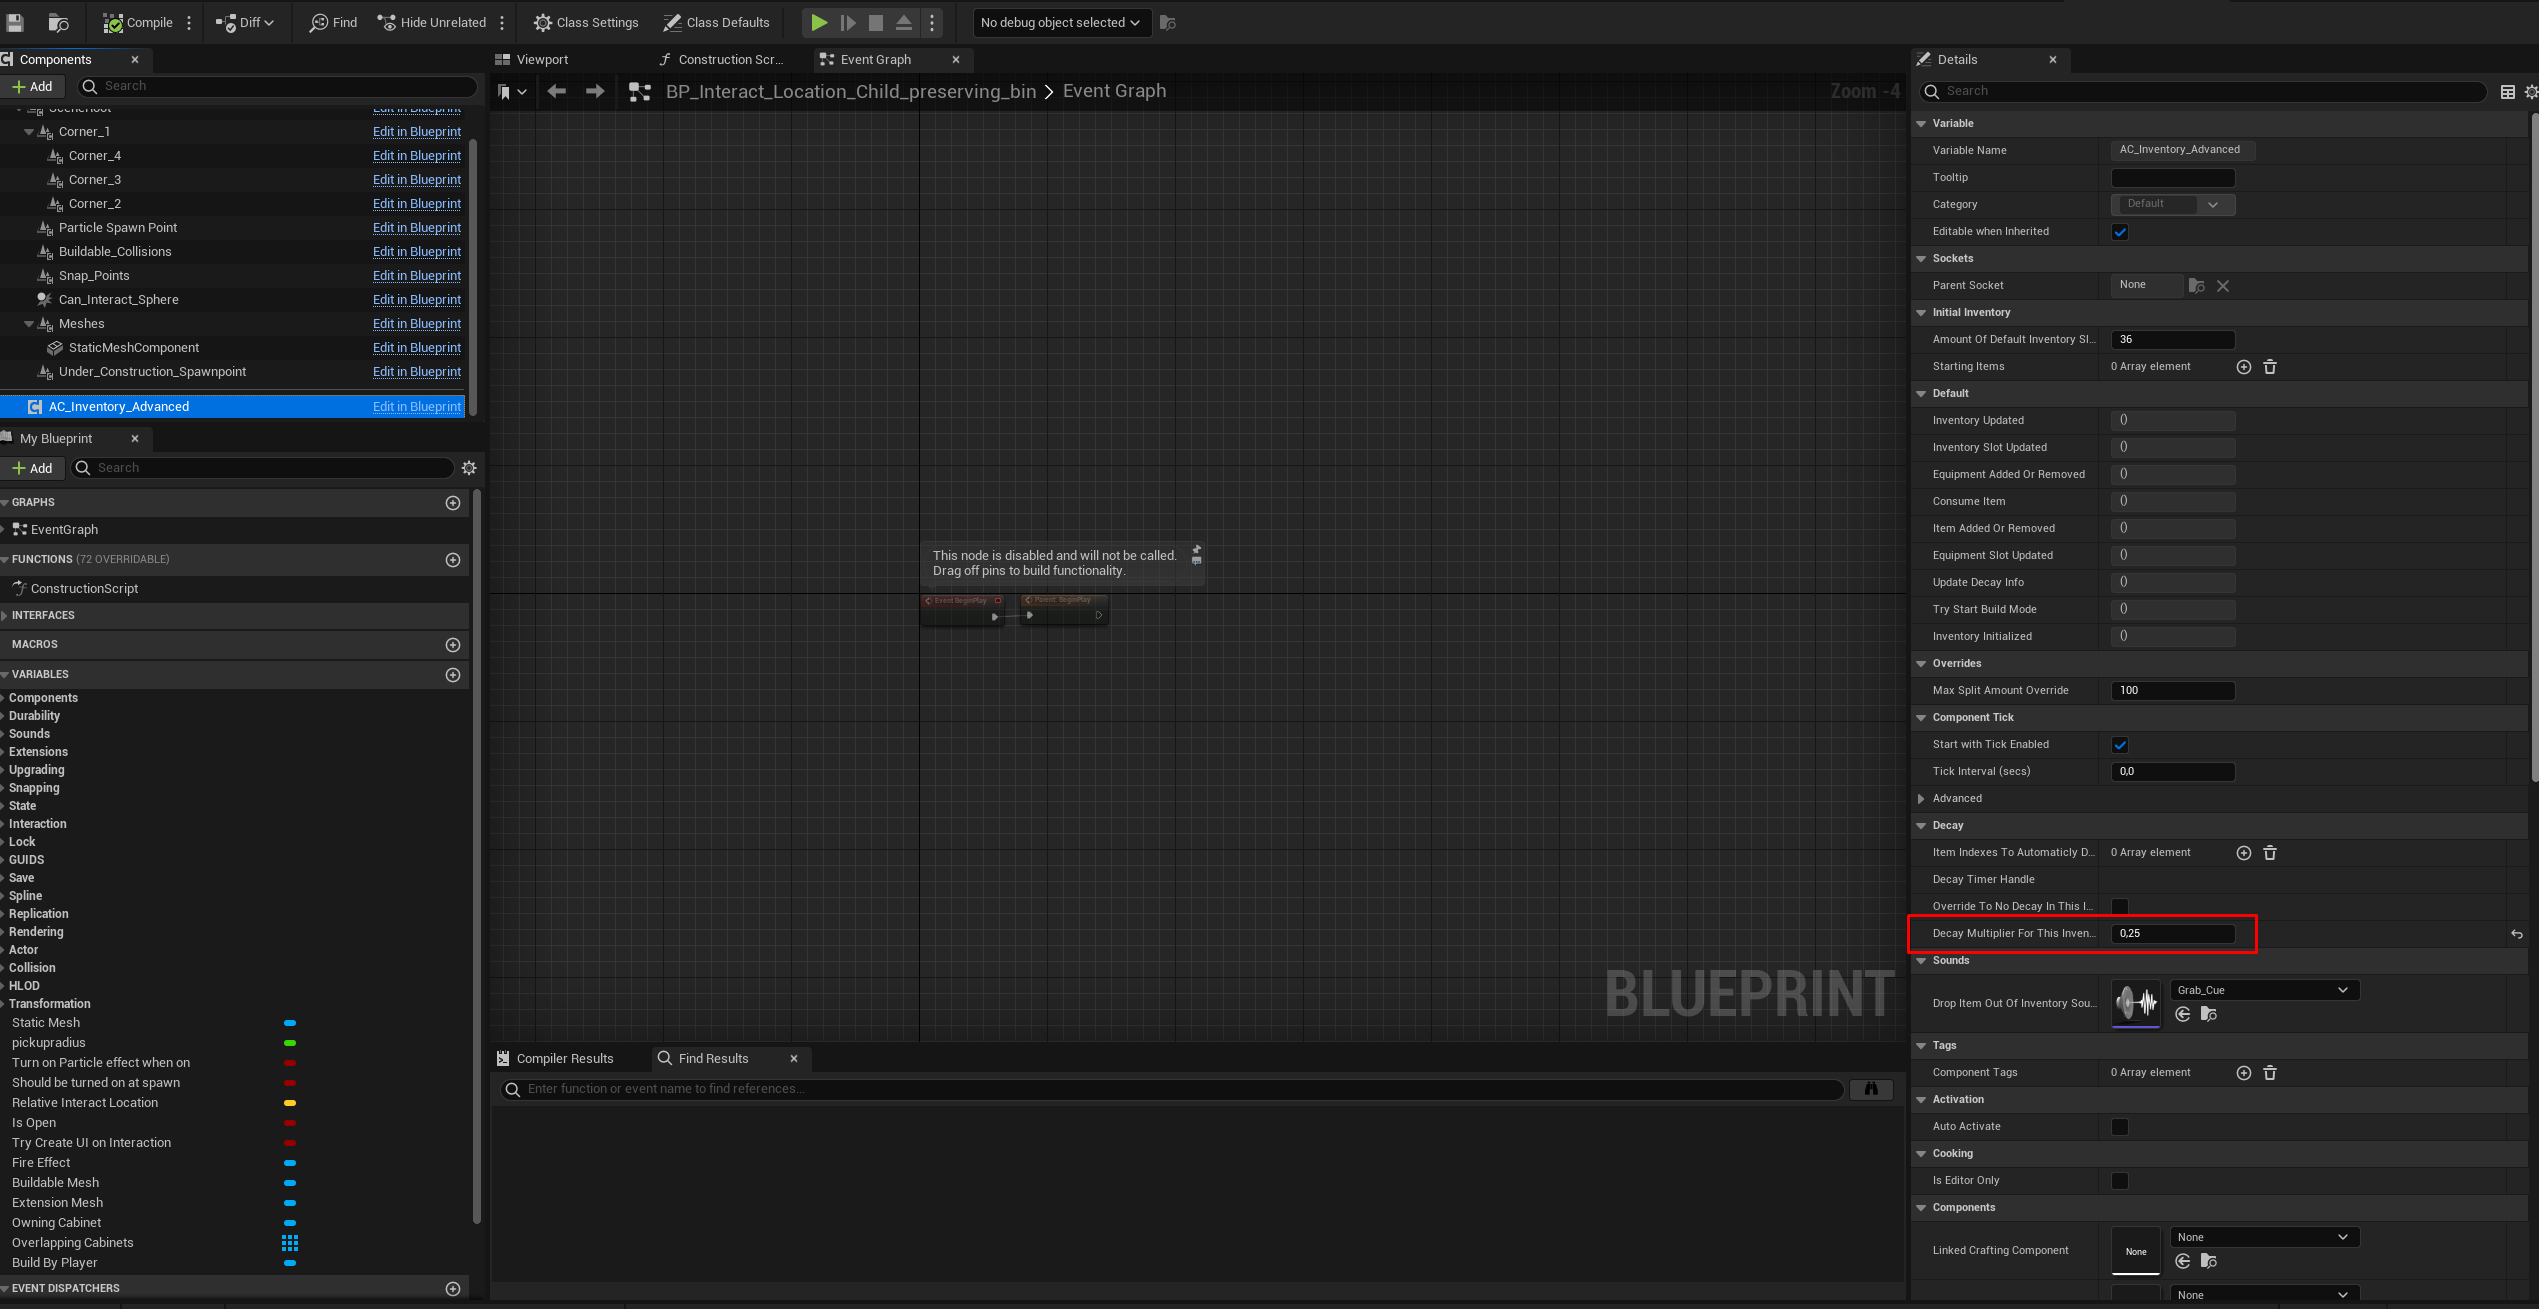
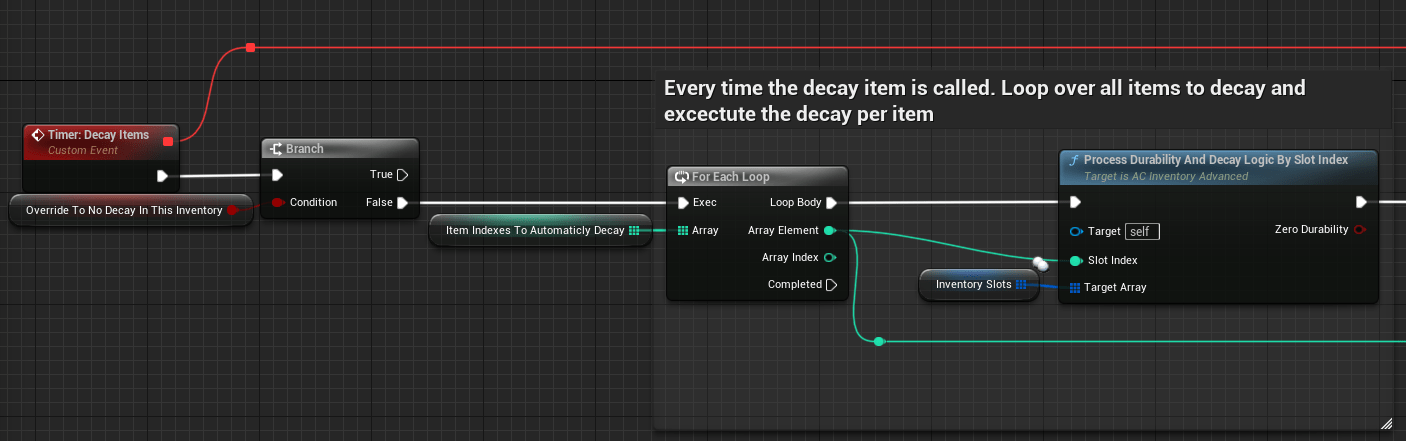
Durability, Decay, and Repair #
Durability can lower due to use or decay. Use-related decay applies to equipment, like hitting with a pickaxe or firing a weapon, while decay works on a timer. Repairable items can be fixed based on data table settings, which include:
- Durability range values
- Repair requirements
- Decay toggles
Limiting the Inventory #
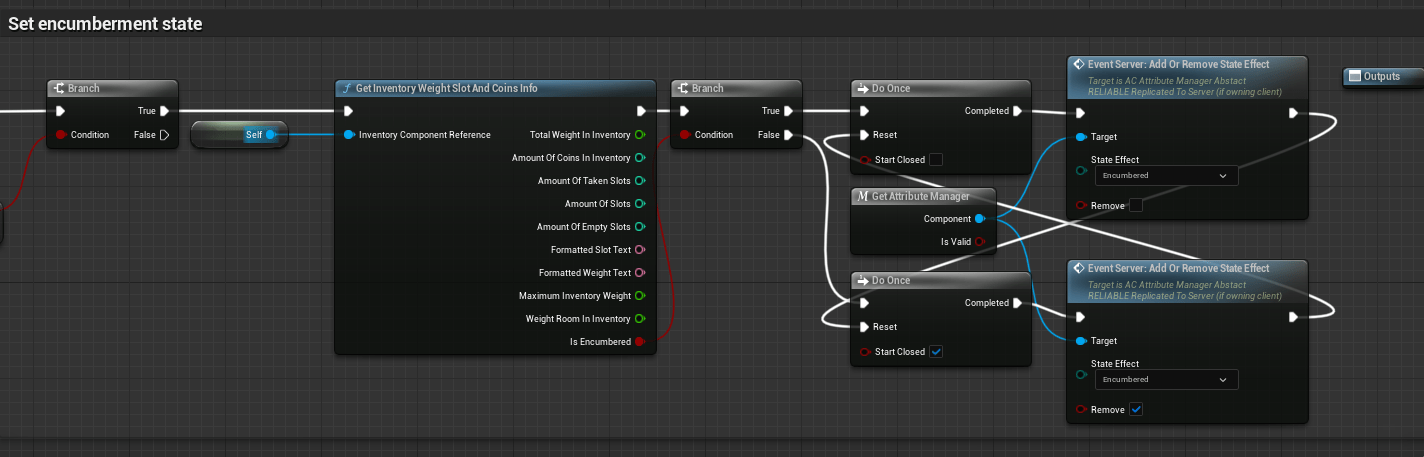
Inventory limits can be based on weight or number of slots. Exceeding the weight limit results in encumbrance, slowing down the character.

Inventory Types #
Different inventory types offer varied interaction options, such as recipe-based crafting or location-specific repairs. Predefined types include:
- Player inventory
- Storage inventory
- Workbench
- Cooking Pot
- Furnace
- Vendor
- Refrigerator
- Loot Chest
- Forge
- Smelter
- Grindstone
- Tanning Rack
- Campfire
- Alchemy Lab
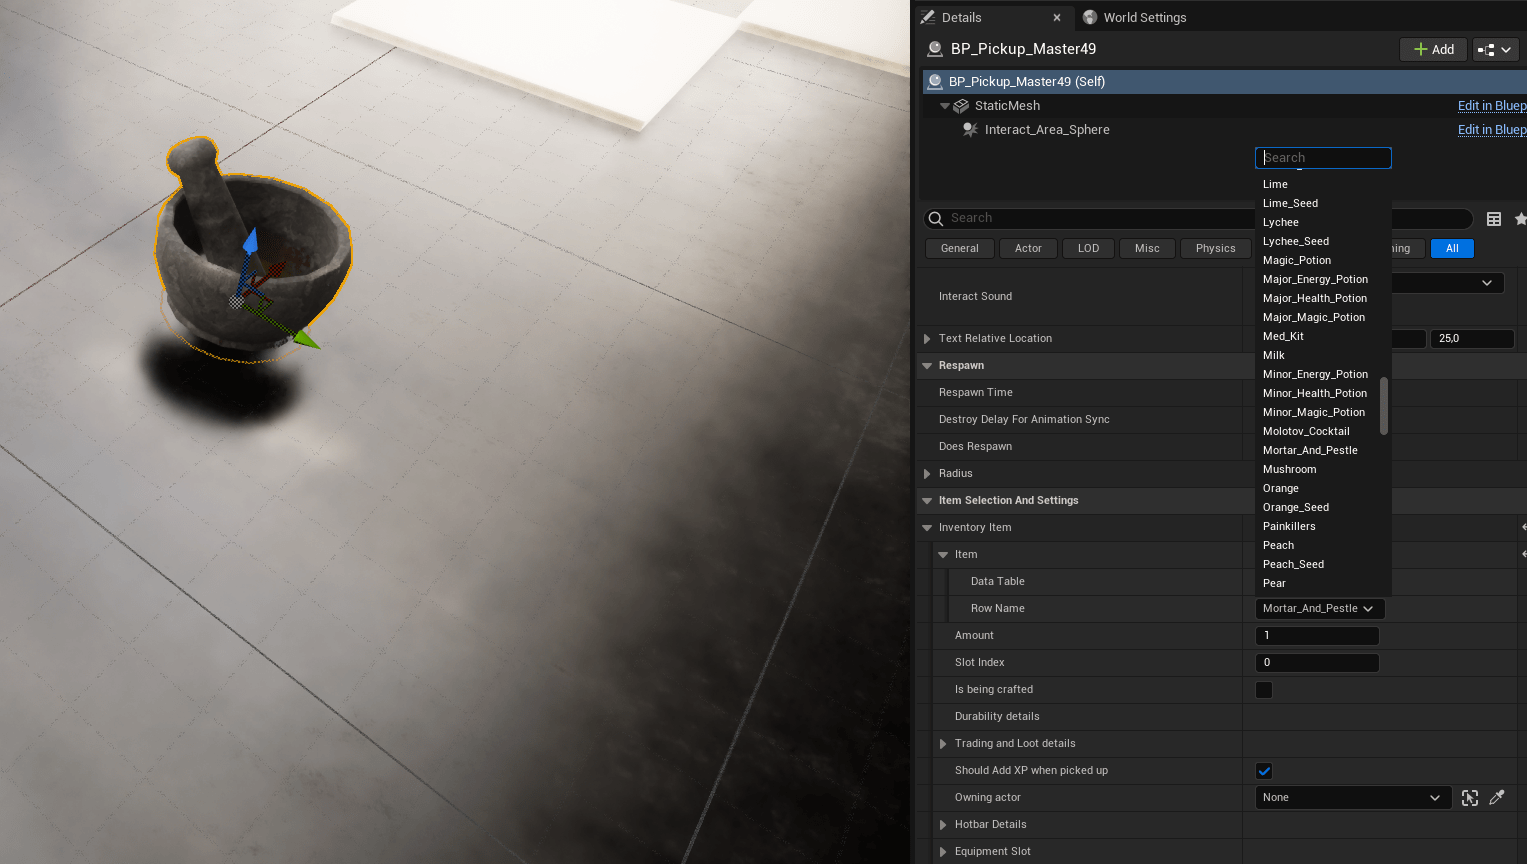
- Mortar and Pestle
- Recycler
- Compost Bin

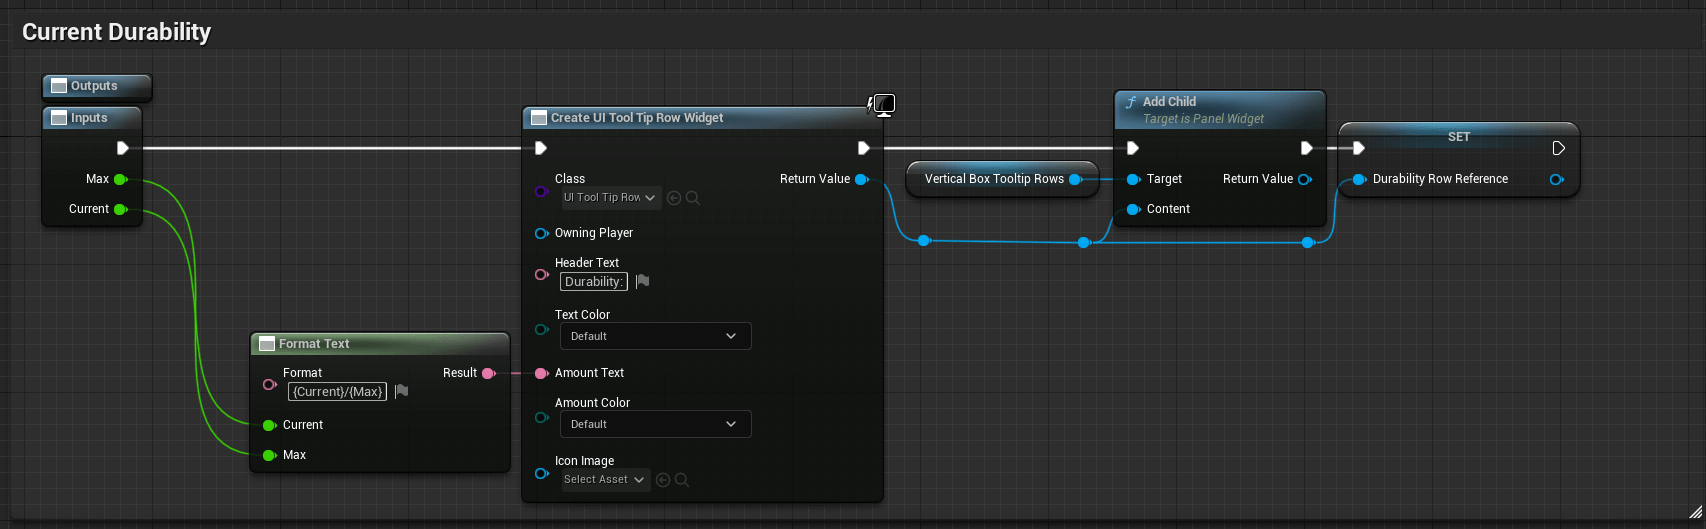
Tooltip #
Hovering over a non-empty item in the inventory shows a tooltip with information relevant to that item. The tooltip structure includes a top part with the description and name, and a bottom part with details like weight and durability.

The bottom part is dynamically created, reading data from the data table.

Dynamic Slot Creation #
If the inventory is full and more items need to be added, dynamic slot creation adds new slots by updating the inventory array and UI.

Pickup Items #
All pickups derive from the Pickup Master Blueprint, where you can change variables like item text, mesh, pickup radius, respawn settings, and physics simulation. Predefined pickups can be created by making a child of the master blueprint.
Decay in the World #
Pickup masters also have decay, using the value at spawn and normal decay speed.
Data Table & Import Logic #
Nearly everything is driven from a data table (inventory, crafting, etc.). Use Excel to fill in values and export to CSV, then convert to JSON for import into the data table in Unreal Engine. Check the data in the UE4 data table to ensure everything is linked correctly.


