Vendor #
Read the inventory documentation first to understand the container system. Also read the item allocator since vendors use the AC_ItemAllocator component for inventory management.
2. Vendor Component #
2.1 AC_Vendor_Advanced #
The AC_Vendor_Advanced component handles all trading functionality. Add this component to any actor to make it a vendor.
Key Settings:
- Trade List: Data table containing items for sale (uses same structure as Item Allocator loot tables)
- Buy Multiplier: Percentage of item value the vendor pays when buying from player
- Sell Multiplier: Percentage of item value the vendor charges when selling to player
- Not Interested Categories: Array of category enum values the vendor won’t purchase
- Currency Item: Reference to the currency item in DT_Items
Currency Counting
When counting player currency:
- Get all items with currency type
- For each currency item stack, multiply amount by base value
- Return total currency value
5.2 Price Calculation #
Prices are calculated using base values and multipliers.
Base Price Calculation
Price = Base Value * Multiplier * Quantity
Where:
- Base Value: From DT_Items
- Multiplier: Buy or sell multiplier from AC_Vendor_Advanced
- Quantity: Number of items
6. How-To Guides #
6.1 How to Create a Basic Vendor #
Step 1: Create Vendor Actor #
- Create a new Blueprint actor (e.g., BP_Vendor_General)
- Add a static mesh for the vendor (NPC, shop stall, etc.)
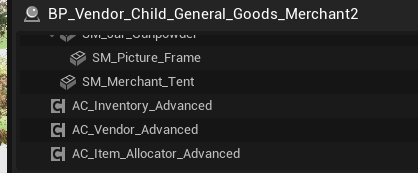
Step 2: Add Components #
- Add AC_Inventory_Advanced component
- Add AC_ItemAllocator component
- Add AC_Vendor_Advanced component
Step 3: Create Trade List #
- In Content Browser, right-click → Create Data Table
- Choose the loot/trade table struct
- Name it DT_TradeList_General
- Add items you want the vendor to sell
Step 4: Configure Trade List Items #
For each item in the trade list:
- Add a row with the item name
- Set Item Row reference (select from DT_Items)
- Configure Loot Table Info:
- Chance of spawning in vendor inventory: 0.0 to 1.0 (1.0 = always in stock)
- Minimal Amount to restock / Maximum Amount to restock: Initial stock quantity
- Maximum Stock: Upper limit
Step 5: Assign Trade List to Vendor #
- Select the vendor actor
- Find AC_Vendor_Advanced component
- Set Trade List to your created data table
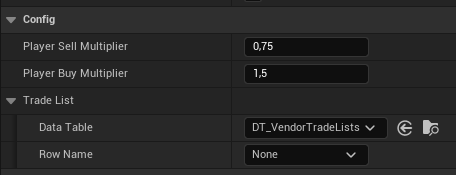
Step 6: Configure Buy/Sell Multipliers #
In the AC_Vendor_Advanced component:
- Set Buy Multiplier (e.g., 0.5)
- Set Sell Multiplier (e.g., 1.0)
Step 7: Configure Not Interested Categories (Optional) #
In the AC_Vendor_Advanced component:
- Add category enum values for item types vendor won’t buy
- Example: General store leaves this empty (buys everything)
- Example: Weapon vendor adds Consumables category
Step 8: Configure Restocking (Optional) #
In the AC_ItemAllocator component:
- Enable Has Reallocation if desired
- Set Reallocation Time
6.2 How to Configure Pricing #
Step 1: Set Base Item Values – In DT_Items, set appropriate base values for each item considering item power and progression. #
Step 2: Set Vendor Multipliers – Determine buy/sell multipliers: #
Typical Setup:
- Buy Multiplier: 0.5 (vendors pay half value)
- Sell Multiplier: 1.0 (vendors charge full value)
Player-Friendly Setup:
- Buy Multiplier: 0.7
- Sell Multiplier: 1.0
Challenging Setup:
- Buy Multiplier: 0.3
- Sell Multiplier: 1.5