Quest Manager
Updated May 25, 2026
The Quest System is a data-driven framework for defining, tracking, and completing player missions. It supports main quests, side quests, staged objectives, quest markers, prerequisites, narrative-driven stages, rewards, and event-triggered progression.
Related setup: Set Up First Narrative.
Quest stages can be triggered from interaction, dialogue choices, world events, or custom Blueprint logic. For conversation-driven quests, also check the Dialogue System.
Use this page for quest data setup, Data Table structure, quest/stage/objective/reward fields, enum extension, supported quest task types, and common setup workflows. For shared setup guidance, see the Migration Guide and Integration Guide. Use the System Atlas to look up functions, variables, events, components, and ownership references.
Related Videos
Some videos may have been recorded before V4. The same principles still apply, but asset names, component names, and folder locations may differ. Use this written page and the current V4 names as the source of truth.
Create Oblivion Style Quests and stories in your project Walkthrough PlayScalable Quest Manager for Open Worlds Devlog Part 2 PlayQuest Manager and Narrative Design Devlog Play
Setup
Quest data is assigned through the GameState tag mapper. Select AC_GS_TagMapper in the GameState and set Linked Quest Table to the quest Data Table used by the project.
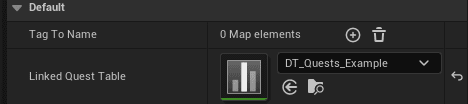
The core quest table is DT_Quests. Each row uses a quest struct containing Quest Info and an array of Quest Stages.

Quest Data Structure
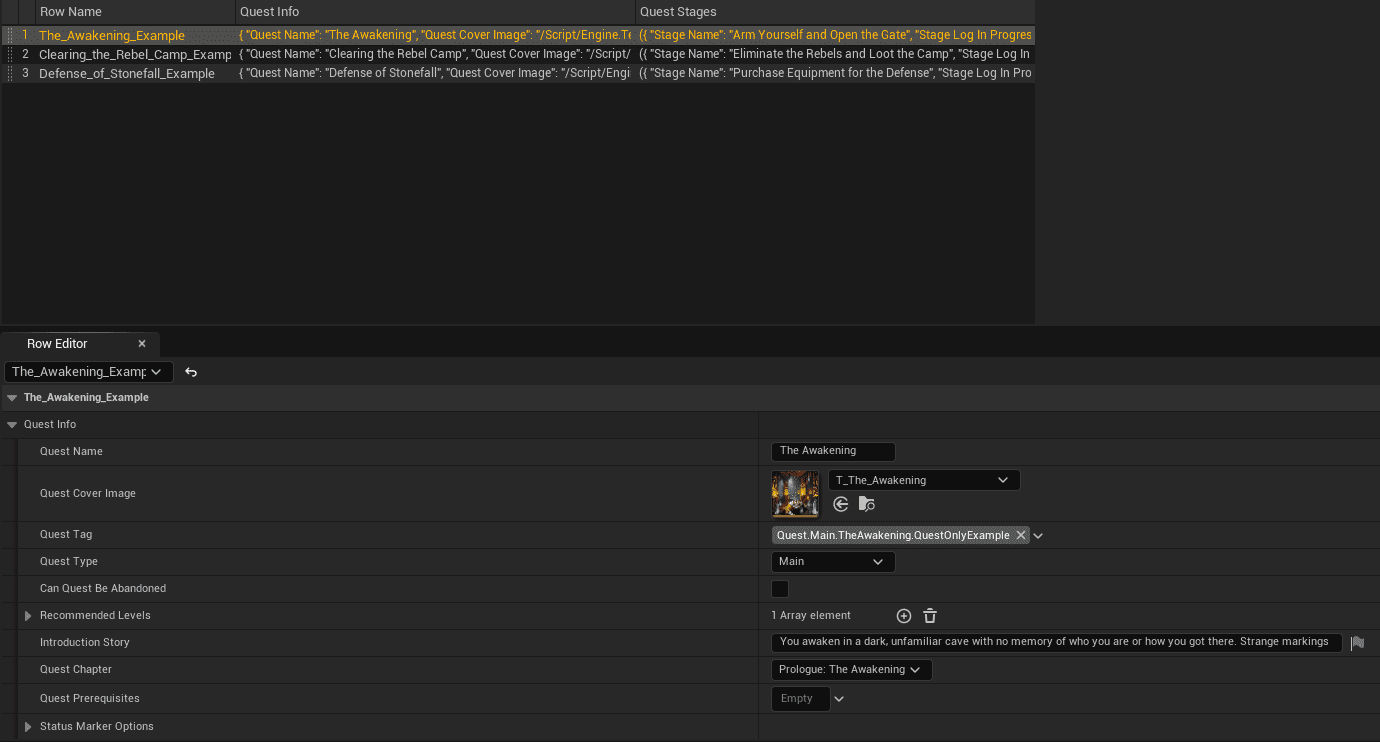
Quest Info
Quest Info defines the quest-level metadata used by UI, tracking, availability, prerequisites, and markers.
| Field | Type | Purpose |
|---|---|---|
| Quest Name | String | Display name shown in the quest log or UI. |
| Quest Cover Image | Texture 2D | Thumbnail or image shown with the quest. |
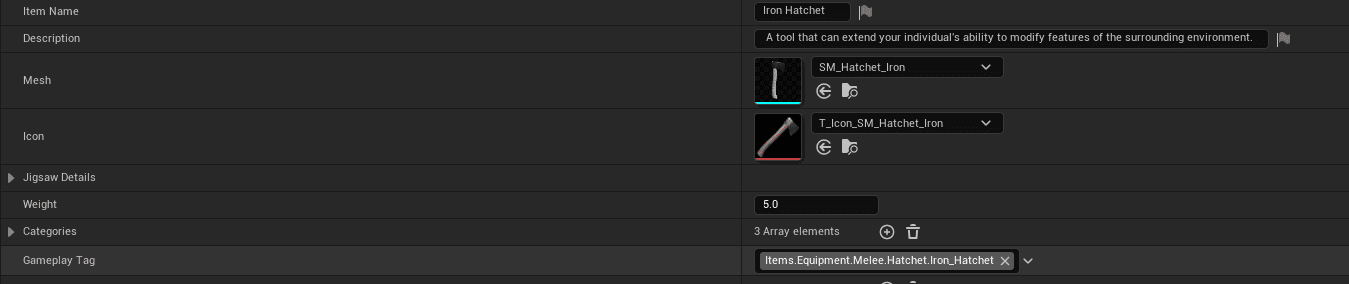
| Quest Tag | Gameplay Tag | Unique internal quest identifier, such as Quest.Main.TheAwakening.QuestOnlyExample. |
| Quest Type | Enum Quest Type | Category such as Main or Side, used for UI grouping and logic. |
| Can Quest Be Abandoned | Boolean | Controls whether the player can remove the quest from the log. |
| Recommended Levels | Struct Skill Level Range array | Suggested level or skill requirement hints for UI and scaling. |
| Introduction Story | Text | Short narrative premise shown when the quest begins. |
| Quest Chapter | Enum Quest Chapter | Groups the quest into a story act or chapter. |
| Quest Prerequisites | Gameplay Tag | Quest that must be completed before this quest is available, such as Quest.Main.ThePrologue.Completed.. |
| Status Marker Options | Struct Quest Status Marker Options | Controls quest marker visibility, icon behavior, active-only display, and completion hiding. |
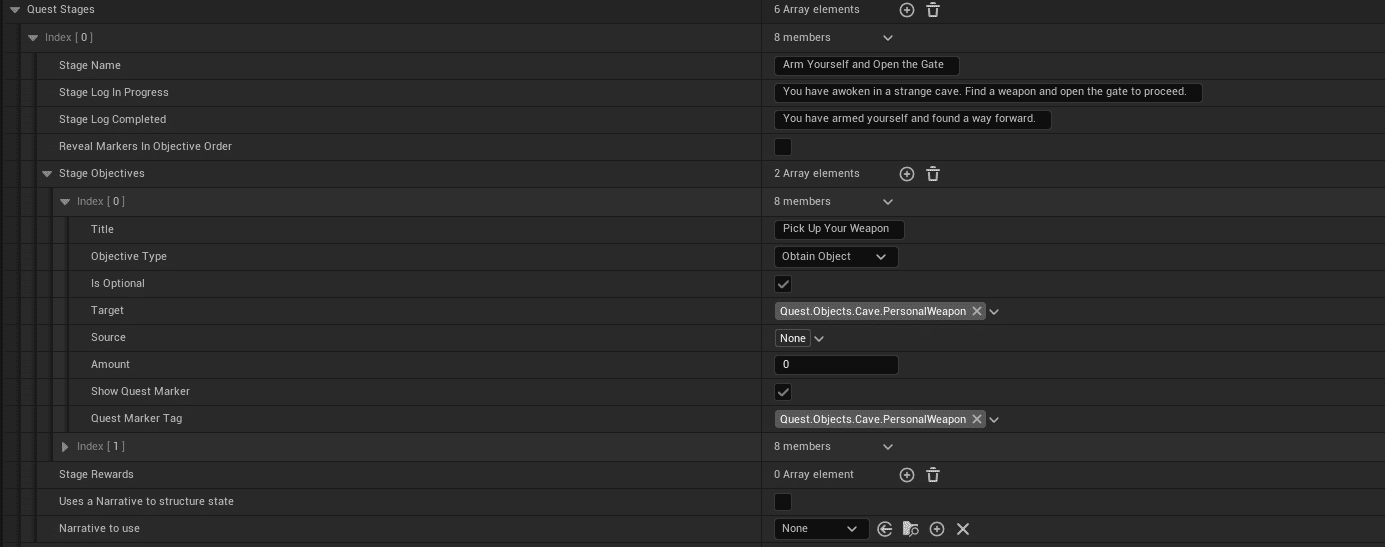
Quest Stage Info
Quest stages break a quest into ordered chunks. Each stage can define player-facing logs, objectives, rewards, marker behavior, and optional Narrative Blueprint control.
| Field | Purpose |
|---|---|
| Stage Name | Display title for the current stage. |
| Stage Log In Progress | Quest log text while the stage is active. |
| Stage Log Completed | Quest log text after the stage is completed. |
| Reveal Markers In Objective Order | Shows markers sequentially instead of all at once. |
| Stage Objectives | Array of Quest Objective structs required for stage progress. |
| Stage Rewards | Array of Quest Reward structs granted on stage completion. |
| Uses a Narrative to Structure State | Enables a Narrative Blueprint to control this stage. |
| Narrative to Use | Blueprint reference such as BP_Narrative_AwakeningIntro. |
Quest Objective
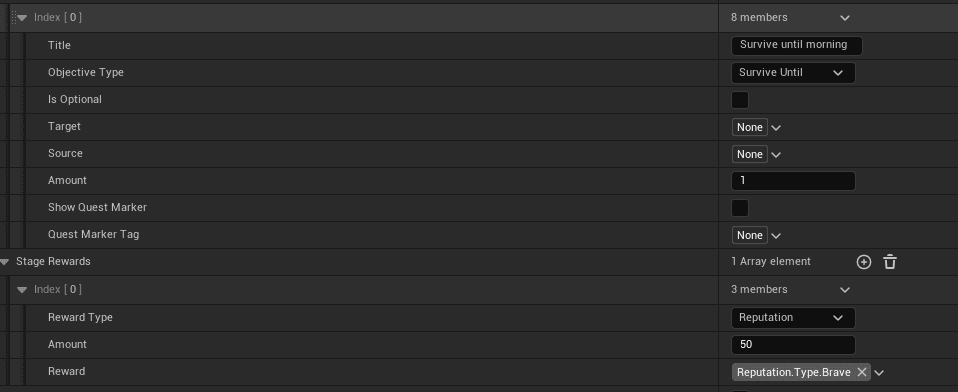
Objectives describe the individual tasks a player must complete inside a stage.
| Field | Purpose |
|---|---|
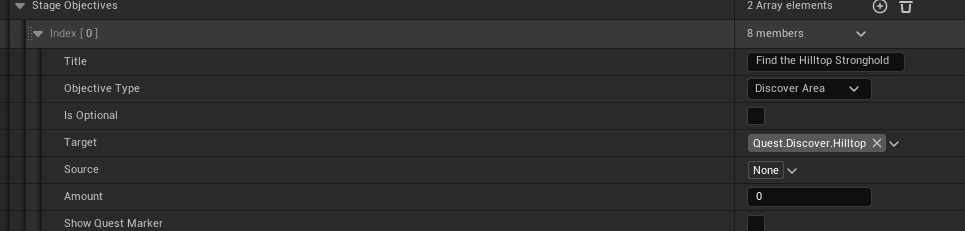
| Title | Short objective text shown in the quest log or tracker. |
| Objective Type | Enum Quest Task type that defines how the objective completes. |
| Is Optional | Marks bonus objectives that are not required for stage completion. |
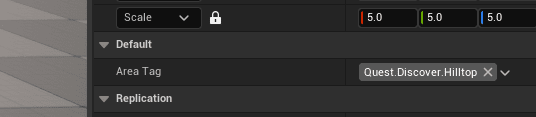
| Target | Gameplay tag identifying the actor, item, area, or object to track. |
| Source | Gameplay tag identifying the origin of the objective, such as an NPC or location. |
| Amount | Required number of items, kills, interactions, or actions. |
| Show Quest Marker | Controls whether this objective displays a marker. |
| Quest Marker Tag | Tag used to select the correct world or UI marker. |
Example target/source style from the source includes tags such as target creature/item/NPC identifiers and source NPC/location identifiers.
Quest Reward
Quest rewards define what the player receives when a quest or stage completes.
| Field | Purpose |
|---|---|
| Reward Type | Enum reward category, such as XP, Item, Currency, or Reputation. |
| Amount | Reward quantity or numeric value. |
| Reward | Gameplay tag identifying the reward, such as Reward.Item.HealthPotion, Reward.Currency.Gold, or Reward.XP.General. |
Enums and Extensions
Reward Types

To add a reward type, add the value to E_Reward_Types, then update AC_PC_QuestManager in the Give Reward function so the new type is handled correctly.
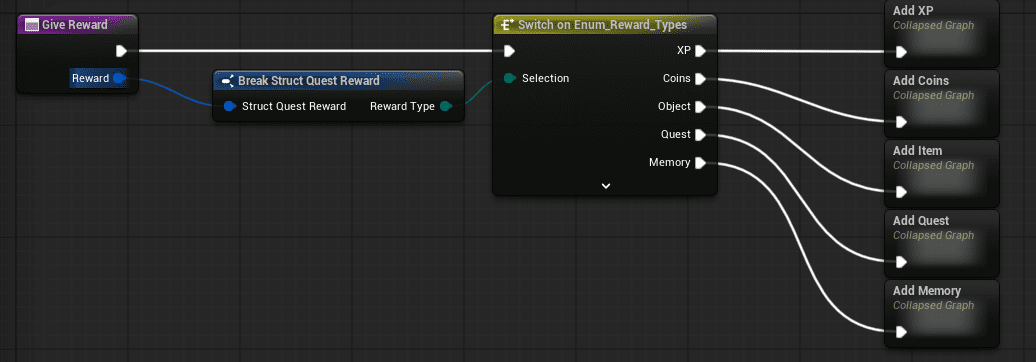
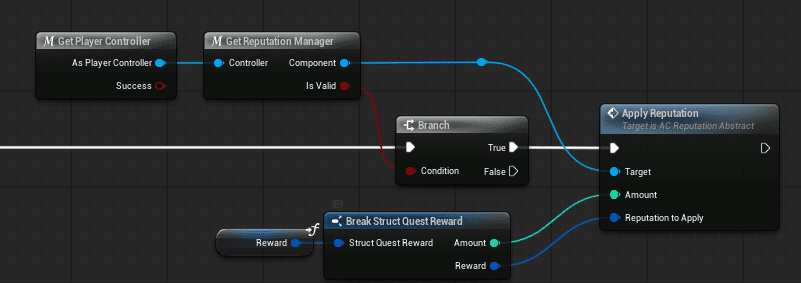

For a Reputation reward example, the reward flow gets the Player Controller, resolves the Reputation Manager, breaks the Quest Reward struct, and applies the reputation amount through that manager.
Quest Task Type
Quest task types define the kinds of objective logic the system can track. To add a new quest task type, extend the enum and add handling logic for the new objective behavior.

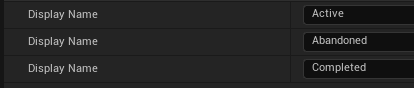
Quest Chapter, State, Status, and Type
Quest chapters organize the narrative. Quest states and statuses track runtime progress. Quest type classifies quests for UI and logic.


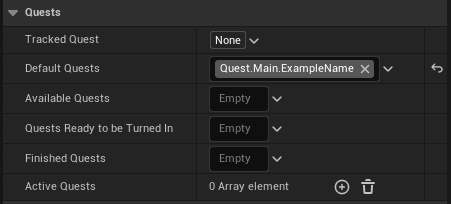
Default Quest
The default quest setup is configured in the quest system so the project can start with an initial quest state or example quest.
Supported Quest Objective Types
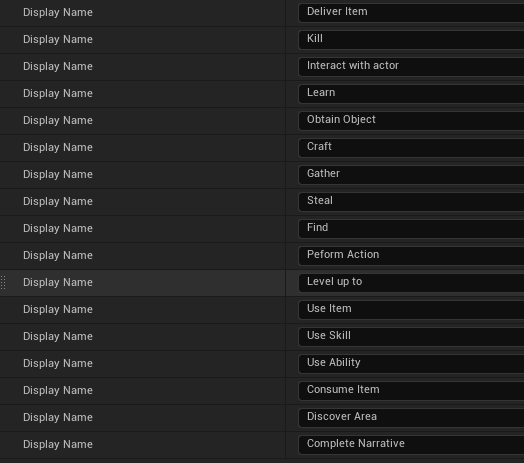
The source document lists the following quest task types and examples.
| Type | Use |
|---|---|
| Deliver Item | Bring a required item to a target NPC, object, or location. |
| Interact with Actor | Complete when the player interacts with the target actor. |
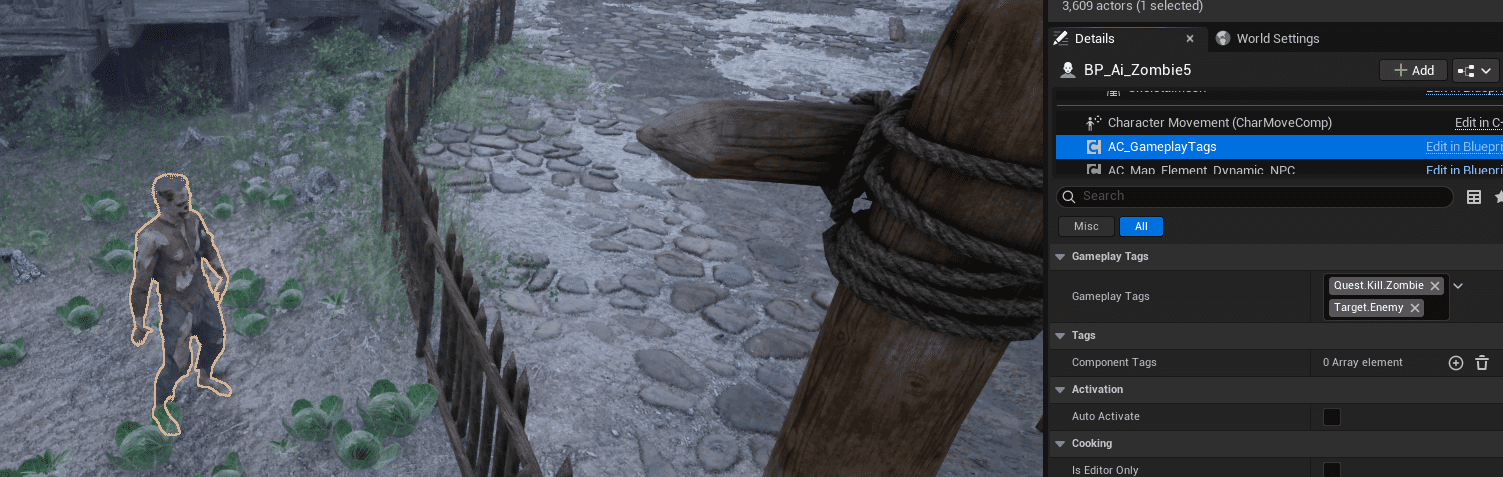
| Kill | Complete by killing actors with matching tags, such as Quest.Kill.Zombie. |
| Learn | Complete when the player learns a required entry, skill, or knowledge item. |
| Obtain Object | Complete when the player obtains a required item or object. |
| Craft | Complete when the player crafts a required recipe or item, using data such as DT_CraftingRecipies. |
| Gather | Complete when the player gathers the required resource amount. |
| Steal | Complete when the player steals the required target. |
| Find | Complete when the player finds the target location/object. |
| Perform Action | Complete when a specific action event is performed. |
| Level Up to | Complete when the player reaches the required level. |
| Use Item | Complete when the player uses the required item. |
| Use Skill | Complete when the player uses the required skill. |
| Use Ability | Complete when the player uses the required ability. |
| Consume Item | Complete when the required item is consumed. |
| Discover Area | Complete when the player triggers a discovery actor or area, such as BP_Trigger_DiscoverArea. |
| Complete Narrative | Complete when the configured narrative state completes. |


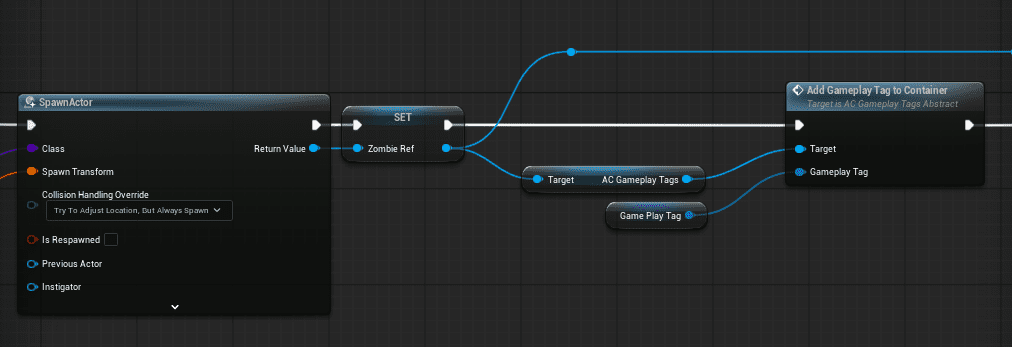

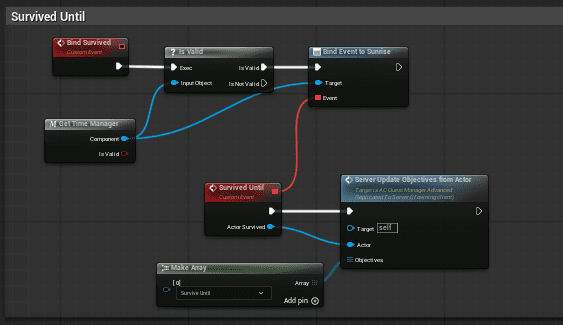
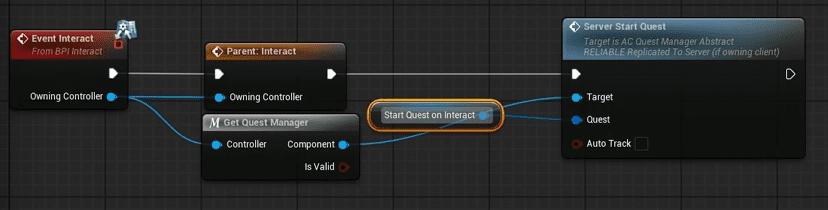
Triggering Quests by Events
Quests can be triggered or advanced by gameplay events. This allows other systems to start quests, update objectives, or complete tasks without tightly coupling every system to quest logic.

Integration Notes
- AC_PC_QuestManager handles player-side quest state and reward logic.
- AC_GS_TagMapper links the project quest Data Table.
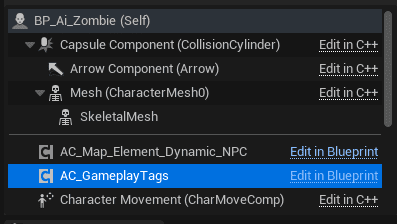
- AC_Gameplay_Tags / AC_GameplayTags are used for tag-driven matching and objective targets.
- DT_Items supports item rewards and item-based objectives.
- DT_CraftingRecipies supports craft objectives.
- Narrative Blueprints such as BP_Narrative_AwakeningIntro can drive structured quest stages.
Summary
The Quest System is built around DT_Quests, quest info, staged objectives, reward structs, quest task enums, and gameplay tags. Use quest tags for stable IDs, stages for progression, objectives for tracked player tasks, rewards for completion output, and event triggers for integration with gameplay systems.