Crafting
Updated May 25, 2026
The Crafting system handles recipe data, material checks, crafting queues, workstation requirements, fuel, output containers, and player or station-based item creation.
For shared setup guidance, see the Migration Guide and Integration Guide. Use the System Atlas to look up functions, variables, events, components, and ownership references. Use this page for crafting-specific setup and behavior.
Related setup: Customize Your Datatables, Set Up Inventory for the Player.
Related Videos
Version note: Some videos may have been recorded before V4. Concepts still apply, but asset names, component names, and folder locations may differ. Treat this written documentation as the source of truth.
Learning note: Basics-course videos are not specific to this system. Use them to understand Unreal Engine or Blueprint concepts, then follow this documentation for project-specific setup.
Data Structures – Enumerations and Data Tables Play
Workstation Requirements
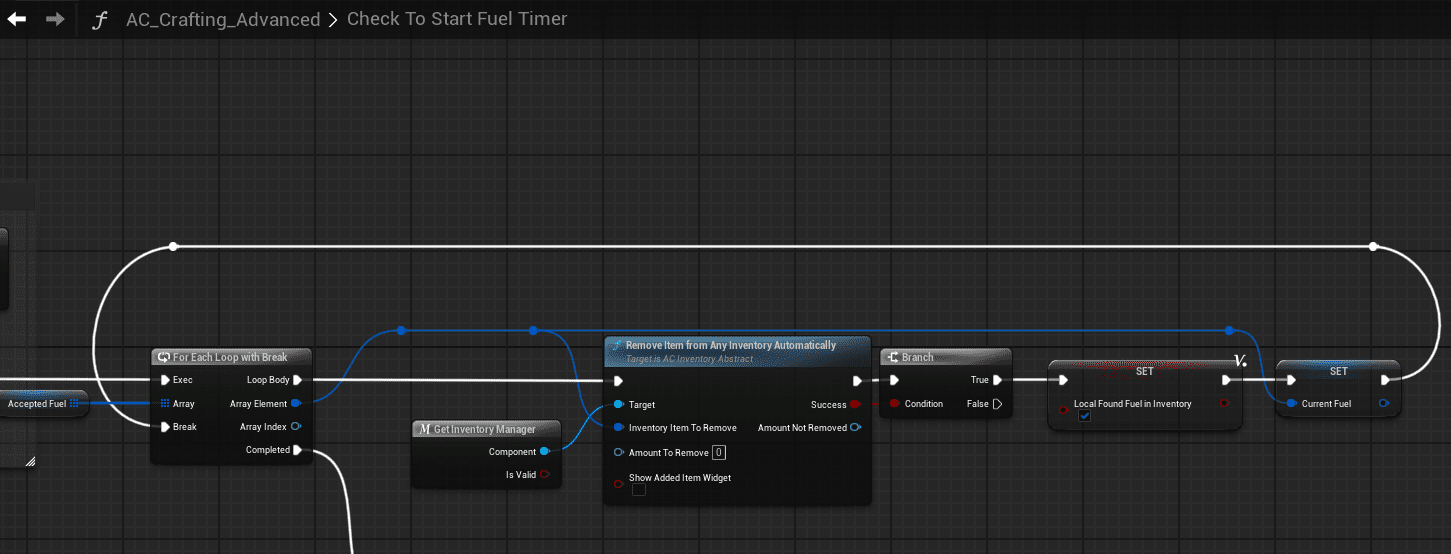
Crafting stations can have activation and fuel requirements. Stations can be configured to work without fuel, require fuel, or pause when fuel runs out.
- On/Off state: Controls whether the station is active and can process the queue.
- Toggle Fuel Requirement: Enables or disables fuel consumption in the crafting component.
- Select Fuel Items: Defines which items count as valid fuel.
- Turn On/Off Without Fuel: Allows activation without requiring fuel when configured.
When fuel is enabled, the station consumes fuel while active, becomes inactive when fuel runs out, and pauses crafting while inactive.
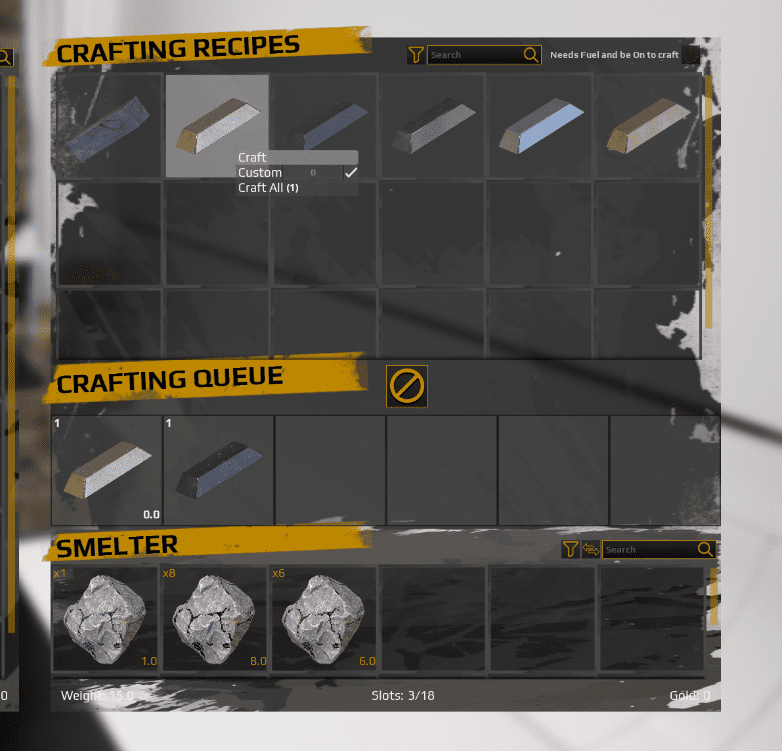
Crafting Queue
The crafting queue processes items in first-in-first-out order. Each queued item runs its own crafting timer and can pause when station conditions are no longer met.
- Check whether crafting is active.
- Get the first non-empty queue slot.
- Start the recipe timer.
- Update progress while validating station state and requirements.
- Finalize the craft when the timer reaches 100%.
- Move to the next item in the queue.
When a queue slot contains a stack, the system crafts one item, reduces stack quantity by one, then continues crafting the stack until the quantity reaches zero.
Crafting can pause if the station turns off, fuel runs out, the player closes the station when configured that way, or required materials become unavailable. When conditions are valid again, crafting resumes from the paused state.
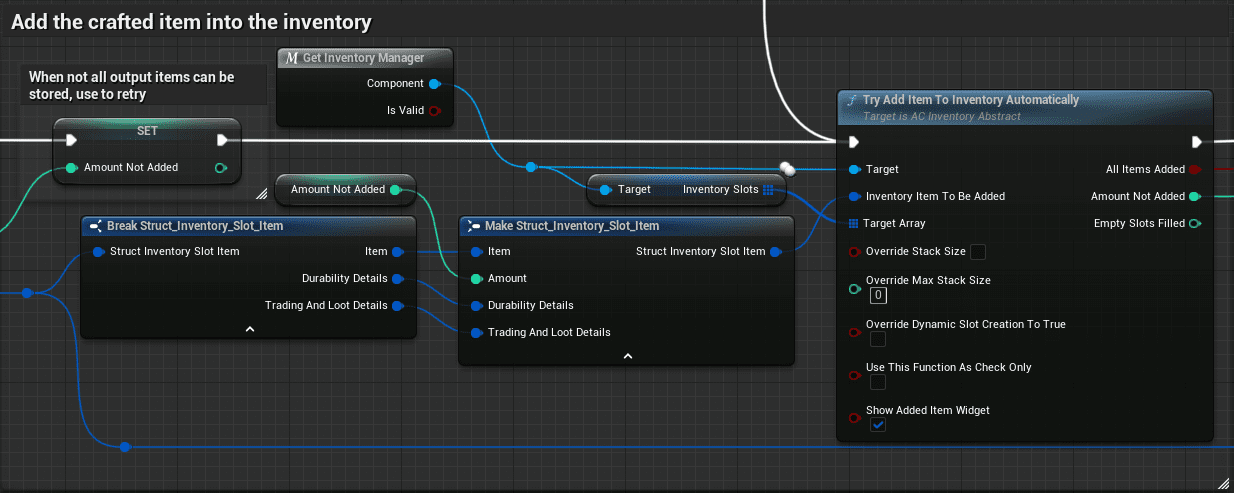
Item Completion
When a craft completes, the result is created and placed in the correct output inventory.
- World crafting station: Completed items are added to the station’s own AC_Inventory output container.
- Player crafting: Completed items are added directly to the player’s inventory.
Materials are consumed when the recipe starts, not when it completes. If crafting is cancelled after starting, the materials have already been removed.
Inventory Rules
Before adding a craft to the queue, the system checks the required materials through the inventory component’s item-checking logic.
By default, material checks include:
- Default containers, such as the main inventory.
- Container type containers, such as backpacks.
Material checks do not include:
- Equipment containers.
- Crafting containers or the queue itself.
This prevents crafting from using equipped items or creating circular dependencies from the crafting queue.
If the output inventory is full, behavior depends on the container setup. Dynamic slot creation can add new slots automatically, but large dynamic inventories can affect performance. If dynamic slots are disabled, the project should choose whether to pause crafting, cancel and return materials, or drop output items into the world.
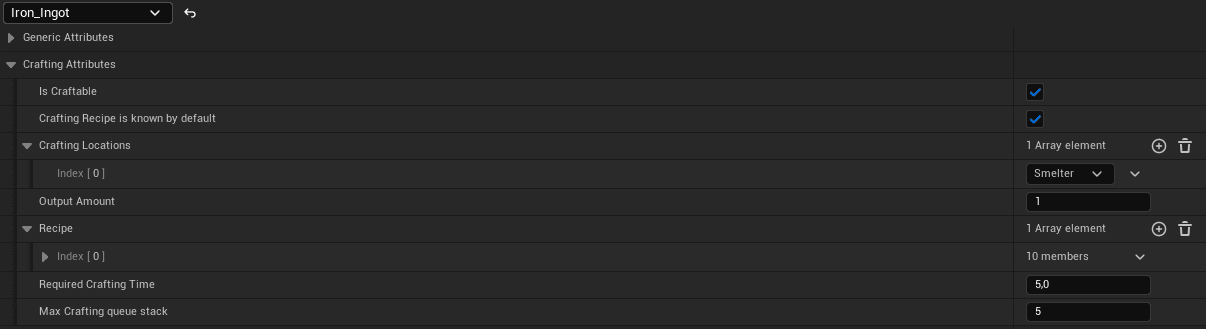
Create a Recipe
- Open the crafting recipe data table, such as DT_Crafting_Recipes.
- Add a new recipe row with a clear name, such as Recipe_WoodenSpear.
- Set the result item and result quantity.
- Add required materials, including item, quantity, and whether the material is consumed.
- Set crafting time in seconds.
- Configure whether the recipe can be crafted without a workstation.
- Set required crafting locations when the recipe needs a workstation type.
- Assign a recipe category for UI filtering.
- Set whether the recipe is known by default or must be learned through project-specific logic.
- Save and test the recipe in the crafting UI.
Example Recipe_WoodenSpear materials:
- Wood: Quantity 2, Consume true.
- Stone: Quantity 1, Consume true.
- Fiber: Quantity 3, Consume true.
Example workstation rules:
- Basic items can be craftable without a workstation.
- Weapons can require a Workbench.
- Cooked food can require a Campfire or Cooking Pot.
- Metal items can require a Forge.
Set Up a Crafting Station
- Create or open an actor Blueprint such as a workbench, campfire, or furnace.
- Add AC_Inventory near the top of the component hierarchy.
- Add an output container with an appropriate type, slot count, and name.
- Add a fuel container if the station consumes fuel. Restrict allowed items to fuel where needed.
- Set the inventory type to match the station, such as Workbench, Campfire, or Furnace.
- Add an interaction component so the player can open the station UI.
- Configure station state if the station can be active or inactive.
- Use the built-in fuel settings in the crafting component when fuel is required.
- Create or assign a UI widget that shows available recipes, the queue, output inventory, fuel inventory, and station state.
- Test interaction, recipe filtering, queue processing, fuel behavior, output collection, and activation state.
Example fuel logic: while active, the station gets the fuel container, reads the first fuel item, reduces durability or quantity, deactivates when no fuel remains, and updates the UI fuel display.