Building System
Updated May 25, 2026
The Building System provides character-driven placement, modular snapping, placeable objects, radial-menu selection, ghost construction, direct placement, repair, upgrading, destruction, locks, spline-based defense walls, and territory authorization.
For shared setup guidance, see the Migration Guide and Integration Guide. Use the System Atlas to look up functions, variables, events, components, and ownership references. Use this page for building-specific setup and behavior.
Related setup: Prepare Landscape for Building System, Set Up Your Game Environment.
Related Videos
Version note: Some videos may have been recorded before V4. Concepts still apply, but asset names, component names, and folder locations may differ. Treat this written documentation as the source of truth.
Ultimate Building System walkthrough PlayContext based controls for Building System devlog Play
Landscape Requirements
Foundation placement requires the landscape or placement surface to block the buildable trace channel. For the step-by-step landscape collision setup, use Prepare Landscape for Building System.
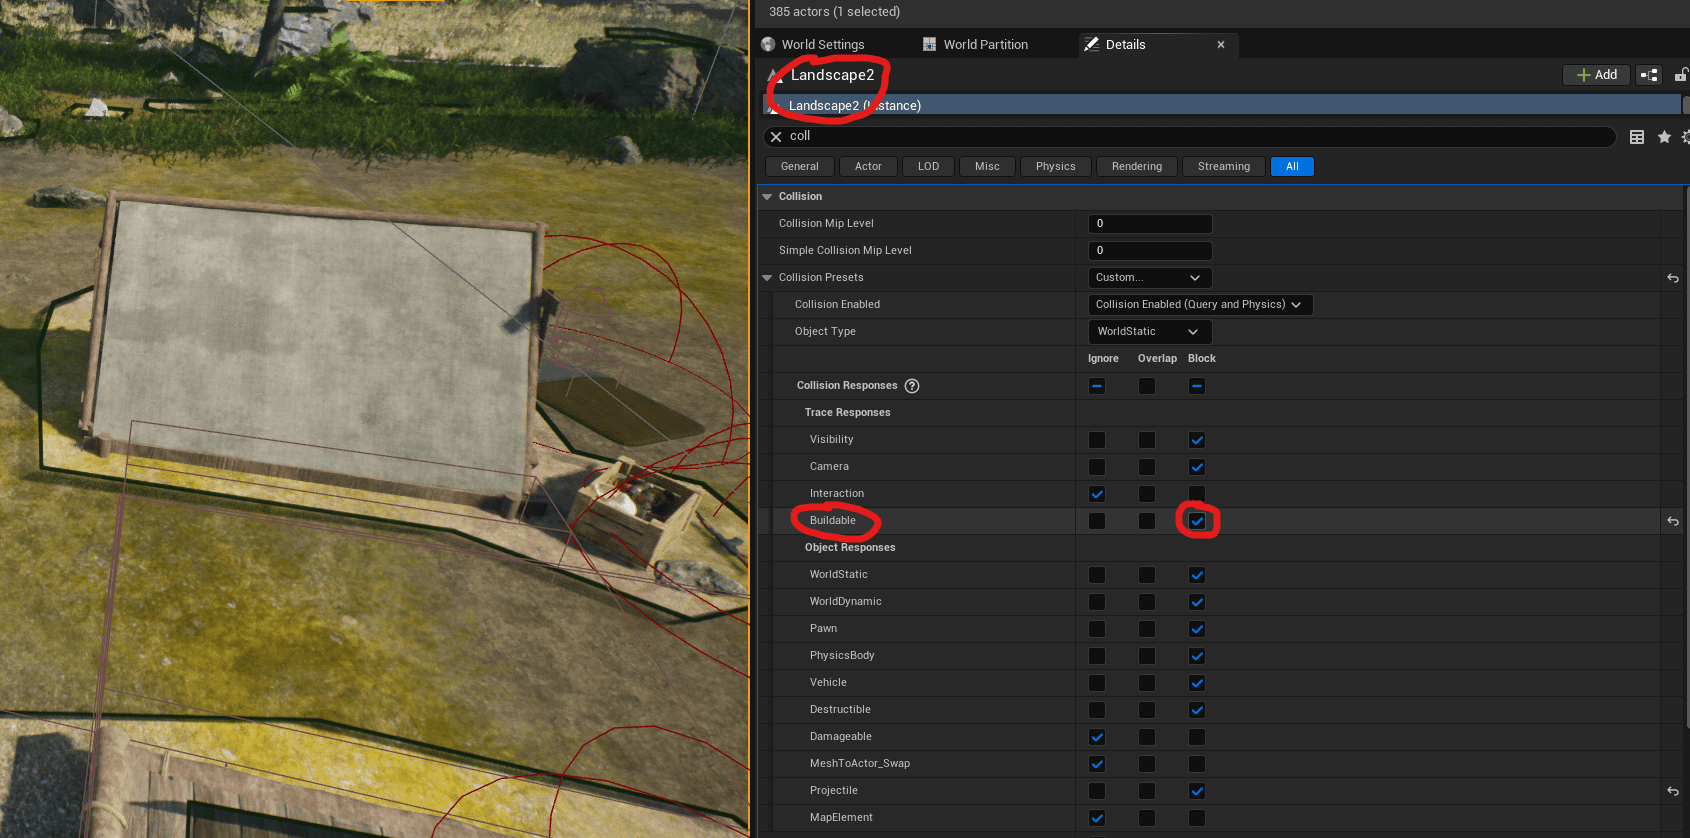
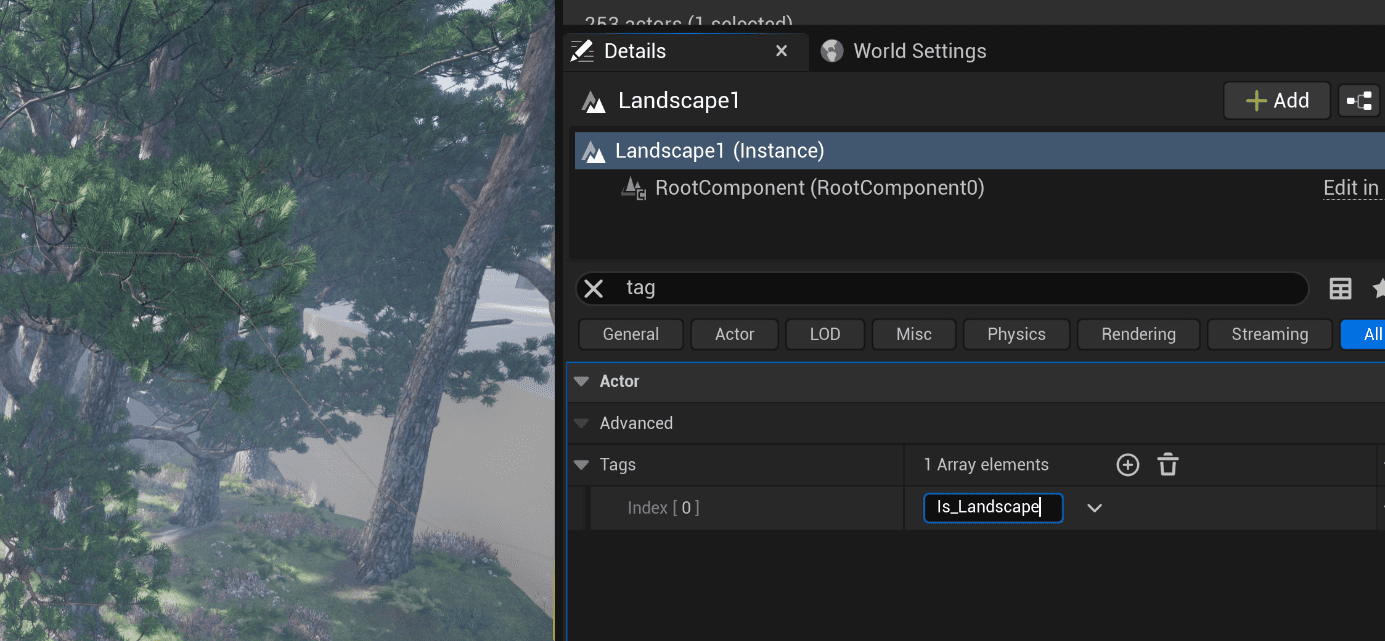
To ignore specific landscape collisions, add the tag shown in the screenshot where appropriate. This is optional.
Core Flow
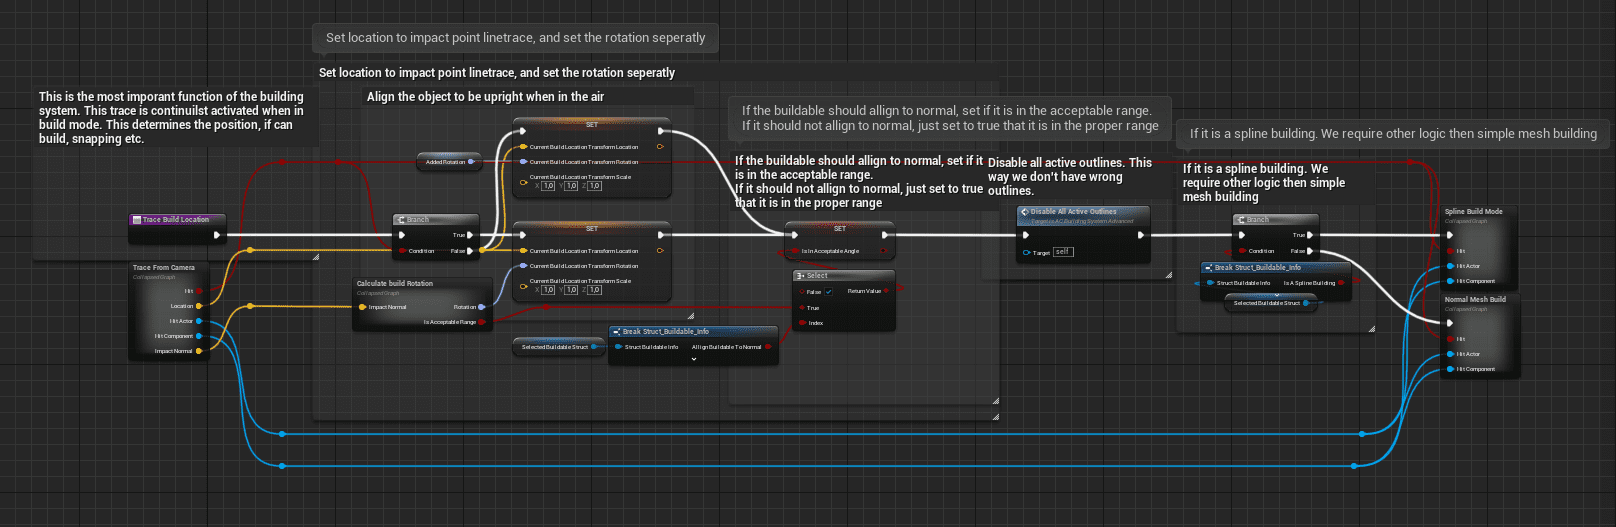
Most runtime behavior is handled by AC_CH_BuildingSystem, an actor component added to the character. The component owns build mode, buildable spawning, trace location, placement validation, ghost preview updates, and logic that should not live inside individual buildable actors.
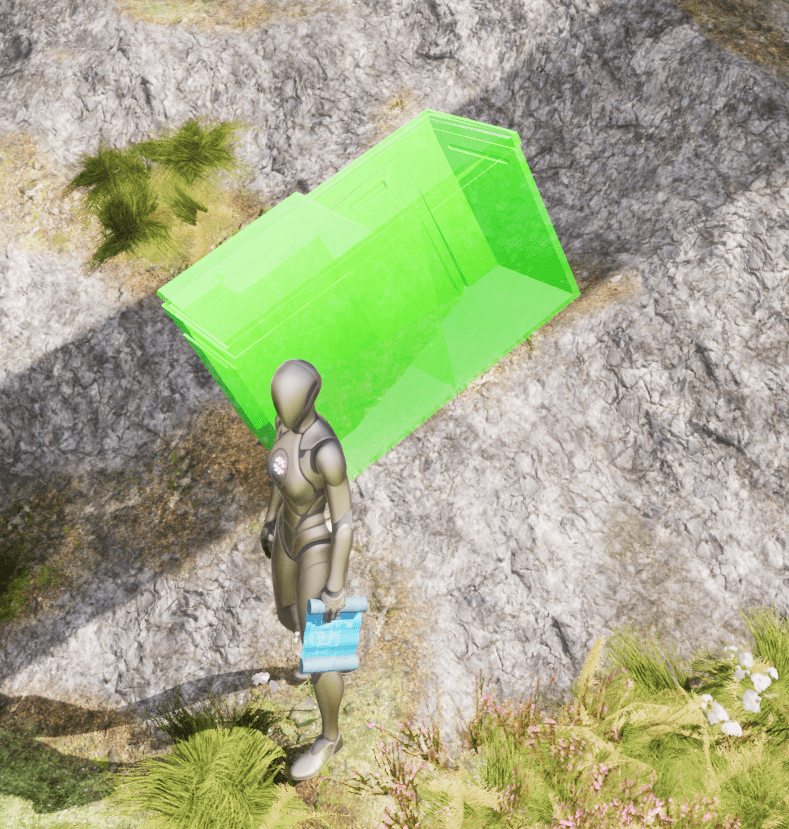
The main placement loop is handled by the trace build location function. While build mode is active, the component traces from the camera, resolves a target location, applies rotation/elevation and normal alignment rules, then routes the result through normal building or spline building logic.

For normal buildings, the trace hit starts placement validation. That logic checks snapping points, overlaps, floating state, accepted angles, and final preview color before allowing placement.
Buildable Types
The system supports two main buildable types: modular buildables and placeables.
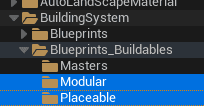
Modular Buildables
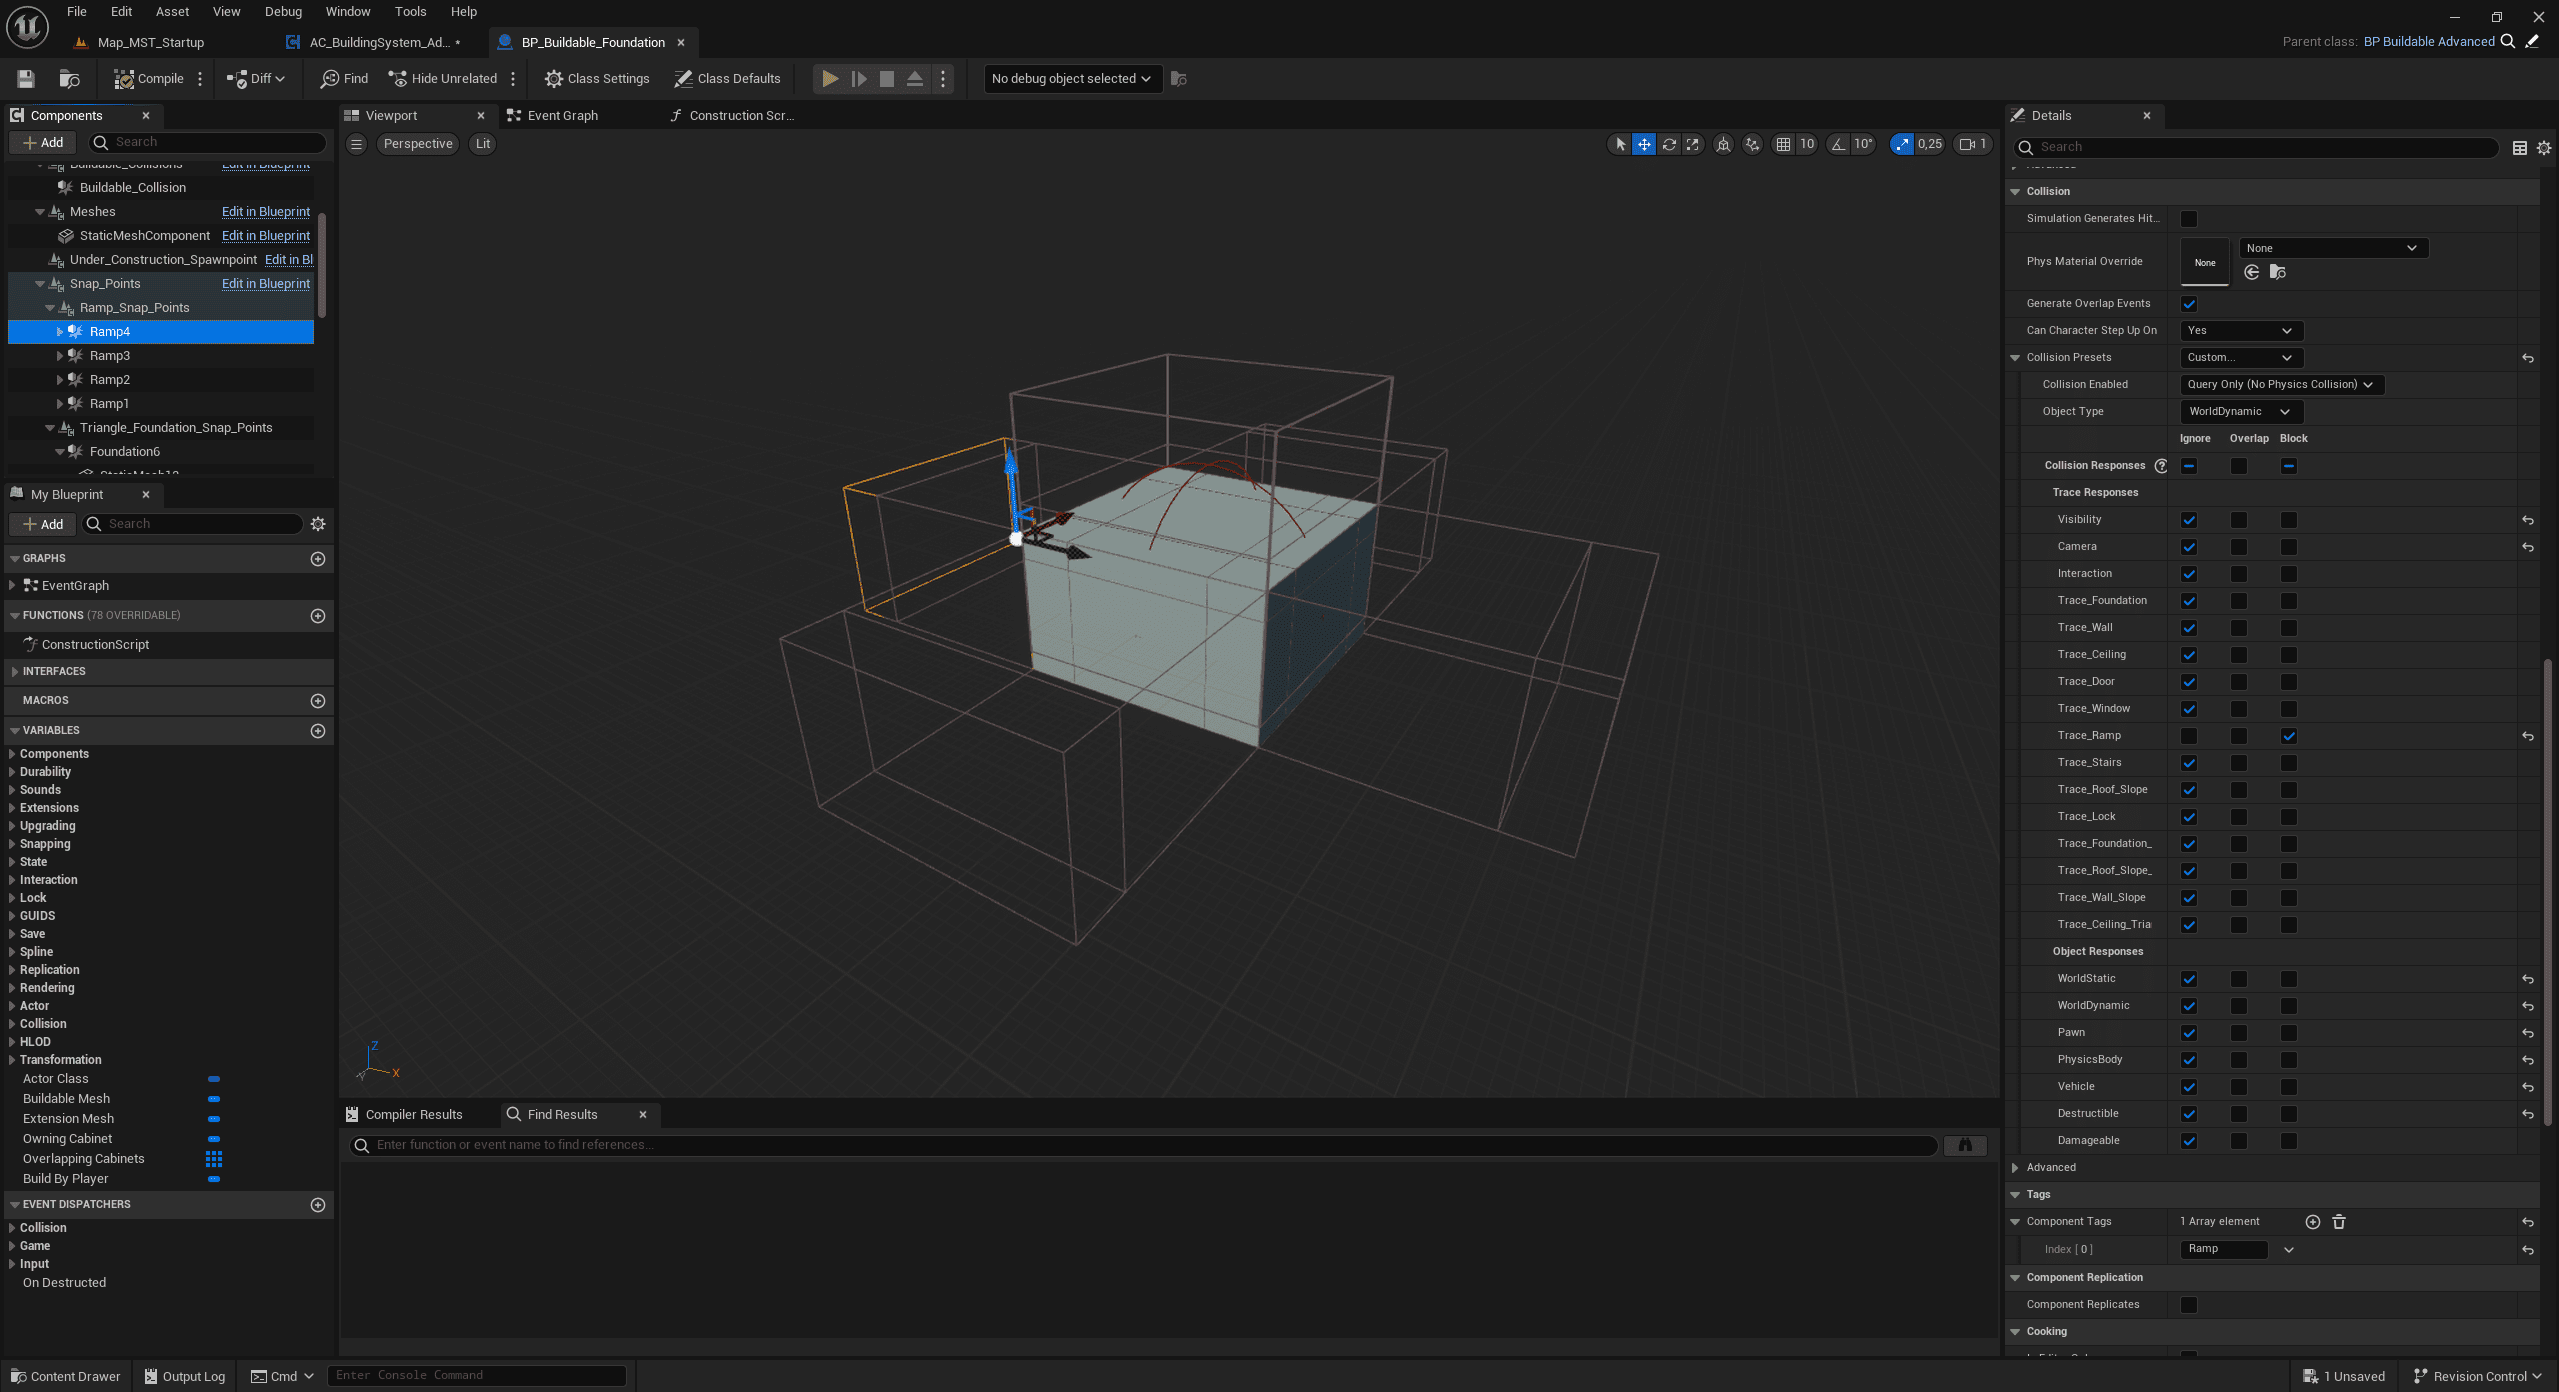
Modular buildables are grid-style pieces that snap together to form structures, such as foundations, walls, and other construction parts. The screenshots show the modular pieces without final materials, so in-game visuals may differ. The farming plot shown in the source image is not included.

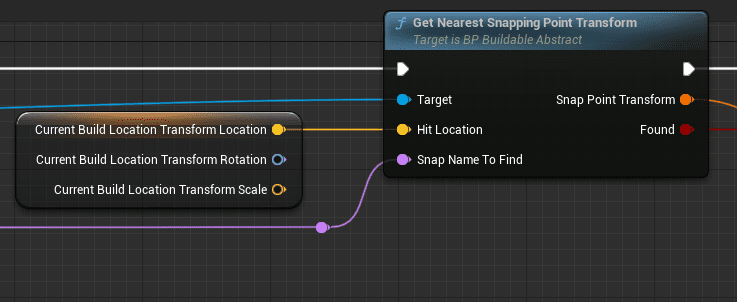
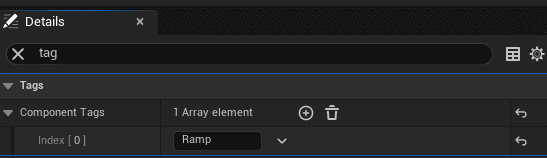
Snapping uses both trace channels and tags:
- Trace channels: The placement trace only looks for compatible collision channels, such as a wall trace when placing a wall.
- Snap tags: The buildable searches for matching snap tag names, such as Wall, on the hit buildable.
- Nearest snap point: When a compatible tag exists, the system returns the nearest snap point for the piece being placed.
Placeables
Placeables are non-modular objects such as furniture, campfires, and other standalone objects.
Data Model
The building system is data-table driven. Buildable behavior is configured through the buildables data table and the accompanying spreadsheet workflow. Review the variables carefully; many core behaviors are controlled from this data.
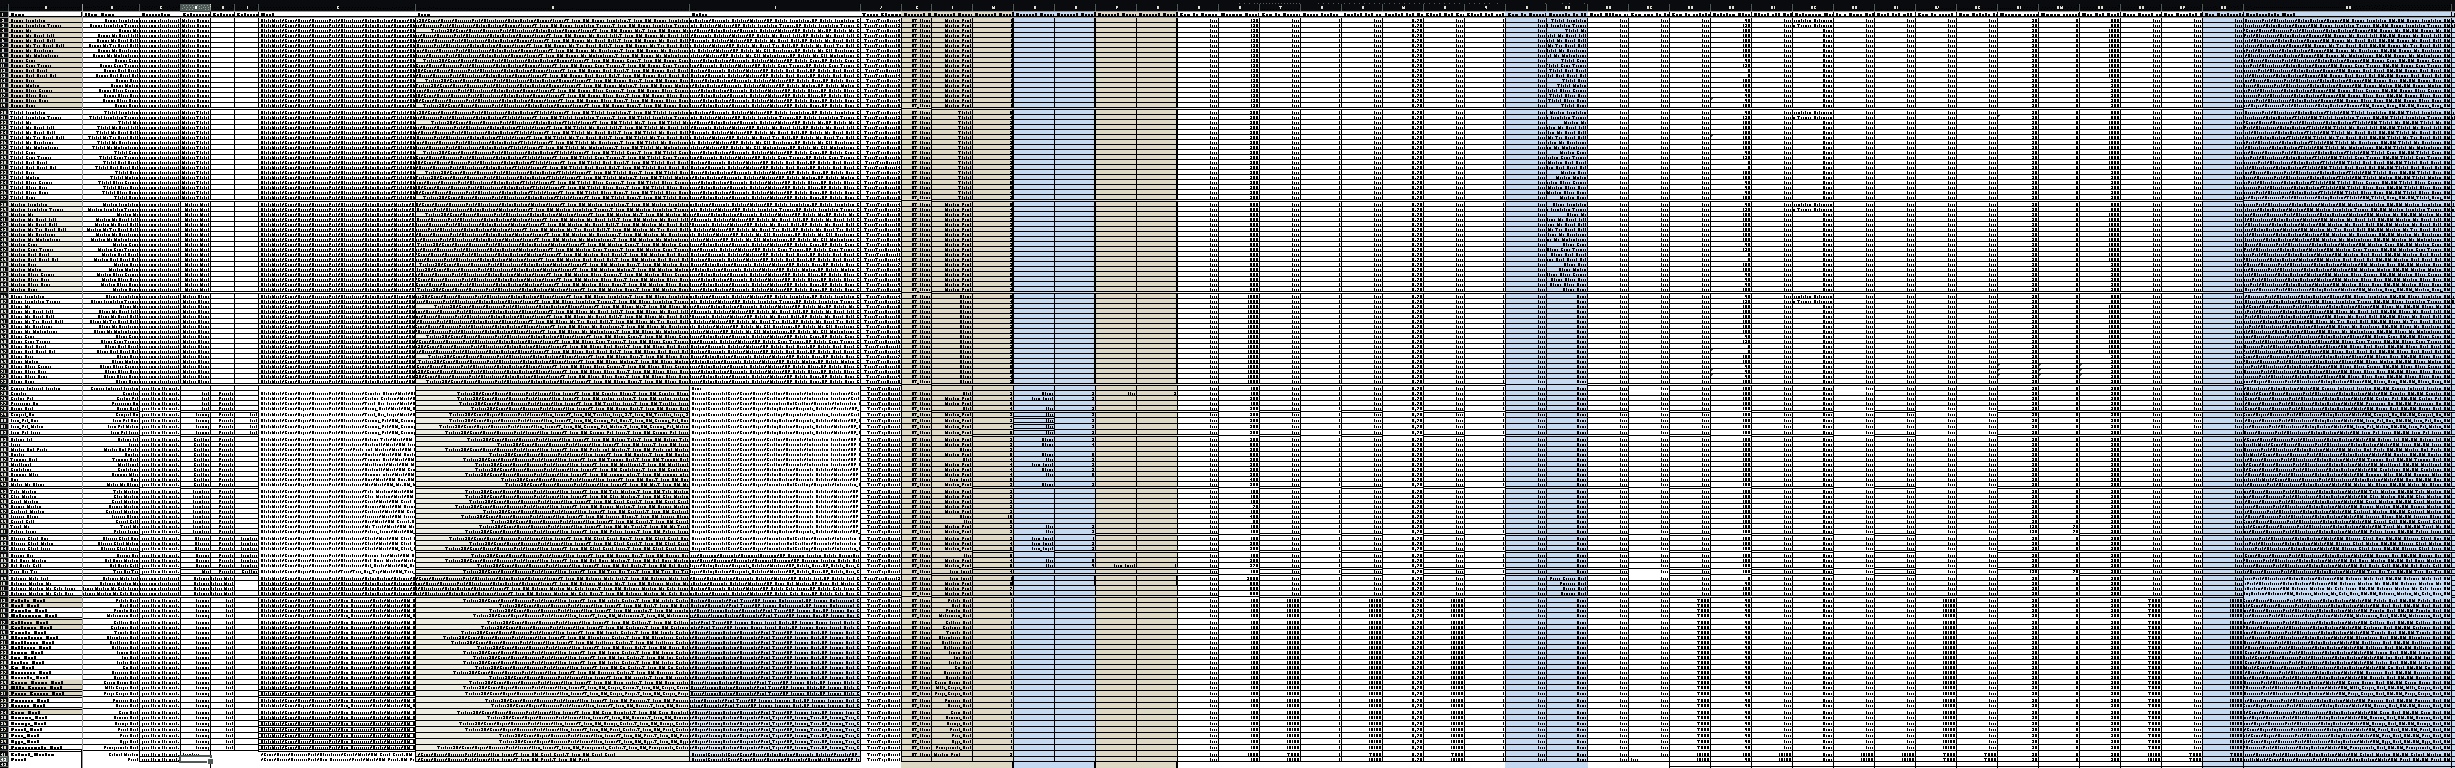
Common data-driven behavior includes category assignment, placement mode, snap behavior, direct placement, normal alignment, accepted placement angles, durability, repair requirements, upgrade settings, child-building behavior, and radial-menu visibility.
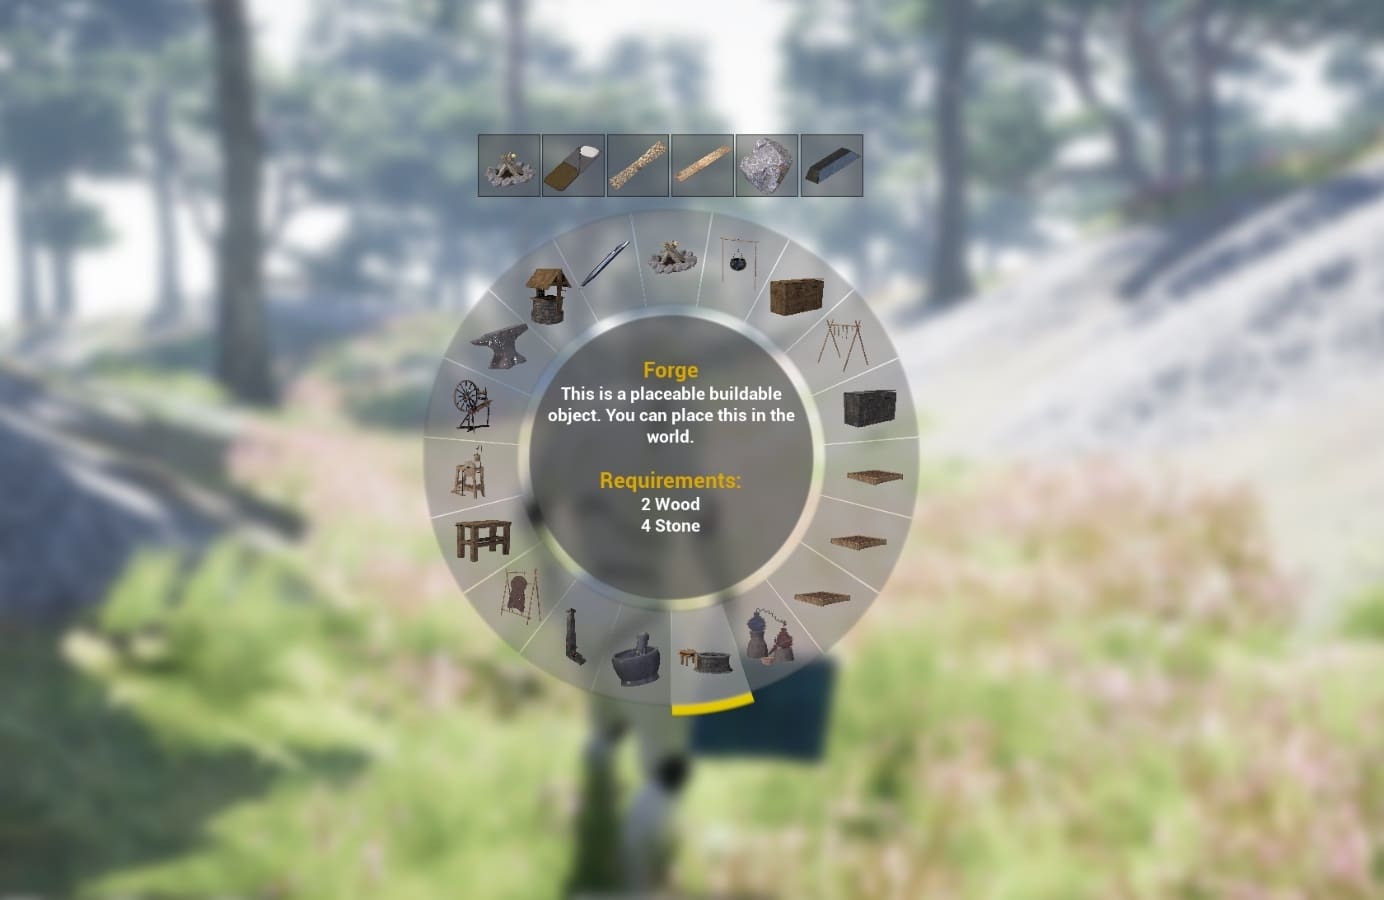
Radial Menu
The radial menu opens when the hammer or building plan is equipped. With the building plan active, the player can navigate between radial-menu tabs.
Radial menus are generated per category. UI_Radial_Menu_Generated_Category can be placed under the widget switcher in UI_Radial_Menu. In the widget defaults, select which categories should appear and which categories should be ignored.
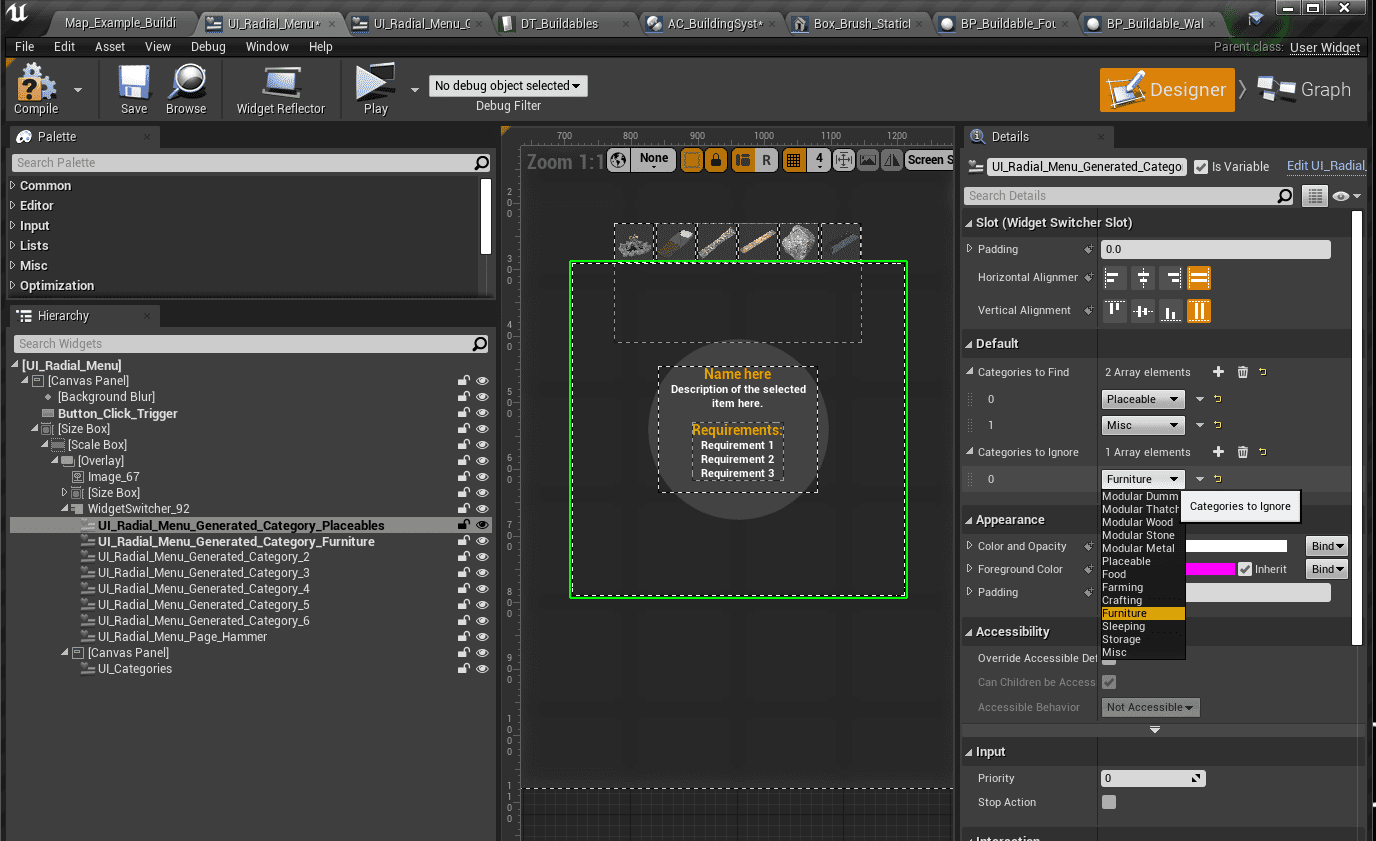
When adding new categories in UI_Categories, also update Set Active Radial Category so the correct widget opens.

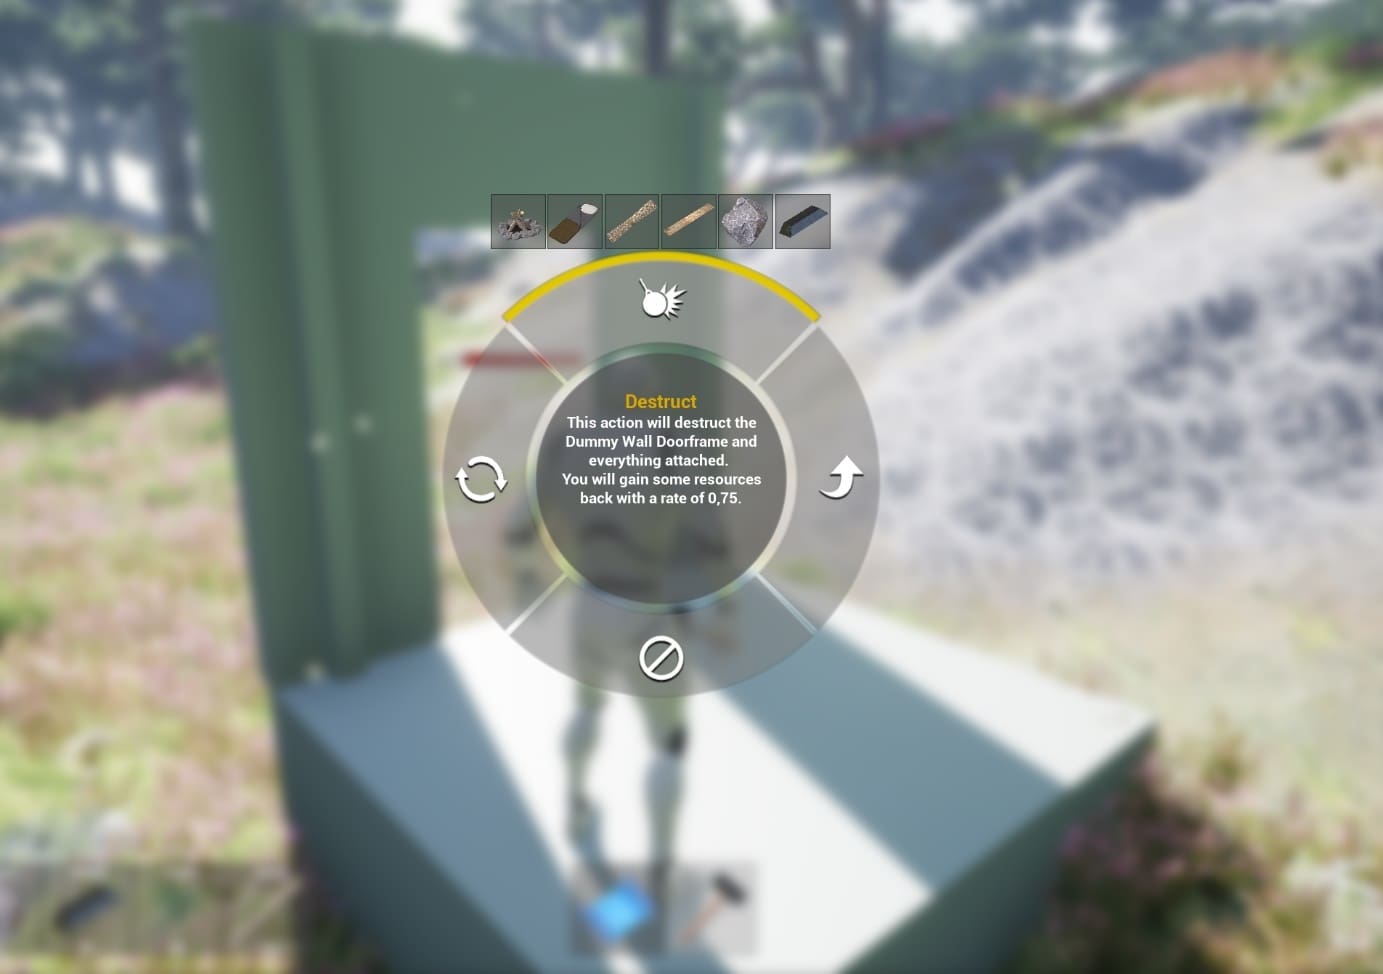
Damage, Repair, and Upgrades
Each buildable has durability assigned in the data table. When a buildable takes damage, the health bar is shown. The hammer can be used to repair the buildable.
The hammer supports these interactions:
- Destruct
- Upgrade
- Cancel Upgrade
- Rotate
Look at a buildable and select the hammer action. The UI text shows which building is being targeted and what action will happen.
Upgrades do not complete immediately. The player starts the upgrade with the hammer, then brings the required resources to the upgrading buildable.
Parent and Child Buildings
Buildables placed on top of other buildables become connected. If the supporting foundation is destroyed, the connected child buildables are also destroyed. The system also prevents finishing an upper buildable before its required support exists.
To adjust this behavior, check the data-table setting avoid adding as child to other buildings.
Placement Controls
Rotation and Elevation
Before placement, use the middle mouse wheel or left/right arrows to rotate the buildable. Use the up/down arrows to elevate foundations. If a foundation is placed in the air, the system automatically adds extensions below it.

Align Buildable to Normal
Enable align buildable to normal in the data table when a buildable should follow the landscape rotation. You can also configure minimum and maximum accepted build angles to prevent placement on surfaces that are too steep.
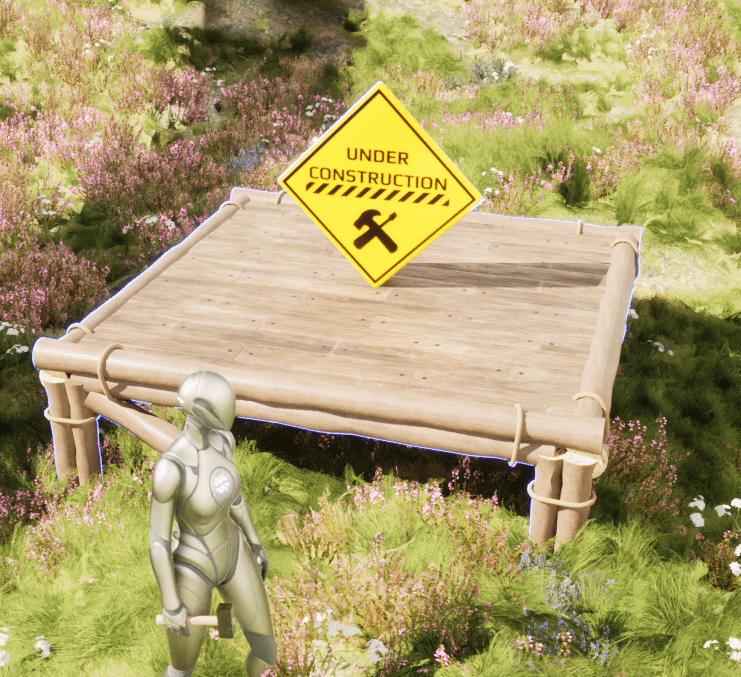
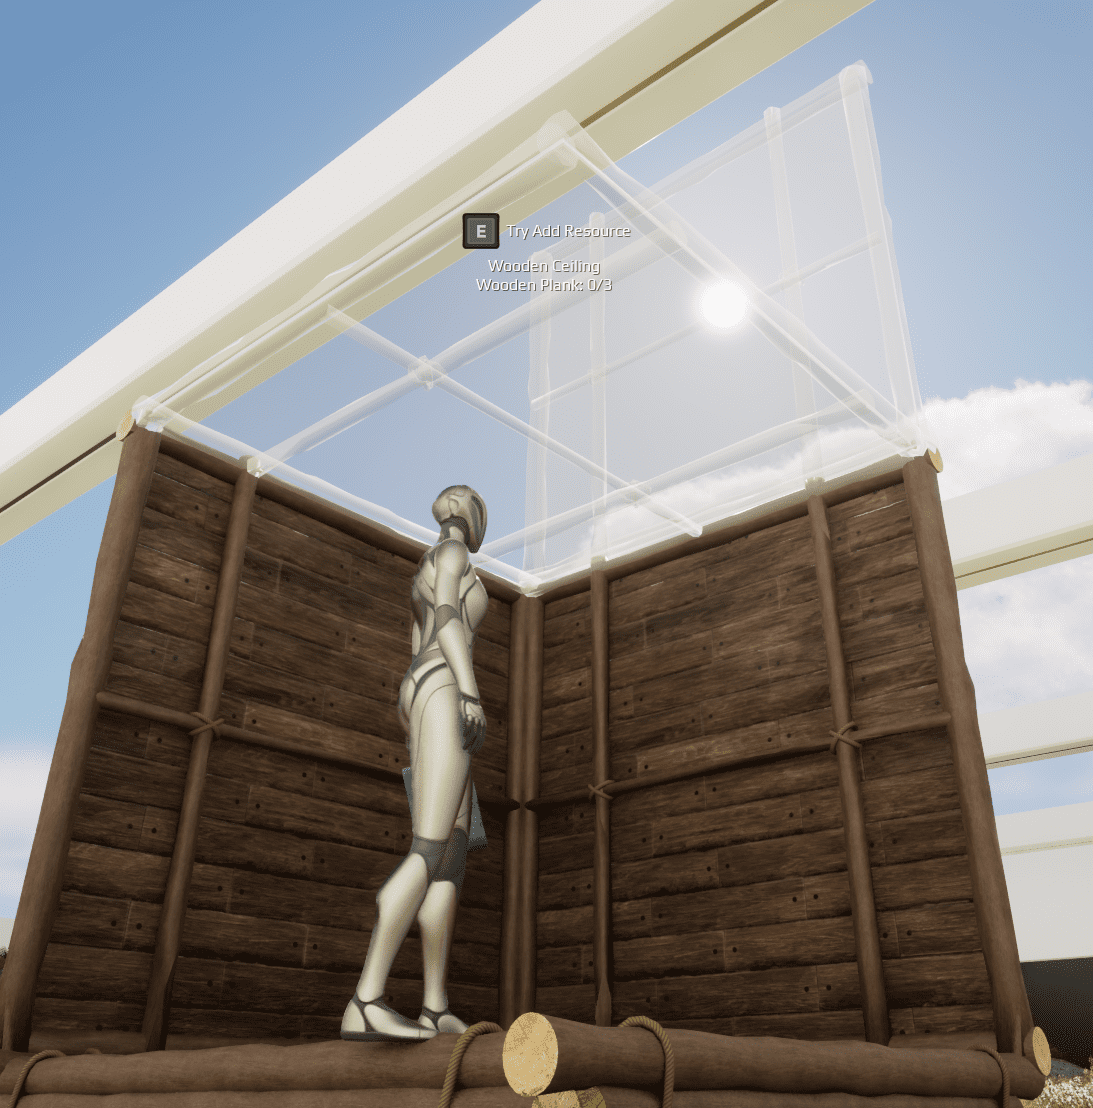
Ghost Build Mode vs Direct Placement
By default, the system uses ghost build mode. The player places a ghost building first, then adds resources to finish construction.
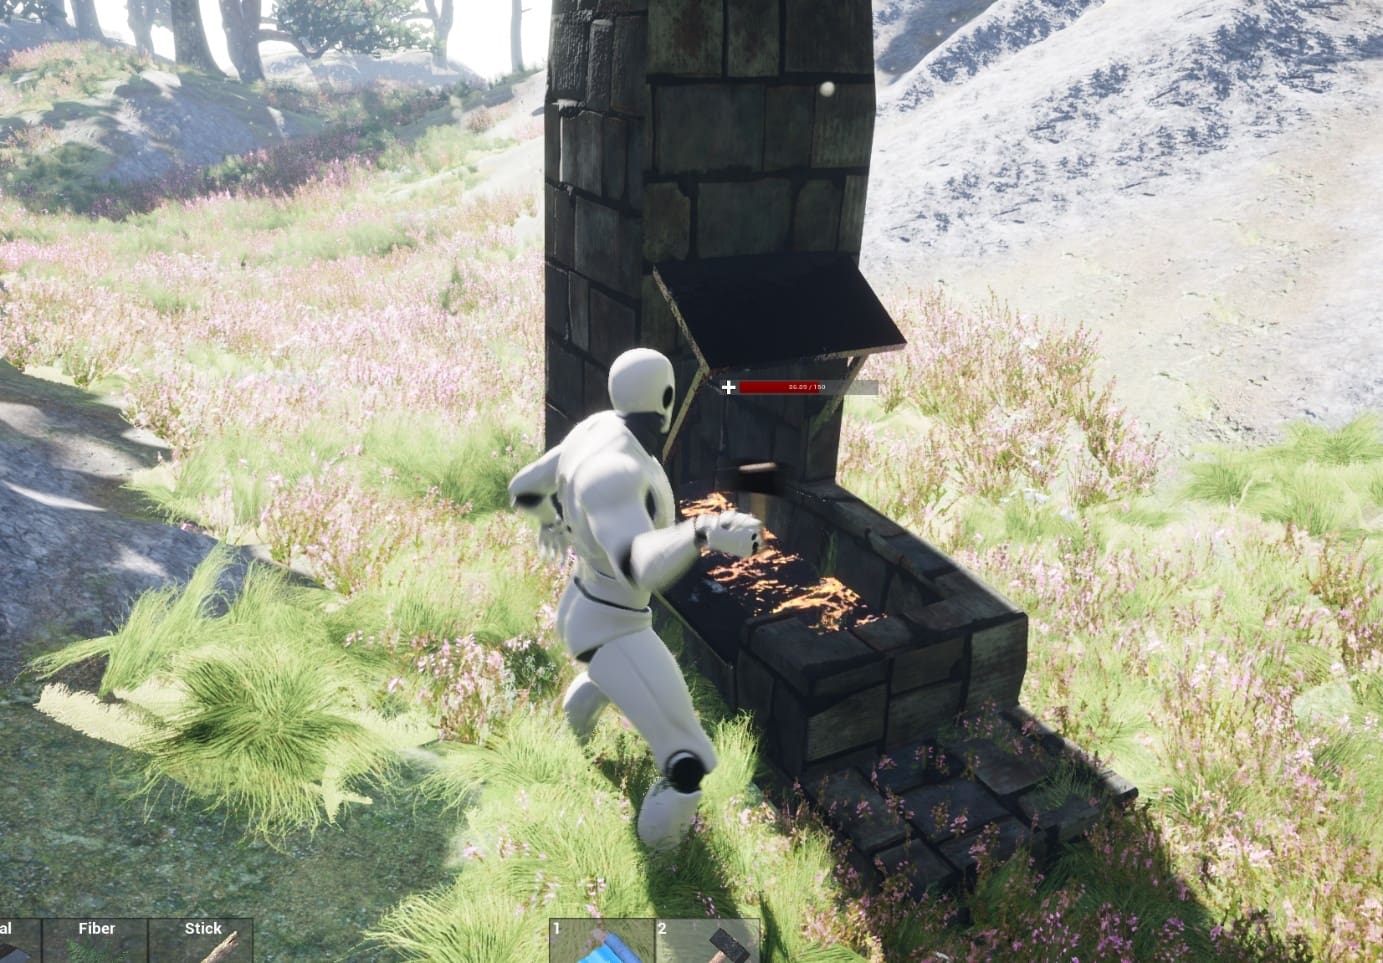
Direct placement mode can be enabled in the data table. In direct placement mode, the building is finished immediately and the required resources are removed from the player’s inventory. The forge is configured this way in the example so it can be tested quickly.

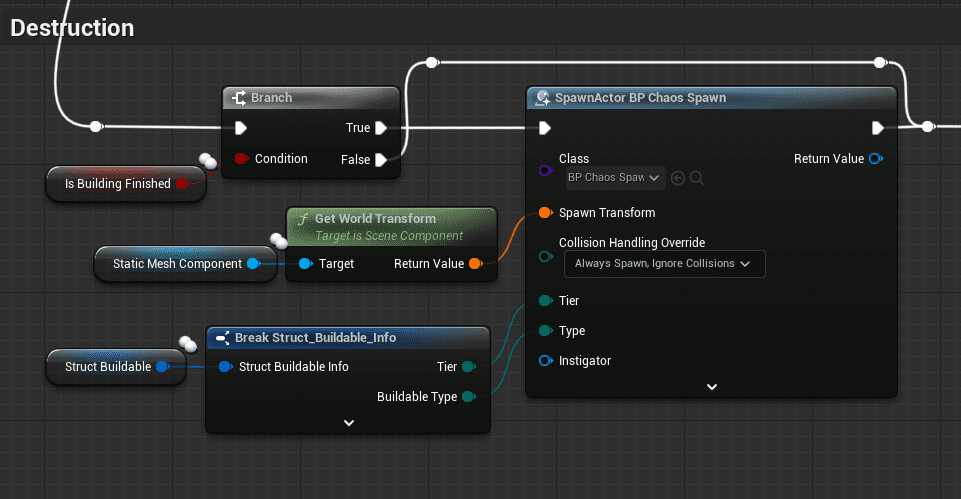
Destruction
Buildable health is tracked in the deal and process damage to buildable function in the Buildable blueprint. When health reaches zero, destruction can be triggered. Based on the tier and buildable type, the system creates a Chaos spawn blueprint with a Geometry Collection for destruction visuals.
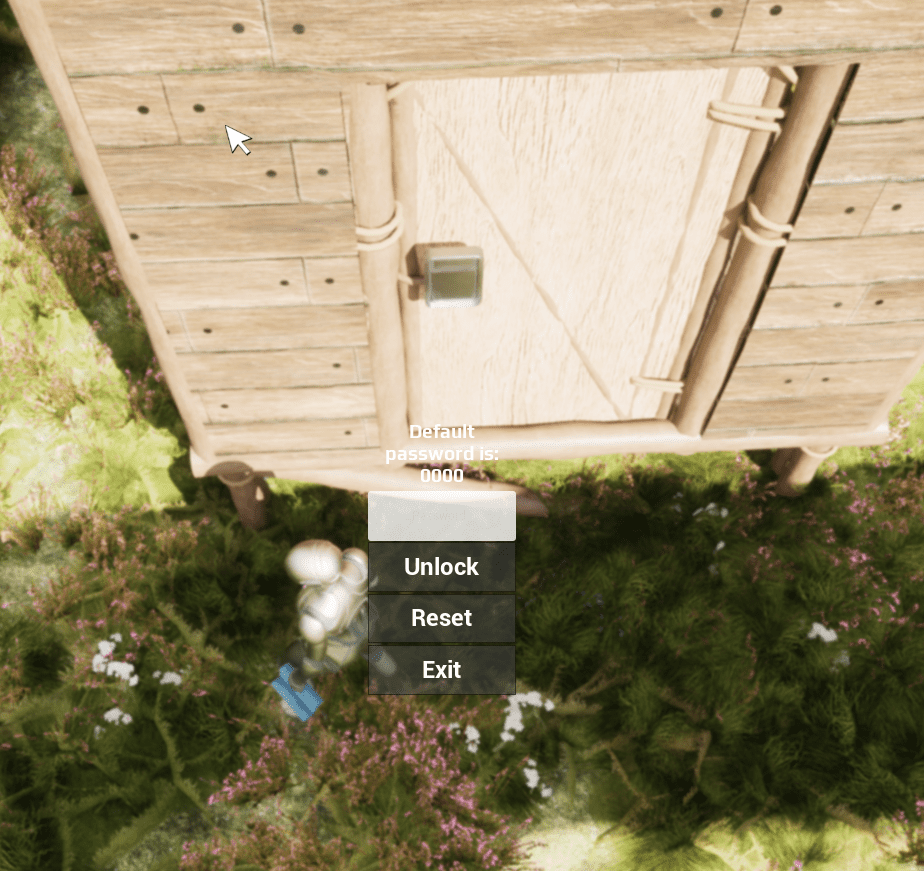
Lock System
Locks can be placed on doors. When a lock is placed, the player must enter the password to open the door. The default password is 0000. Use password reset to change it. After reset, only players with the correct password can authorize and open the door.
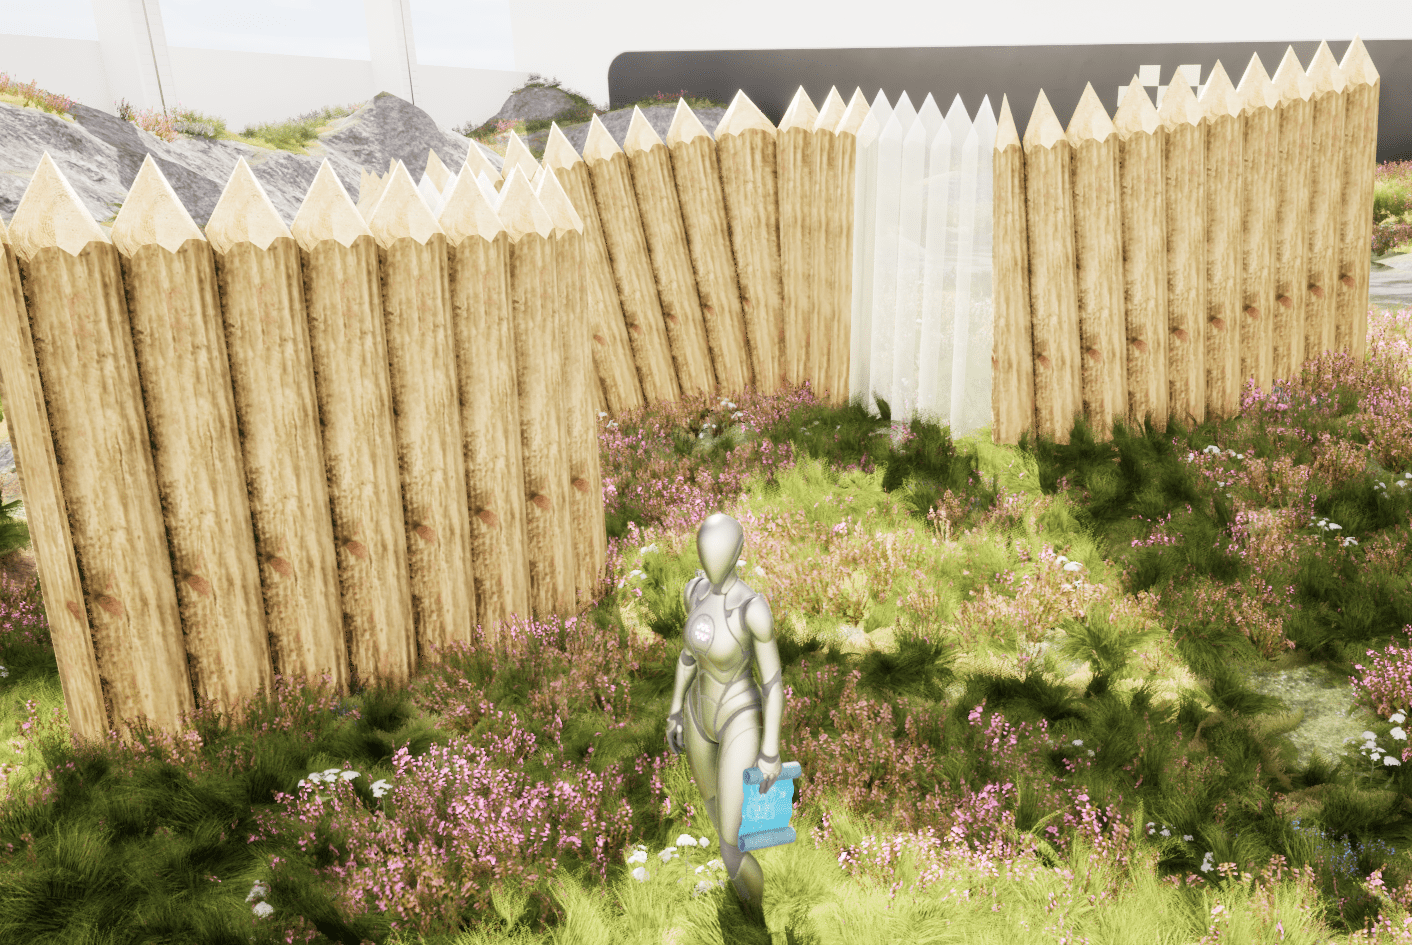
Spline Building
Basic spline building is included for defense walls. The spline setup supports gate frames for doors. It does not snap and is intended for simple defense-wall construction.
The system calculates buildable master placement along the spline so individual spline segments can be built separately. Spline segments are linked to those buildable masters.
Cabinet and Territory Authorization
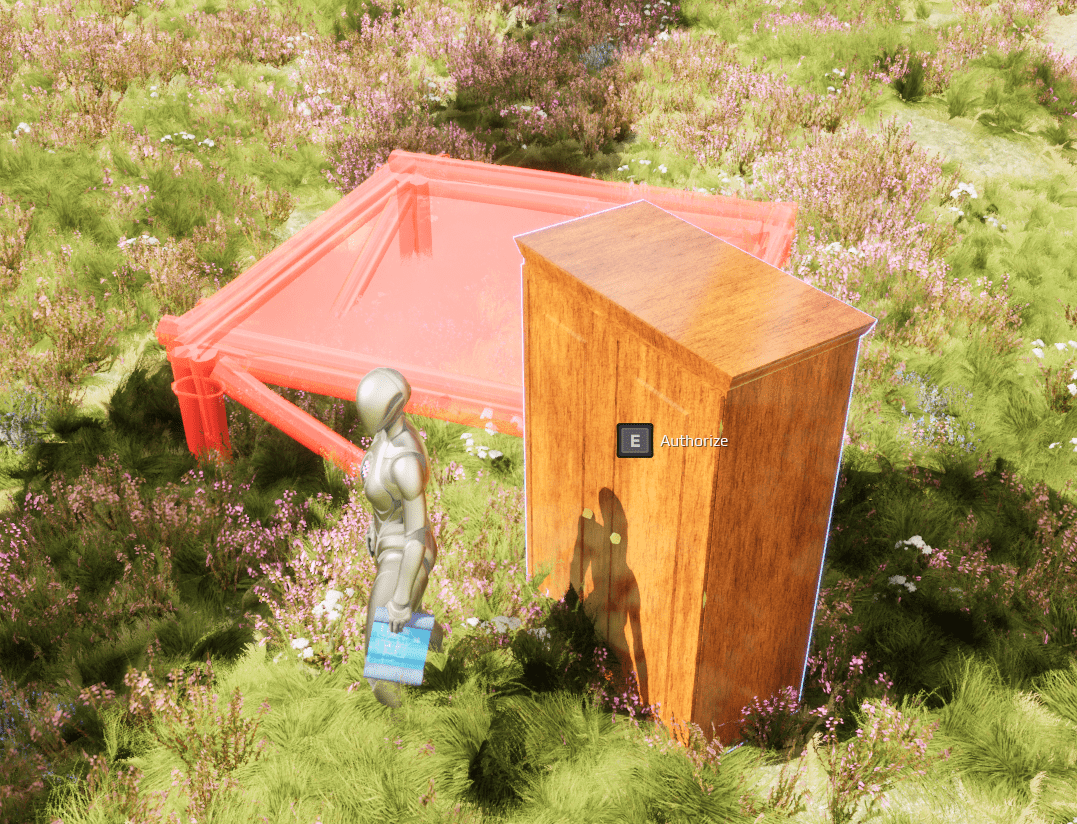
The cabinet is used to claim territory. Authorized players can place buildings within the configured radius. Players who are not authorized cannot place buildings in that area.
Add a New Placeable to the Radial Menu
- Add a new entry to the buildables data table.
- Configure the buildable settings for the object you want to place.
- Set the correct category so the object appears in the intended radial menu.
- If you added a new category, update UI_Categories and Set Active Radial Category.
- Test the buildable in world placement, including trace validity, category visibility, resource requirements, and final construction behavior.