Item Allocator
Updated May 25, 2026
Read the Inventory documentation first. The Item Allocator fills inventory containers with generated items, vendor stock, or loot-table results. It depends on the core container and item data structure.
For shared setup guidance, see the Migration Guide and Integration Guide. Use the System Atlas to look up functions, variables, events, components, and ownership references. Use this page for allocator-specific loot, vendor, restock, and reset behavior.
Related Videos
Version note: Some videos may have been recorded before V4. Concepts still apply, but asset names, component names, and folder locations may differ. Treat this written documentation as the source of truth.
Make your own loot chests and vendors Play
Overview
The AC_Item_Allocator component populates an inventory with items from a loot list or vendor trade list. It supports chance-based generation, min/max quantities, maximum stock limits, timed restocking, full resets, and vendor-specific behavior.
The allocator is used in two main scenarios:
- Loot chests: Generate random loot from a configured quality tier or loot table.
- Vendors: Populate vendor inventory from the vendor component’s trade list.
Loot Chests
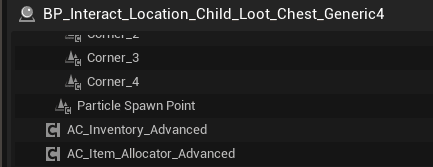
A loot chest is an actor with AC_Inventory and AC_Item_Allocator. If the actor has no vendor component, the allocator uses its configured loot list.
Typical setup:
- Add AC_Inventory to the chest actor.
- Add AC_Item_Allocator.
- Assign the loot list or tier-specific allocation list.
- Enable restock or reset timers when needed.
- Leave out the vendor component for normal loot-chest behavior.
The source setup includes low, medium, and high quality loot tiers. Each tier references a different loot list with its own spawn chances and quantities.
Allocator Component
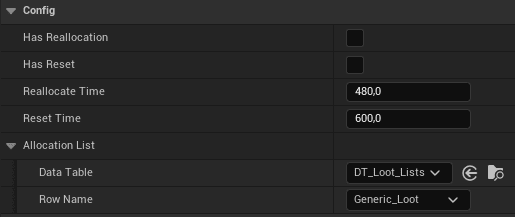
The allocator controls initialization, list selection, item generation, restock, and reset.
- Has Reallocation: Enables periodic restocking.
- Has Reset: Enables full inventory reset.
- Reallocation Time: Restock interval in seconds.
- Reset Time: Full reset interval in seconds.
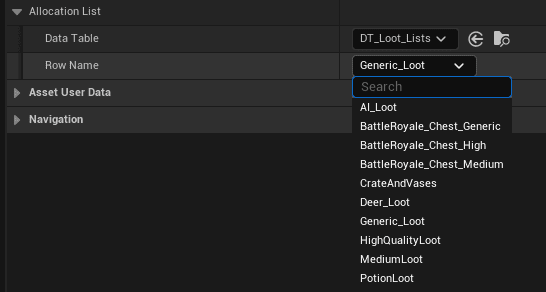
- Allocation List: Loot table data table used by non-vendor containers.
- Never Allocate These Items: Items excluded from allocation.
On BeginPlay, the allocator checks whether the owner has an AC_CH_Vendor component. If it does, the allocator uses the vendor trade list. If it does not, it uses the allocator loot list. The generated items are then added to the inventory container.
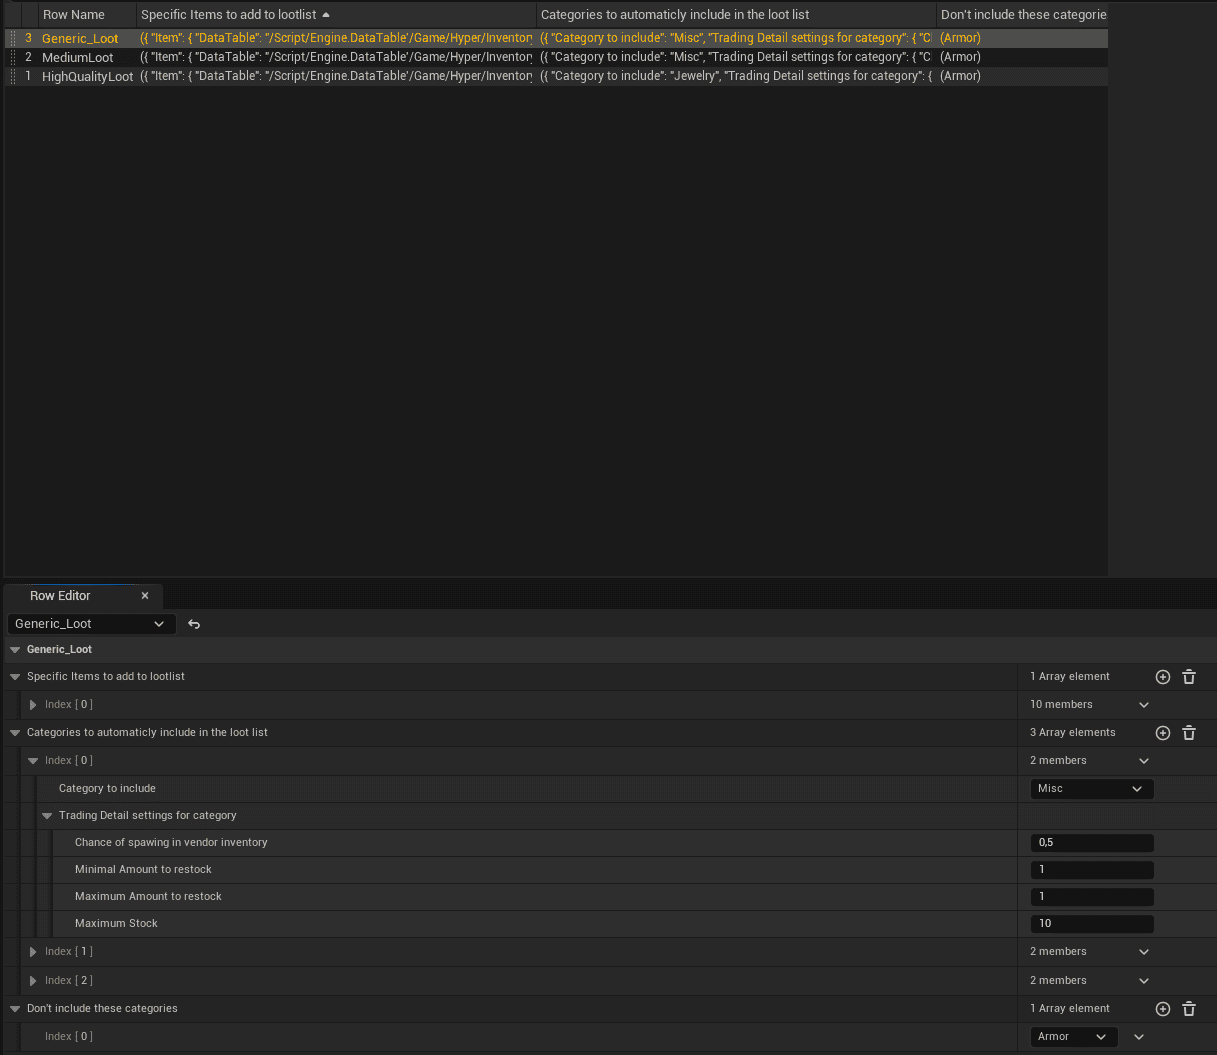
Loot Table Structure
Loot tables define which items can spawn and how they are allocated. Each row references an item in DT_Items and stores allocation rules in the loot-table info struct.
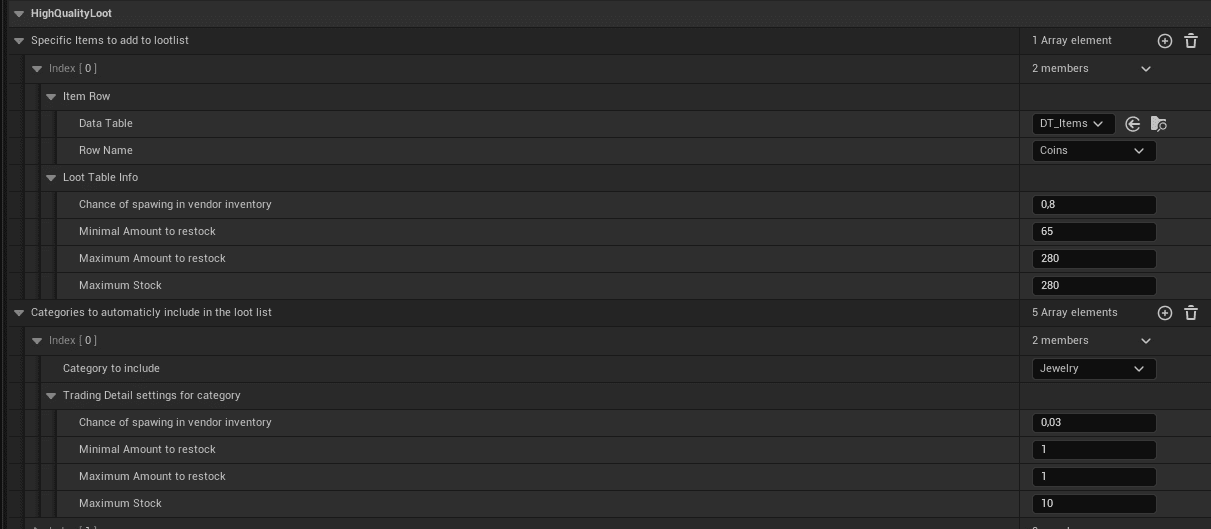
| Field | Purpose |
|---|---|
| Item Row | Row name reference to an item in DT_Items. Item data is not duplicated. |
| Chance of spawning in vendor inventory | Spawn chance from 0.0 to 1.0. For example, 1.0 is always, 0.5 is 50%, and 0.1 is rare. |
| Minimal Amount to restock | Minimum quantity generated when the item is selected. |
| Maximum Amount to restock | Maximum quantity generated when the item is selected. |
| Maximum Stock | Upper limit for that item in the container. Restocking will not exceed this value. |
Example: HealthPotion with chance 0.75, min amount 2, max amount 5, and maximum stock 10 has a 75% chance to generate 2-5 potions and restocks up to 10 total.
Item categories come from DT_Items and are useful for organization, filtering, and container rules such as Allowed Items. The loot table itself selects specific items by row name.
Generation Process
- Select the source list: vendor trade list when a vendor component exists, otherwise the allocator loot list.
- Iterate through each entry in the list.
- Roll against the entry’s 0-1 spawn chance.
- When successful, roll quantity between the configured minimum and maximum amount.
- Create an item struct from DT_Items.
- Initialize relevant item properties, such as durability and decay timer.
- Add the generated item to the inventory container.
Vendor Integration
When the owner has AC_CH_Vendor, the allocator runs in vendor mode.
- Uses the vendor component’s trade list instead of the allocator loot list.
- Applies vendor pricing behavior.
- Uses vendor-specific restock rules.
- Supports “Not Interested” categories.
- Uses buy and sell price multipliers.
Vendor and loot modes share the same core generation, chance, quantity, maximum-stock, restock, and reset mechanics. The main difference is the data source and whether pricing applies.
Restock and Reset
Restock
Restocking gradually refills a container without clearing existing items.
- Wait for Reallocation Time.
- For each loot or trade list entry, roll spawn chance.
- Roll restock quantity between min and max.
- Check the item’s Maximum Stock.
- Add only the amount that fits under the maximum stock limit.
- Start the next restock interval.
Example: maximum stock is 10, current amount is 7, and the roll wants to add 5. Only 3 are added.
Reset
Reset clears the inventory and generates a fresh set of items.
- Wait for Reset Time.
- Clear all existing items from the inventory.
- Run the full initialization process again.
- Generate items from the loot or trade list as if the container were new.
- Start the next reset timer.
| Behavior | Restock | Reset |
|---|---|---|
| Purpose | Gradual refill | Full refresh |
| Removes existing items | No | Yes |
| Respects current state | Yes | No |
| Typical use | Vendor or chest slow refill | Timed dungeon chest reset |
Create Loot Tables
- Create a Data Table using the loot-table row struct.
- Name it descriptively, such as DT_LootTable_ForestChest.
- Add one row per possible item.
- Set Item Row to the matching DT_Items row.
- Configure chance, min amount, max amount, and maximum stock.
- Assign the table to an actor with AC_Inventory and AC_Item_Allocator.
- Spawn or reset the actor several times to verify item variety and probability balance.
Configure Tiered Loot
- Plan the tier structure, such as Common, Uncommon, Rare, Epic, and Legendary.
- Create a separate loot table for each tier, such as DT_LootTable_Tier1, DT_LootTable_Tier2, and DT_LootTable_Tier3.
- Populate each tier with appropriate items, quantities, and spawn chances.
- Increase item quality, quantity, or rare-item availability in higher tiers.
- Create chest blueprints for each tier, such as BP_LootChest_Common, BP_LootChest_Uncommon, and BP_LootChest_Rare.
- Assign each chest blueprint to its matching loot table.
- Place lower-tier chests in easier areas and higher-tier chests in harder or secret locations.
- Play through progression and verify that rewards feel appropriate.
Configure Container Restocking
- Add AC_Item_Allocator to the container actor if it is not already present.
- Assign the loot or trade table to Allocation List.
- Enable Has Reallocation.
- Set Reallocation Time.
- Configure each loot-table row with minimum restock amount, maximum restock amount, and maximum stock.
- Partially empty the container and wait for the restock interval.
- Verify that items are added and maximum stock is respected.