Vendor
Updated May 25, 2026
The Vendor system adds trading behavior to actors through AC_CH_Vendor. Vendors use the Inventory and Item Allocator systems for stock, item values, restocking, and trade-list setup.
For shared setup guidance, see the Migration Guide and Integration Guide. Use the System Atlas to look up functions, variables, events, components, and ownership references. Use this page for Vendor-specific component setup, pricing, and trade-list configuration.
Prerequisites
Read the Inventory documentation first so the container system is clear. Also read the Item Allocator documentation because vendors use AC_Item_Allocator for inventory generation and restocking behavior.
Related Videos
Some videos may have been recorded before V4. The same principles still apply, but asset names, component names, and folder locations may differ. Treat the current written documentation and V4 names as the source of truth.
Make your own loot chests and vendors PlayConfirmation Dialogue On Trades Devlog Play
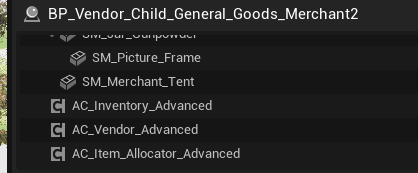
AC_CH_Vendor
AC_CH_Vendor handles all trading functionality. Add this component to any actor that should behave as a vendor.
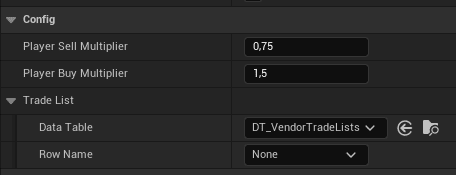
| Setting | Purpose |
|---|---|
| Trade List | Data table containing items for sale. It uses the same structure as Item Allocator loot tables. |
| Buy Multiplier | Percentage of item value the vendor pays when buying from the player. |
| Sell Multiplier | Percentage of item value the vendor charges when selling to the player. |
| Not Interested Categories | Category enum values the vendor will not purchase. |
| Currency Item | Reference to the currency item in DT_Items. |
Currency and Pricing
When counting player currency, the vendor gets all items of the configured currency type, multiplies each stack amount by base value, and returns the total currency value.
Prices use this formula:
Price = Base Value * Multiplier * Quantity
| Term | Source |
|---|---|
| Base Value | Item value from DT_Items. |
| Multiplier | Buy Multiplier or Sell Multiplier from AC_CH_Vendor. |
| Quantity | Number of items being traded. |
Create a Basic Vendor
- Create a new Blueprint actor, such as BP_Vendor_General.
- Add a visual representation for the vendor, such as an NPC mesh or shop stall mesh.
- Add AC_Inventory.
- Add AC_Item_Allocator.
- Add AC_CH_Vendor.
- Create a trade-list data table using the loot/trade table struct, such as DT_TradeList_General.
- Add the items the vendor should sell.
- Assign the trade list to AC_CH_Vendor.
- Configure buy and sell multipliers.
- Optionally configure not-interested categories and restocking behavior.
Configure Trade List Items
For each item in the trade list:
- Add a row with the item name.
- Set the Item Row reference from DT_Items.
- Configure Loot Table Info.
- Set the chance of spawning in vendor inventory from 0.0 to 1.0, where 1.0 means always in stock.
- Set Minimal Amount to restock and Maximum Amount to restock.
- Set Maximum Stock.
Configure Pricing
Set base item values in DT_Items, then tune vendor multipliers on AC_CH_Vendor.
| Setup | Buy Multiplier | Sell Multiplier | Result |
|---|---|---|---|
| Typical | 0.5 | 1.0 | Vendor pays half value and sells at full value. |
| Player-Friendly | 0.7 | 1.0 | Vendor pays more while keeping normal sell prices. |
| Challenging | 0.3 | 1.5 | Vendor pays less and sells above base value. |
Optional Configuration
Not Interested Categories controls what the vendor refuses to buy. A general store can leave this empty. A weapon vendor might reject Consumables.
For restocking, enable Has Reallocation on AC_Item_Allocator and set Reallocation Time.