Set Up First Narrative
Updated May 25, 2026
Use this page to set up a first simple narrative that combines quests, dialogue, actors in the world, quest markers, world map markers, and objective updates.
Related setup:
Customize Your Datatables, Add Your World Map, Set Up Game Mechanics in Your World.
Narratives can be BIG
Setting up your first narrative can be simple or complex depending on your needs, scale, and desired depth. Hyper provides tools for many types of narrative workflows.
Main systems that can be part of narrative setup include:
- Quest Manager
- Map System
- Dialogue System
- Sequence Manager
- Databank and Codex System
- Guide System
- Inspection System
- Memory System
- Teleport System
- Event Manager
- Visual Novel System
- Region Manager
- Level Instance Manager
Secondary systems can also be relevant, such as:
- Level Manager
- Unlock System
- Reputation System
Other systems can also affect narrative. For example, an inventory system may be needed for quest items or item delivery, while NPC systems may be needed for targets, areas, or characters to clear. Large narratives can easily touch many systems, so start small and expand only after the basic loop works.
The Cheesy Farmer – Lets setup a basic Narrative together
This example sets up a basic quest and dialogue and connects it to the world map. Other narrative components follow the same general pattern: define data, place actors, assign tags, trigger events, and test the result.
This guide assumes you already know the previous Getting Started workflows:
- Where to find data tables.
- How to find and assign components.
- Where to find actors to place in the world.
- How to set up the world map, if you use it.
- How to manage and add gameplay tags.
Idea
Start with a simple idea. Ideally, you have a Game Design Document, but for this example the goal is small: a dialogue starts a quest.
The example is a farmer who wants the player to loot two sticks and optionally kill the rebel defending them.
Make the quest
- Open /Game/Hyper/Core/QuestManager/Datamodel/Datatables/DT_Quests.
- Add a new quest and fill in the basic data.
- Add a tag. In this example, the quest is placed under main quest because it is treated as important.
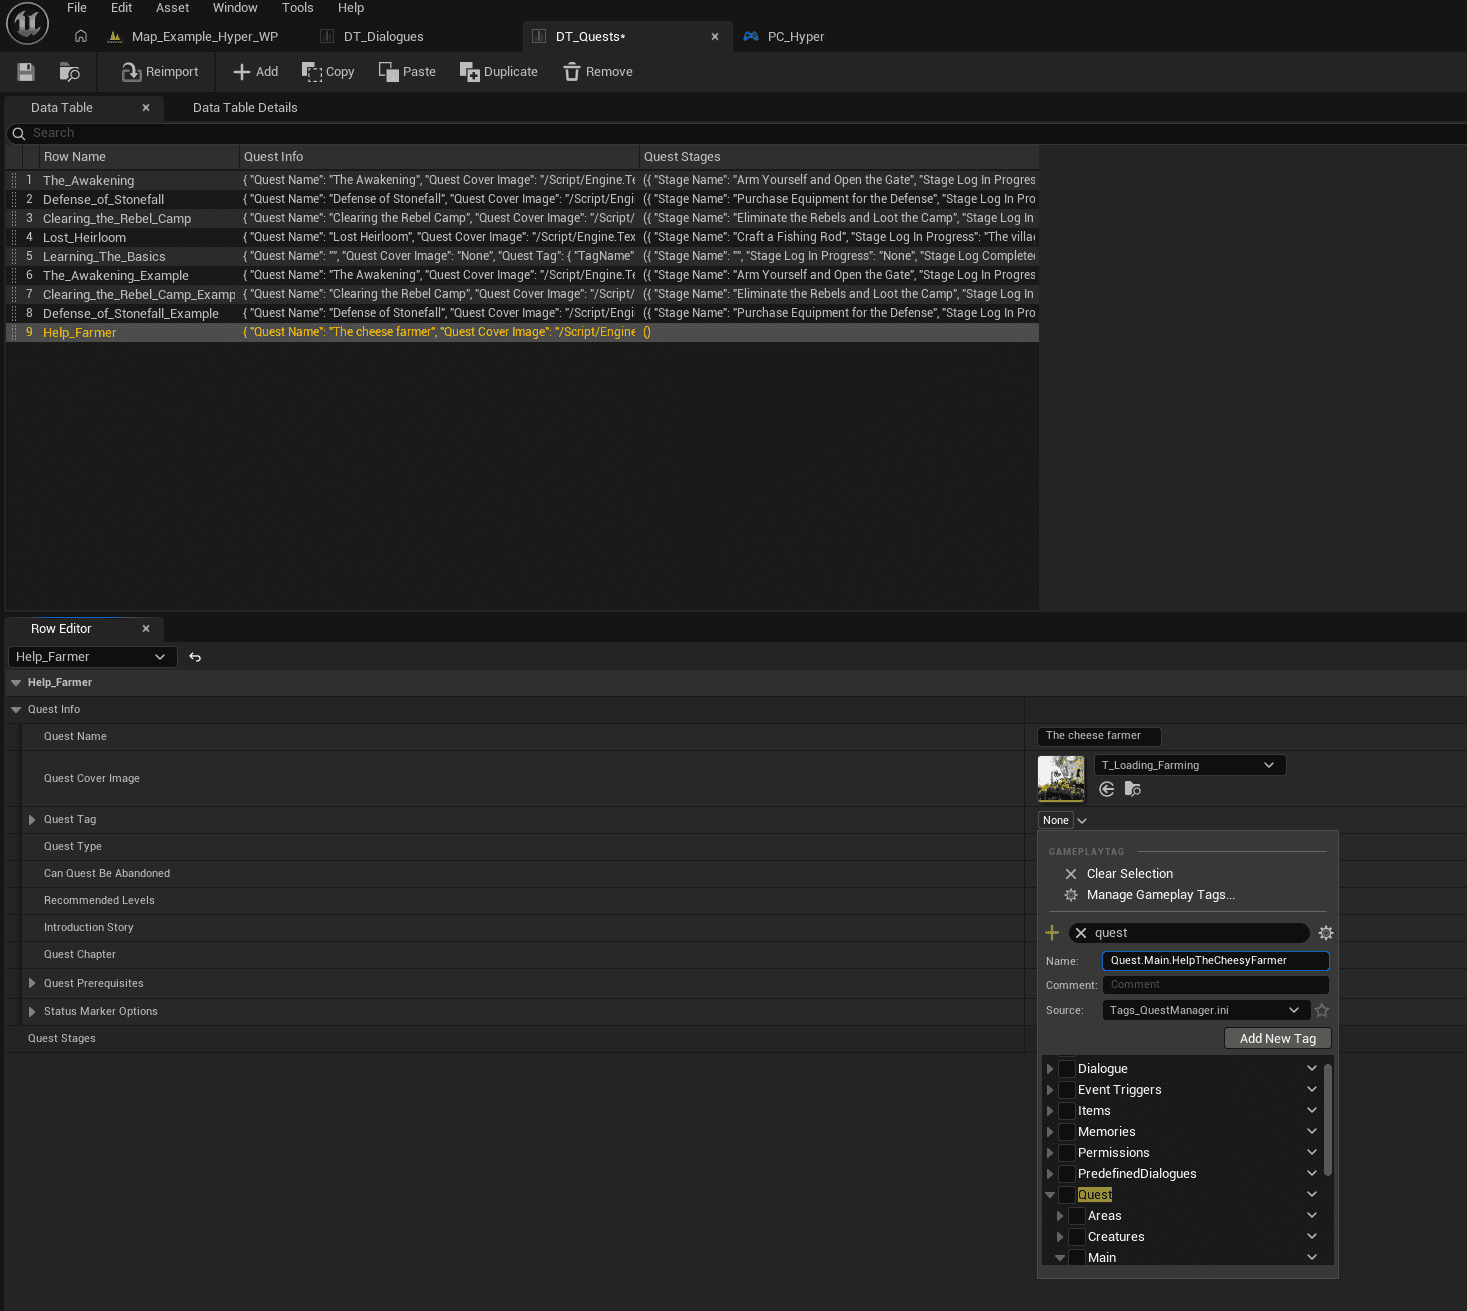
- Fill in quest data to your liking.
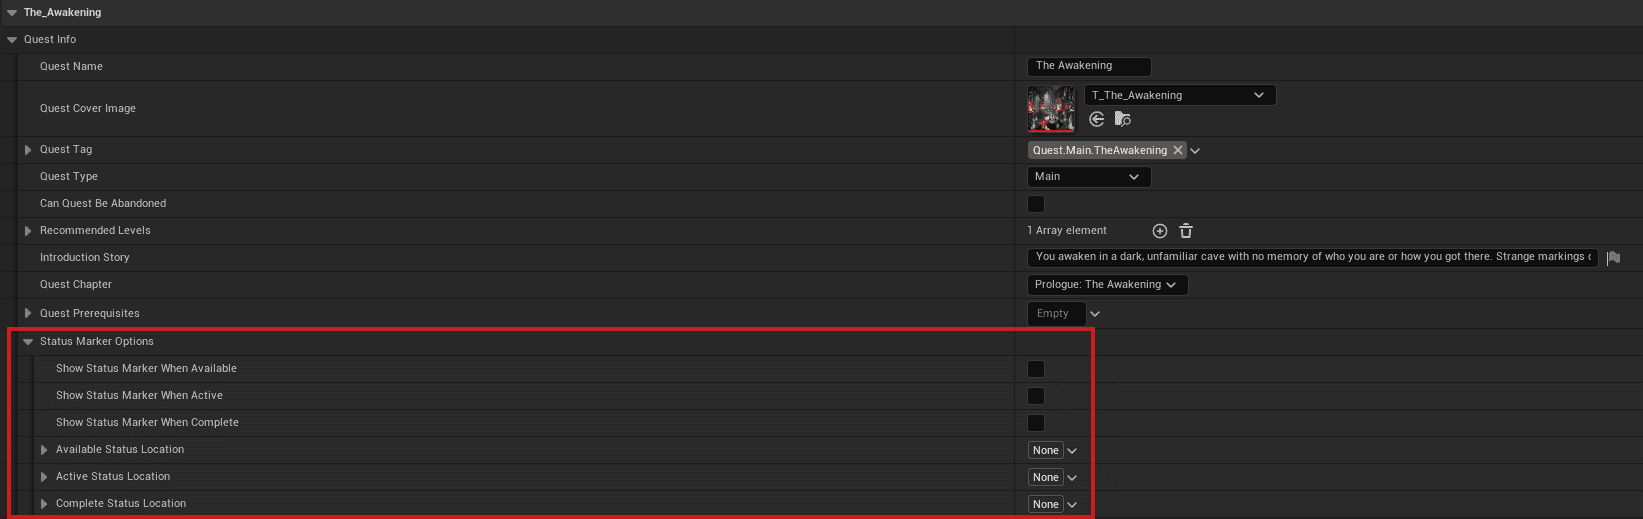
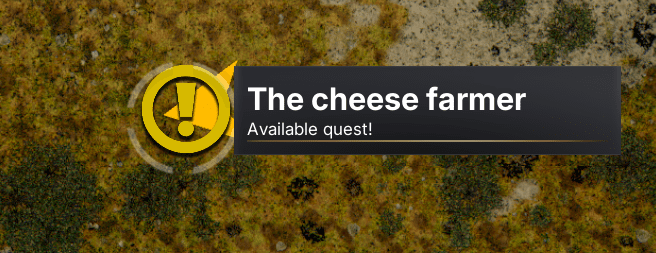
- In this example, enable a status marker when the quest is available, using the typical MMO-style ? and ! marker flow.
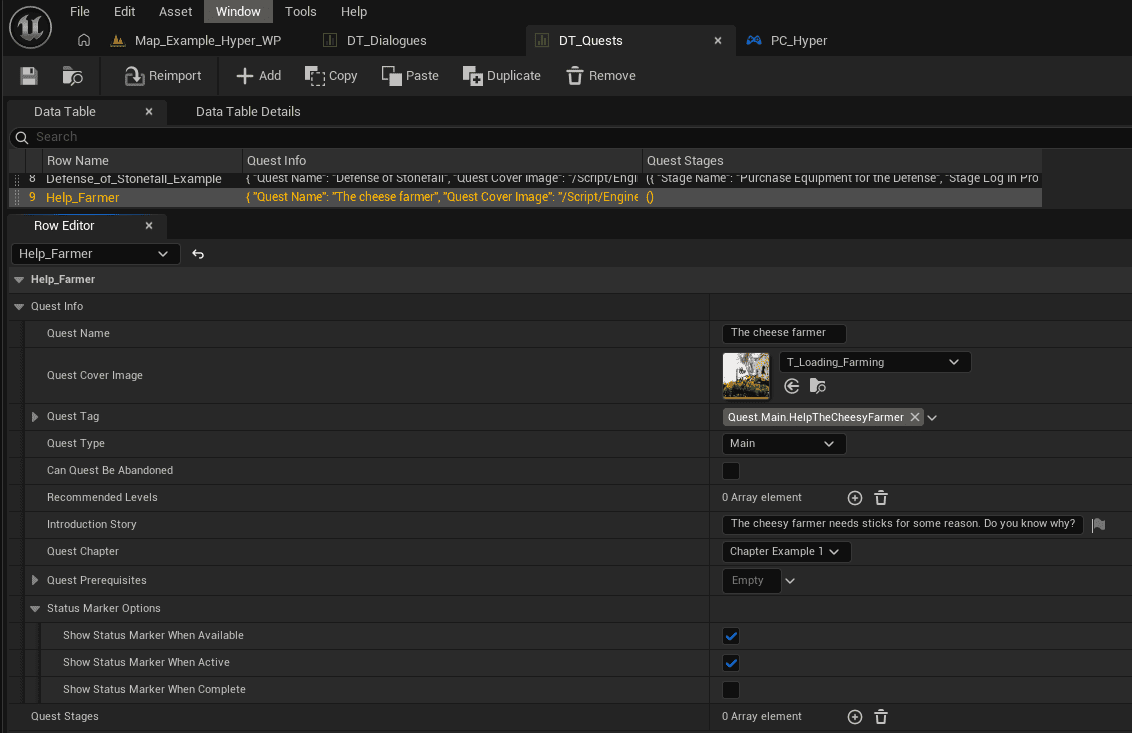
IMPORTANT: Please note that depending on the version, you likely have exrta option under status marker options. If you do have those new options, please fill in the tag for available/active/complete location with the ID you are going to setup later with: “NPC.ID.Vendor.CheesyFarmer“
- Create the first stage with two objectives.
- The quest system supports multiple stages, but this example starts with one core stage and two objectives.
- The item objective targets Items.Resource.Organic Resource.Stick, a generic stick already assigned in DT_Items.
- Because the objective type is obtain object, the quest automatically checks whether that stick is obtained in the inventory.
- If you want a specific stick instead, assign a specific tag, such as Quest.Main.HelpTheCheesyFarmer.Sticks.
- In this example, that specific tag is used on the quest marker so selected sticks can appear on the map.
- Create Quest.Main.HelpTheCheesyFarmer.DefenderOfTheSticks and assign it to the NPC that defends the sticks.
- Set that objective to a kill objective and make it optional.

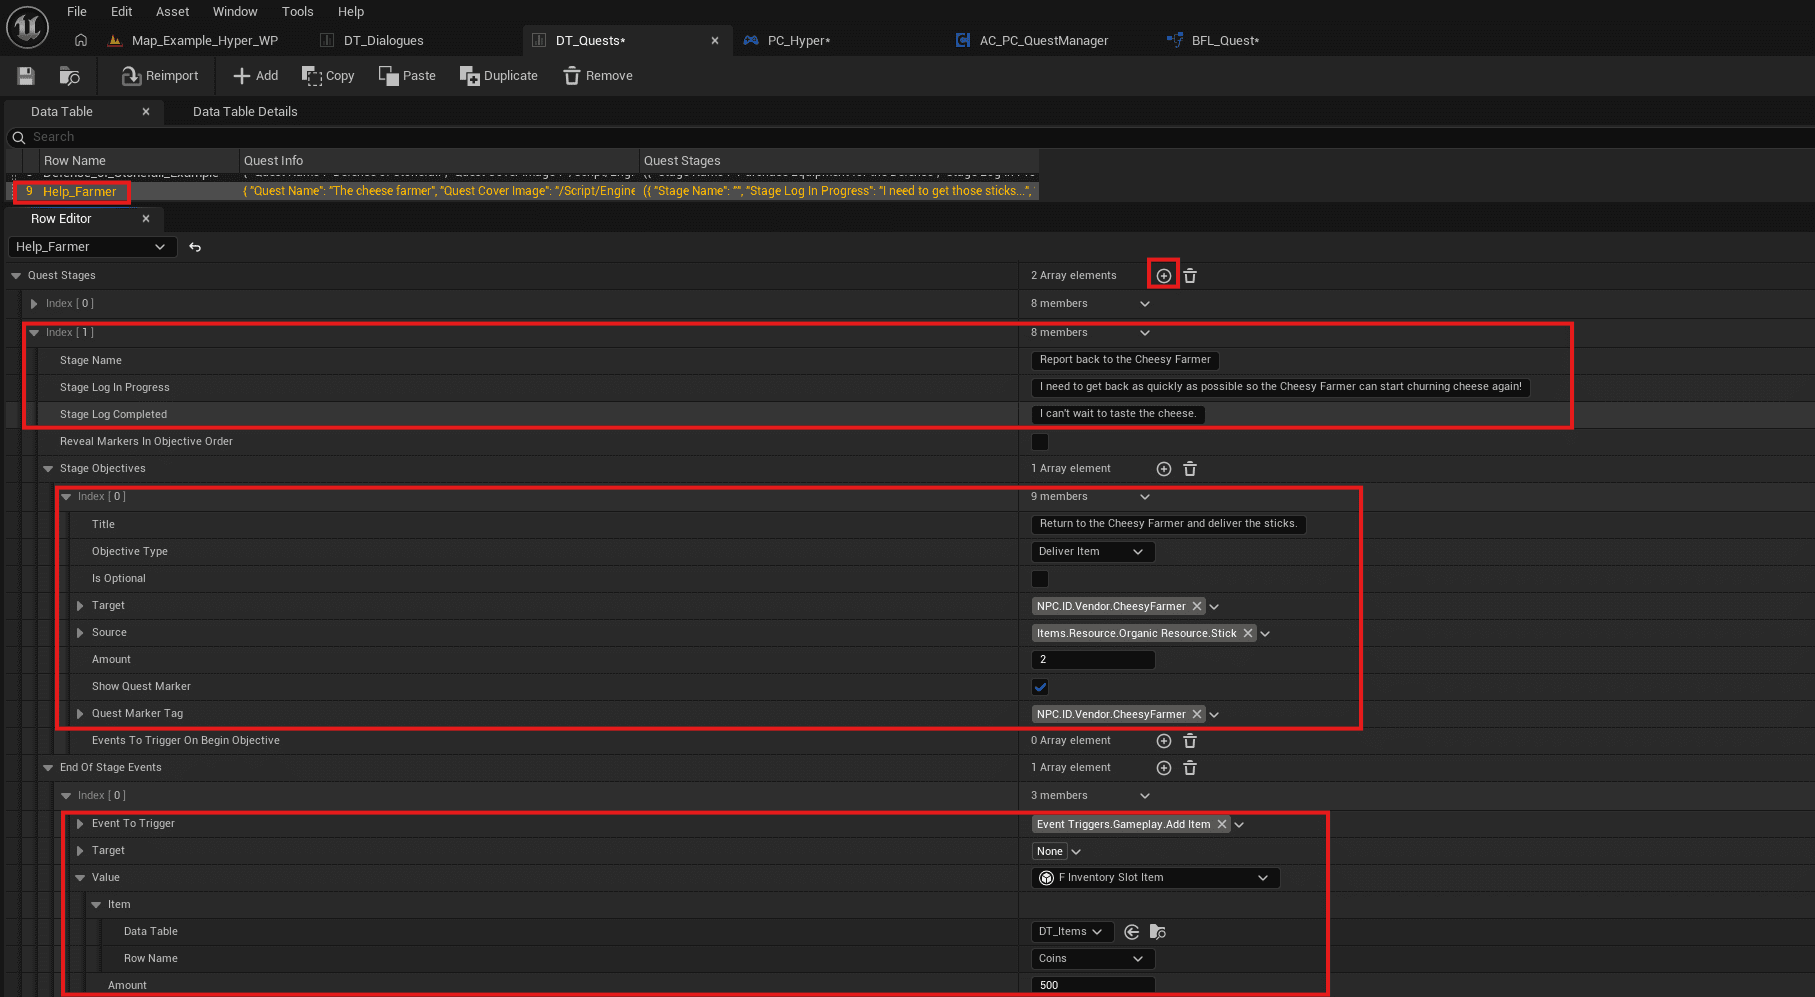
7. Add the final stage by clicking +.
- The target is NPC.ID.Vendor.CheesyFarmer.
- The player needs to deliver the two sticks.
- When completed, the quest gives 500 coins as a reward.
- Assign this quest as an available quest on your Player Controller Quest Manager component.
- Available does not mean the quest is started or tracked. It only means the quest is available for lookup.
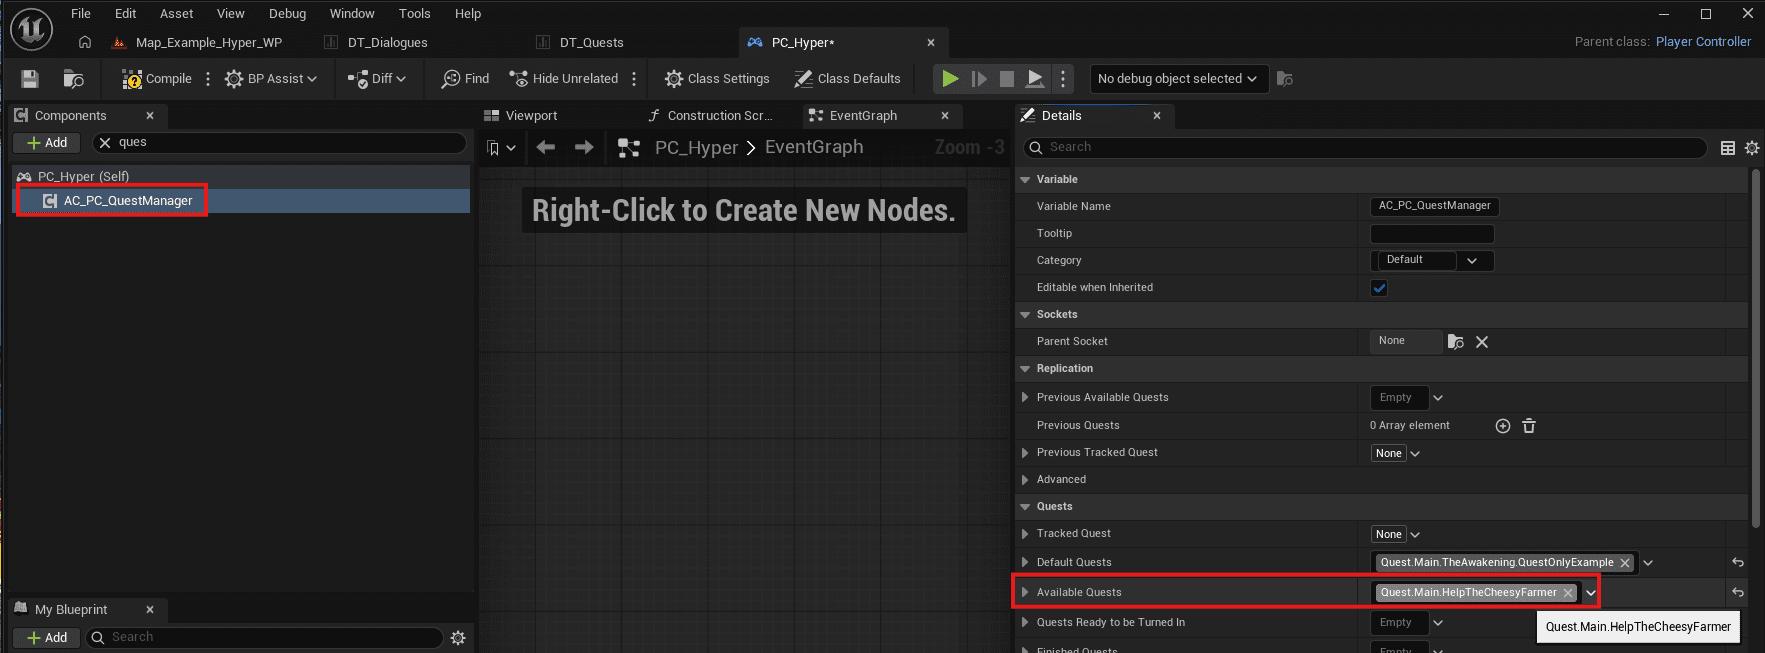
Leave the quest like this for now and continue with the dialogue that starts it.
Make the starting dialogue of the Cheesy Farmer
- Open /Game/Hyper/Core/DialogueSystem/Datamodel/Datatables/DT_Dialogues.
- Add a dialogue.
- This example uses predefined sentences so it can be tested quickly.
- In a production setup, you would usually use custom sentences, audio files, full written lines, and related dialogue setup.
- The dialogue has only one option: I will help!
- That option triggers Start Quest through the Event Manager in the background.
- The target is the quest created above.

Placing the actors in the world
Set up the Cheesy Farmer
- Place /Game/Hyper/AI/Example/Configurations/Static/CH_AI_Static_Dialogue in the world.
- You have this actor if you have the Dialogue Manager.
- If you do not have it, place any NPC that does not move away and make sure it has AC_CH_Dialoague_Manager_NPC assigned.
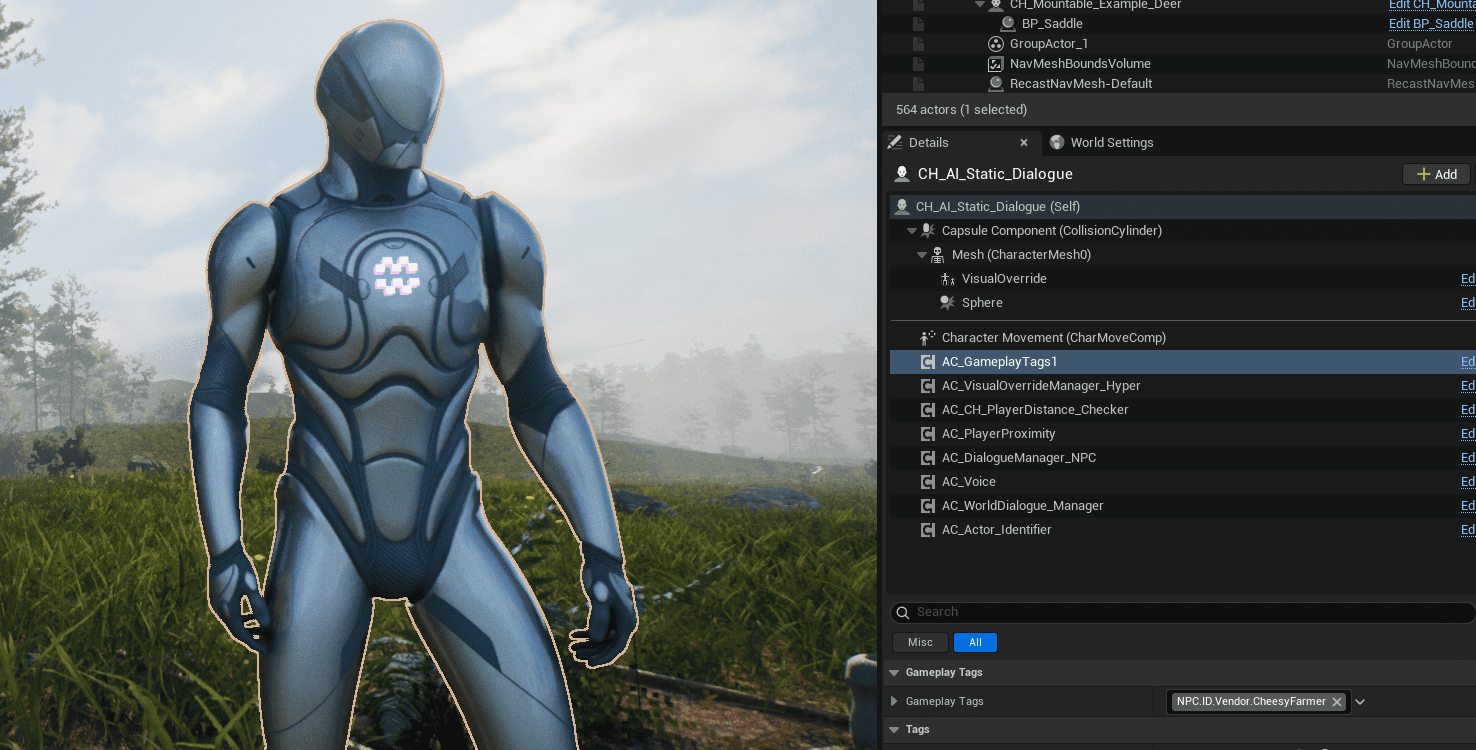
- Also assign AC_GameplayTags with the Add button or on the class itself.
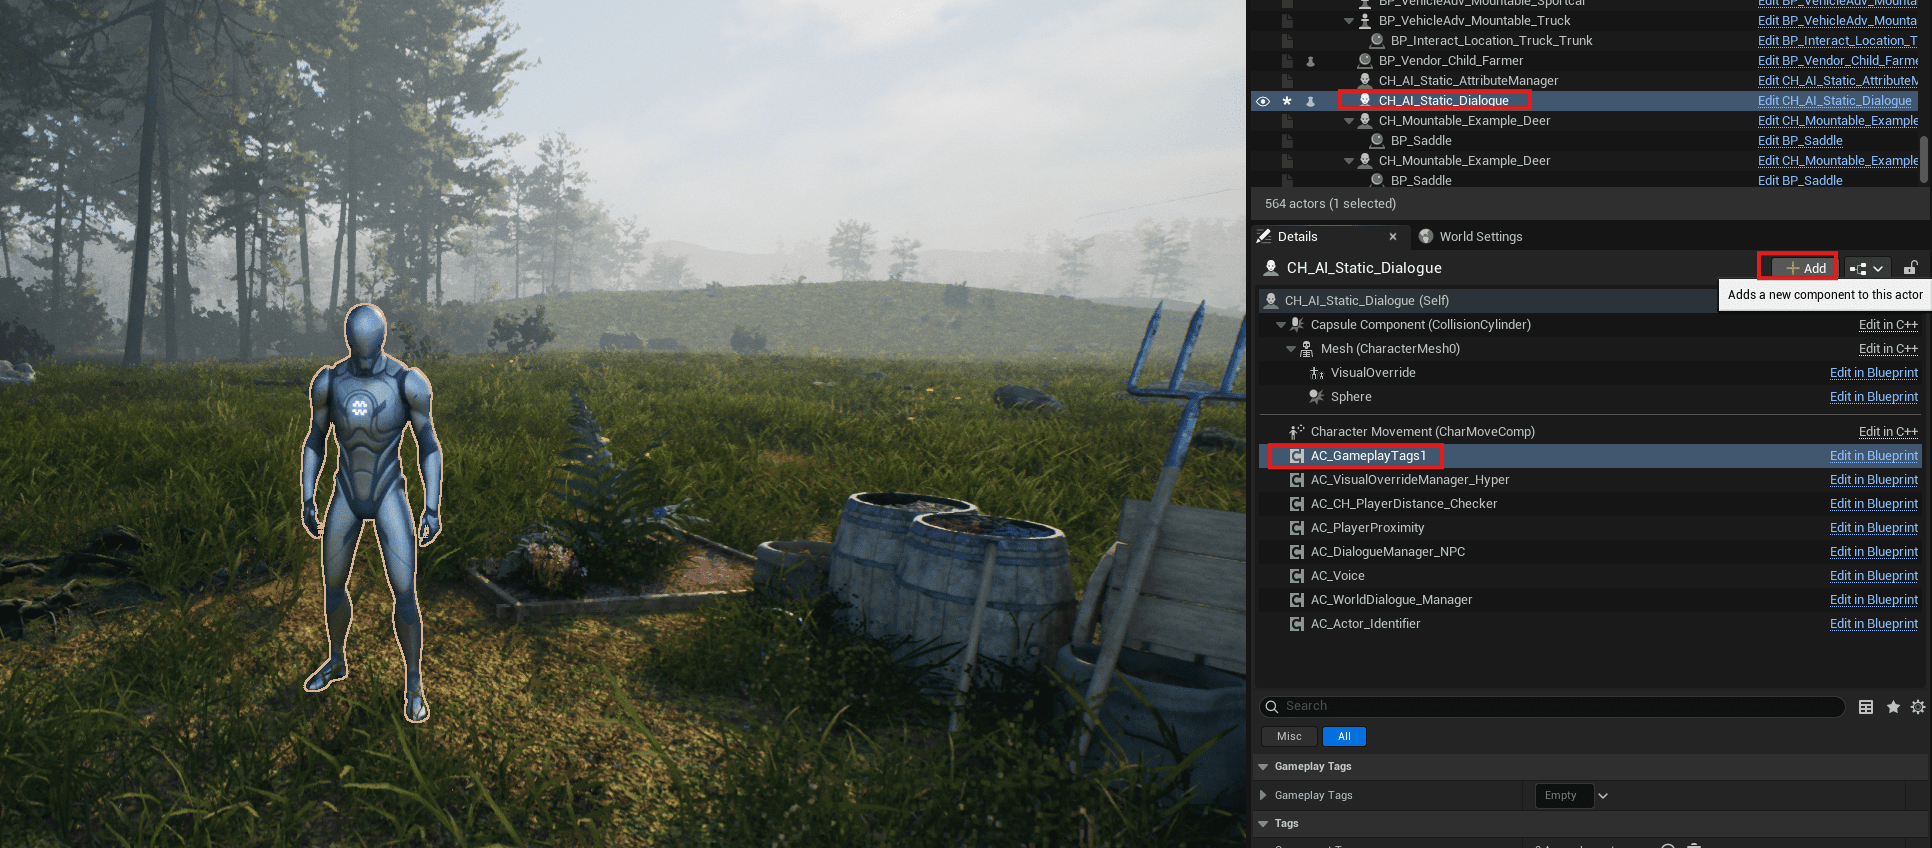
- Assign the ID in the gameplay tag container.
- The quest can automatically detect that this NPC has a quest because the same NPC identifier is used in DT_Quest for the final stage.
- Select the Dialogue Manager component.
- The component name may be old; click the component that represents the dialogue manager to find it.
- Assign the dialogue tag to start with the dialogue created above.
- For this example, the visual override manager is also used to select another visual mesh.
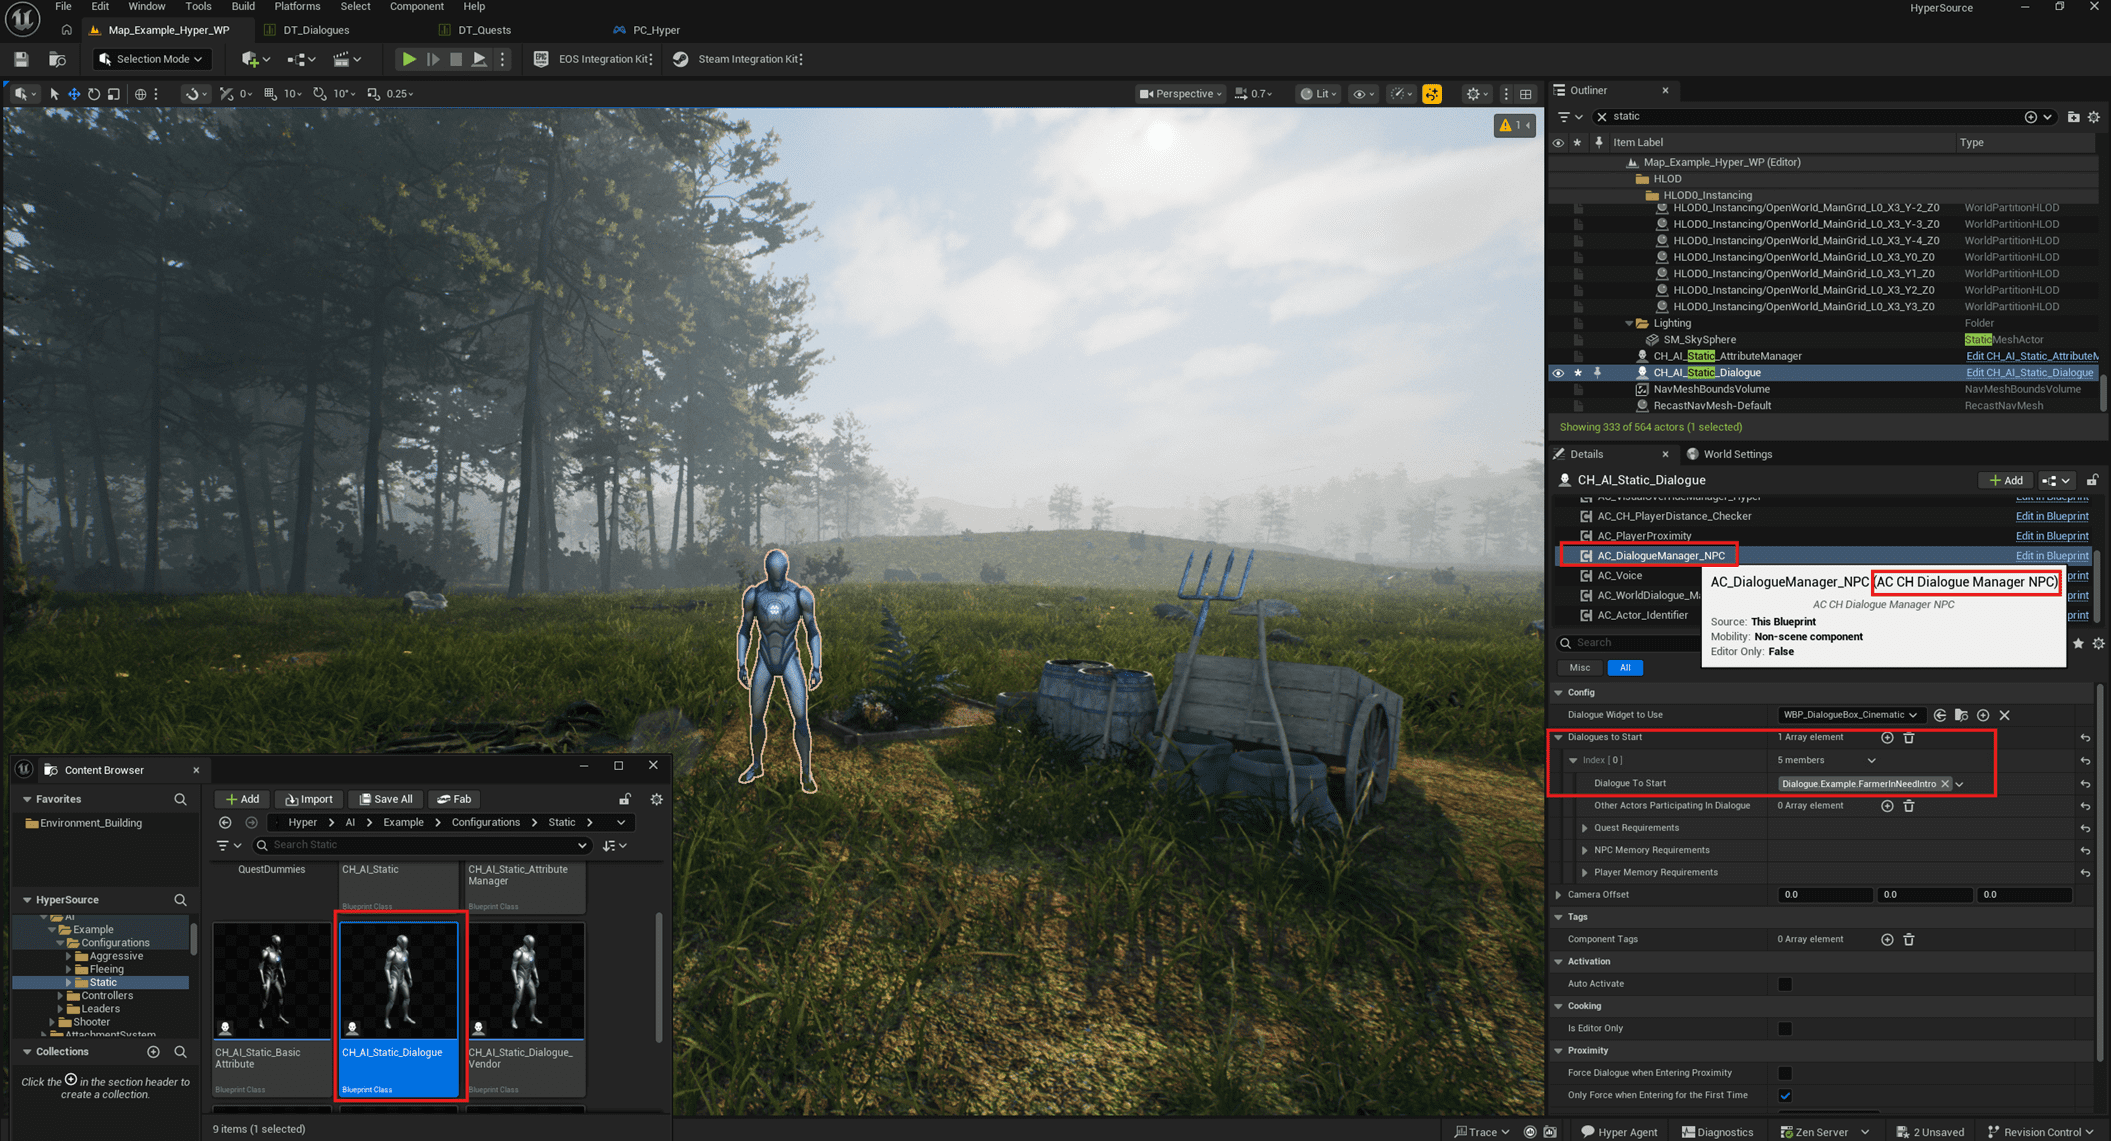
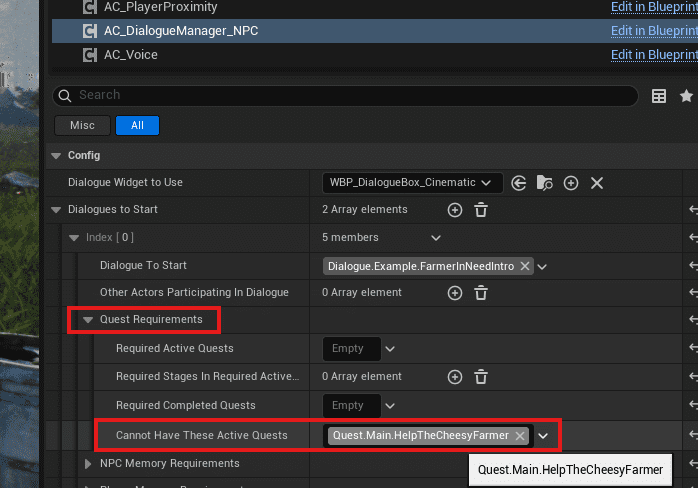
- Set up the quest requirement.
- Use Cannot Have These Active Quest.
- Because this dialogue starts the quest, it should not start the same quest again while it is already active.
At this point, test the setup. Press Play and check whether the map shows the ?, whether the dialogue starts, and whether clicking the dialogue option triggers the quest. If it does not work, review the steps above.
Setup the sticks, and the defender of the sticks
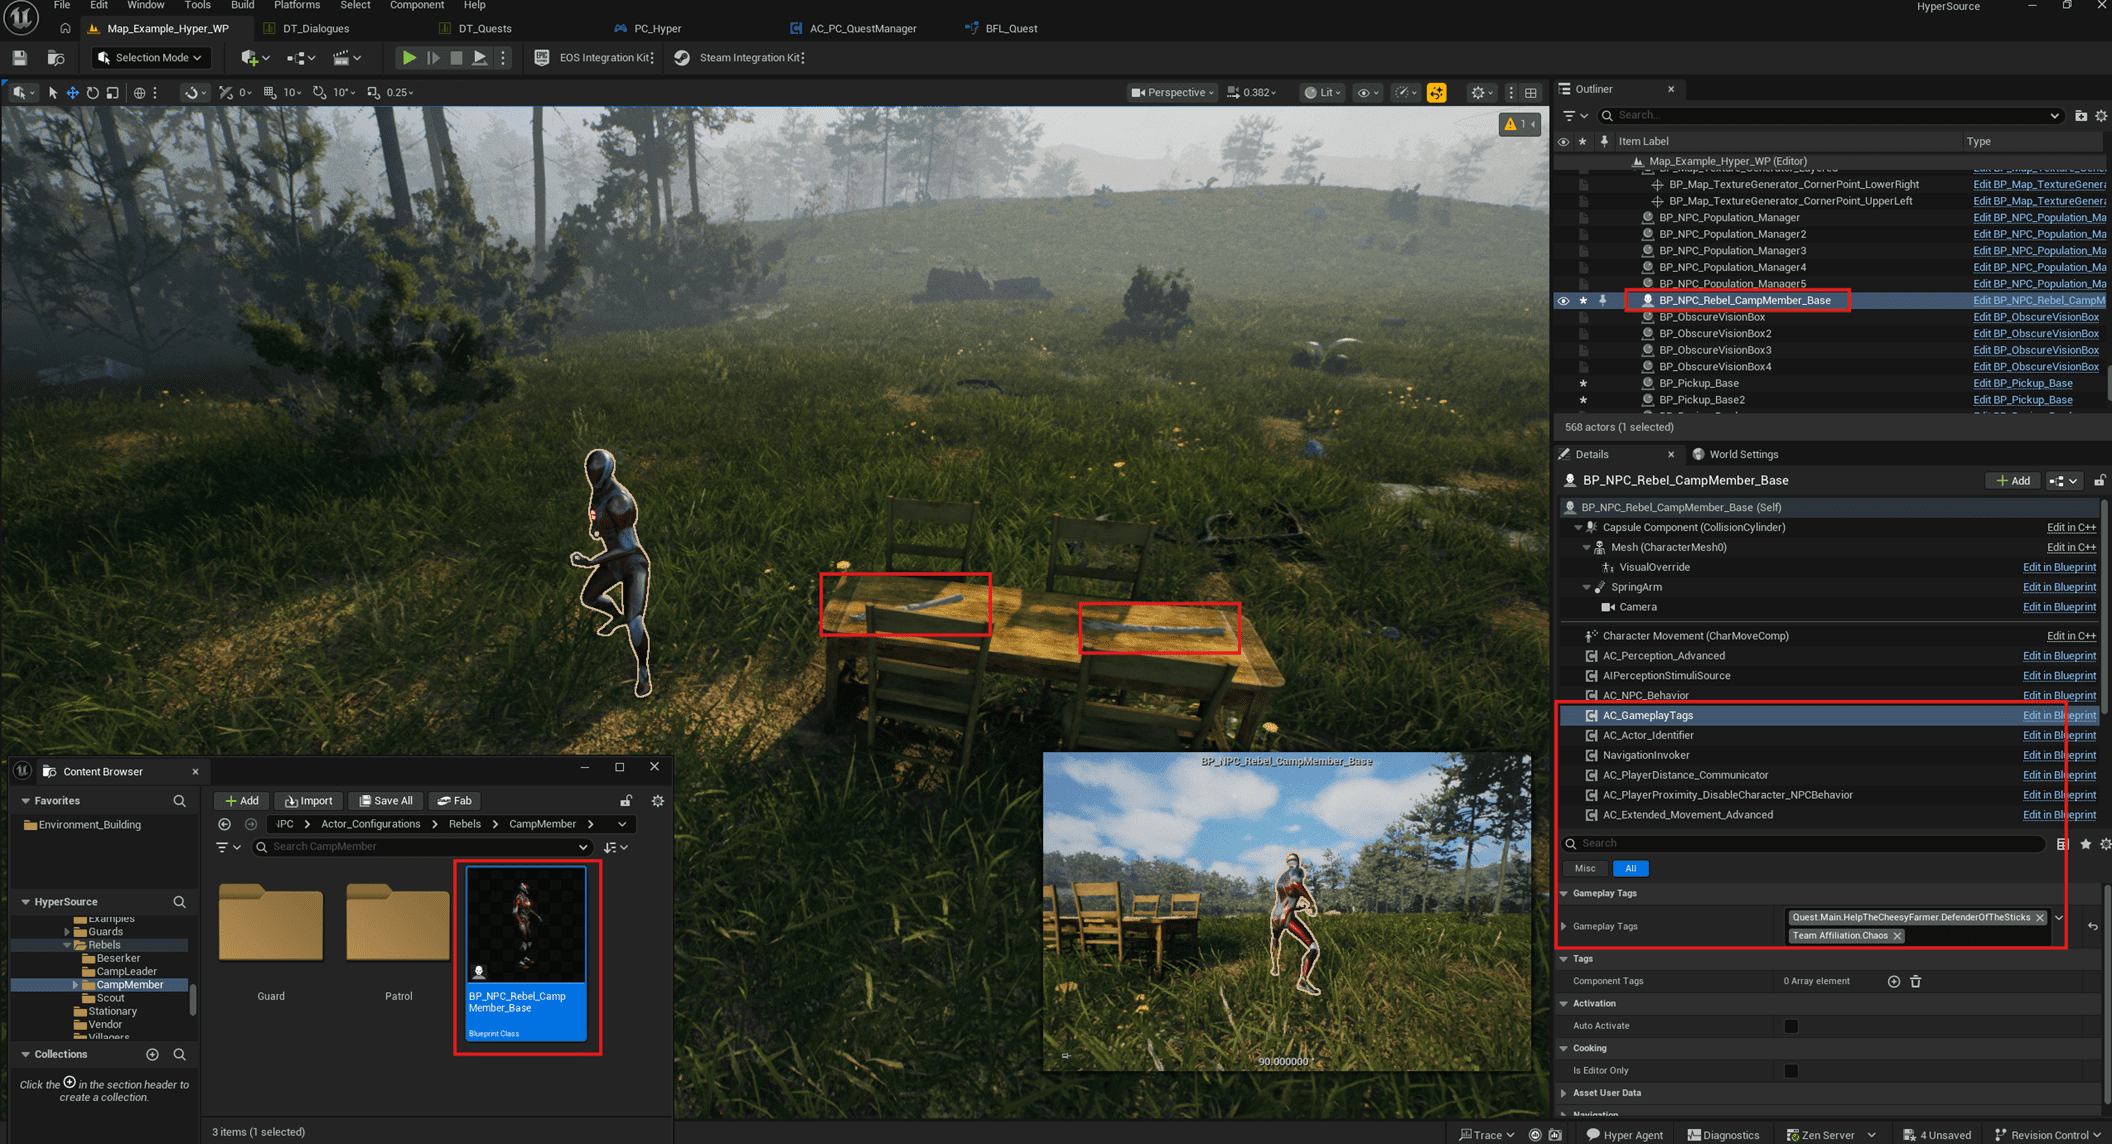
- Place the defender and the sticks in the world.
- In this example, the following assets are used:
- /Game/Hyper/NPCBehaviorSystem/NPC/Actor_Configurations/Rebels/CampMember/BP_NPC_Rebel_CampMember_Base
- The visual override is set to Khaimera Red.
- The defender gameplay tag is assigned so the Quest Manager knows which AI is the defender.
- If you have another Hyper AI that can be killed, you can use that instead. Hyper AI that can be killed listens to the on-kill event in the Quest Manager.
- /Game/Hyper/Environment_Building/Props/SemiPredefinedSpawner/Table/BP_Table_02
- This comes from the props tool. Use another placed object if you do not have this asset.
- /Game/Hyper/Inventory/Blueprints/PickUp_Master_Blueprint/MasterBlueprint/BP_Pickup_Base
- Select Stick as the item.
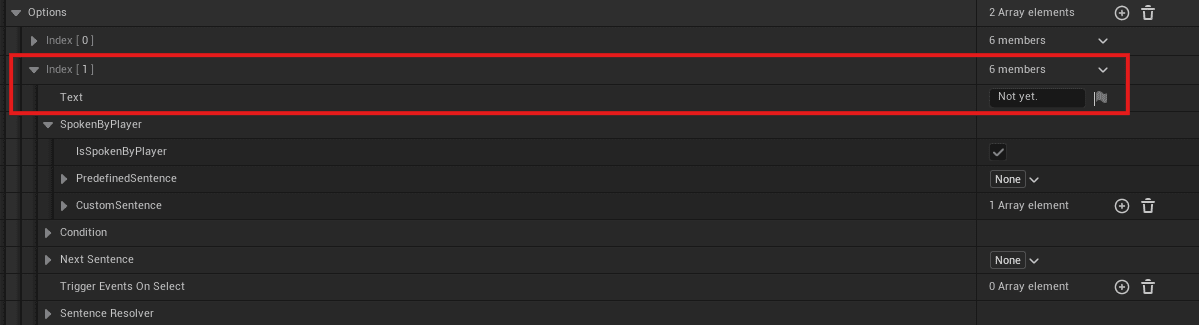
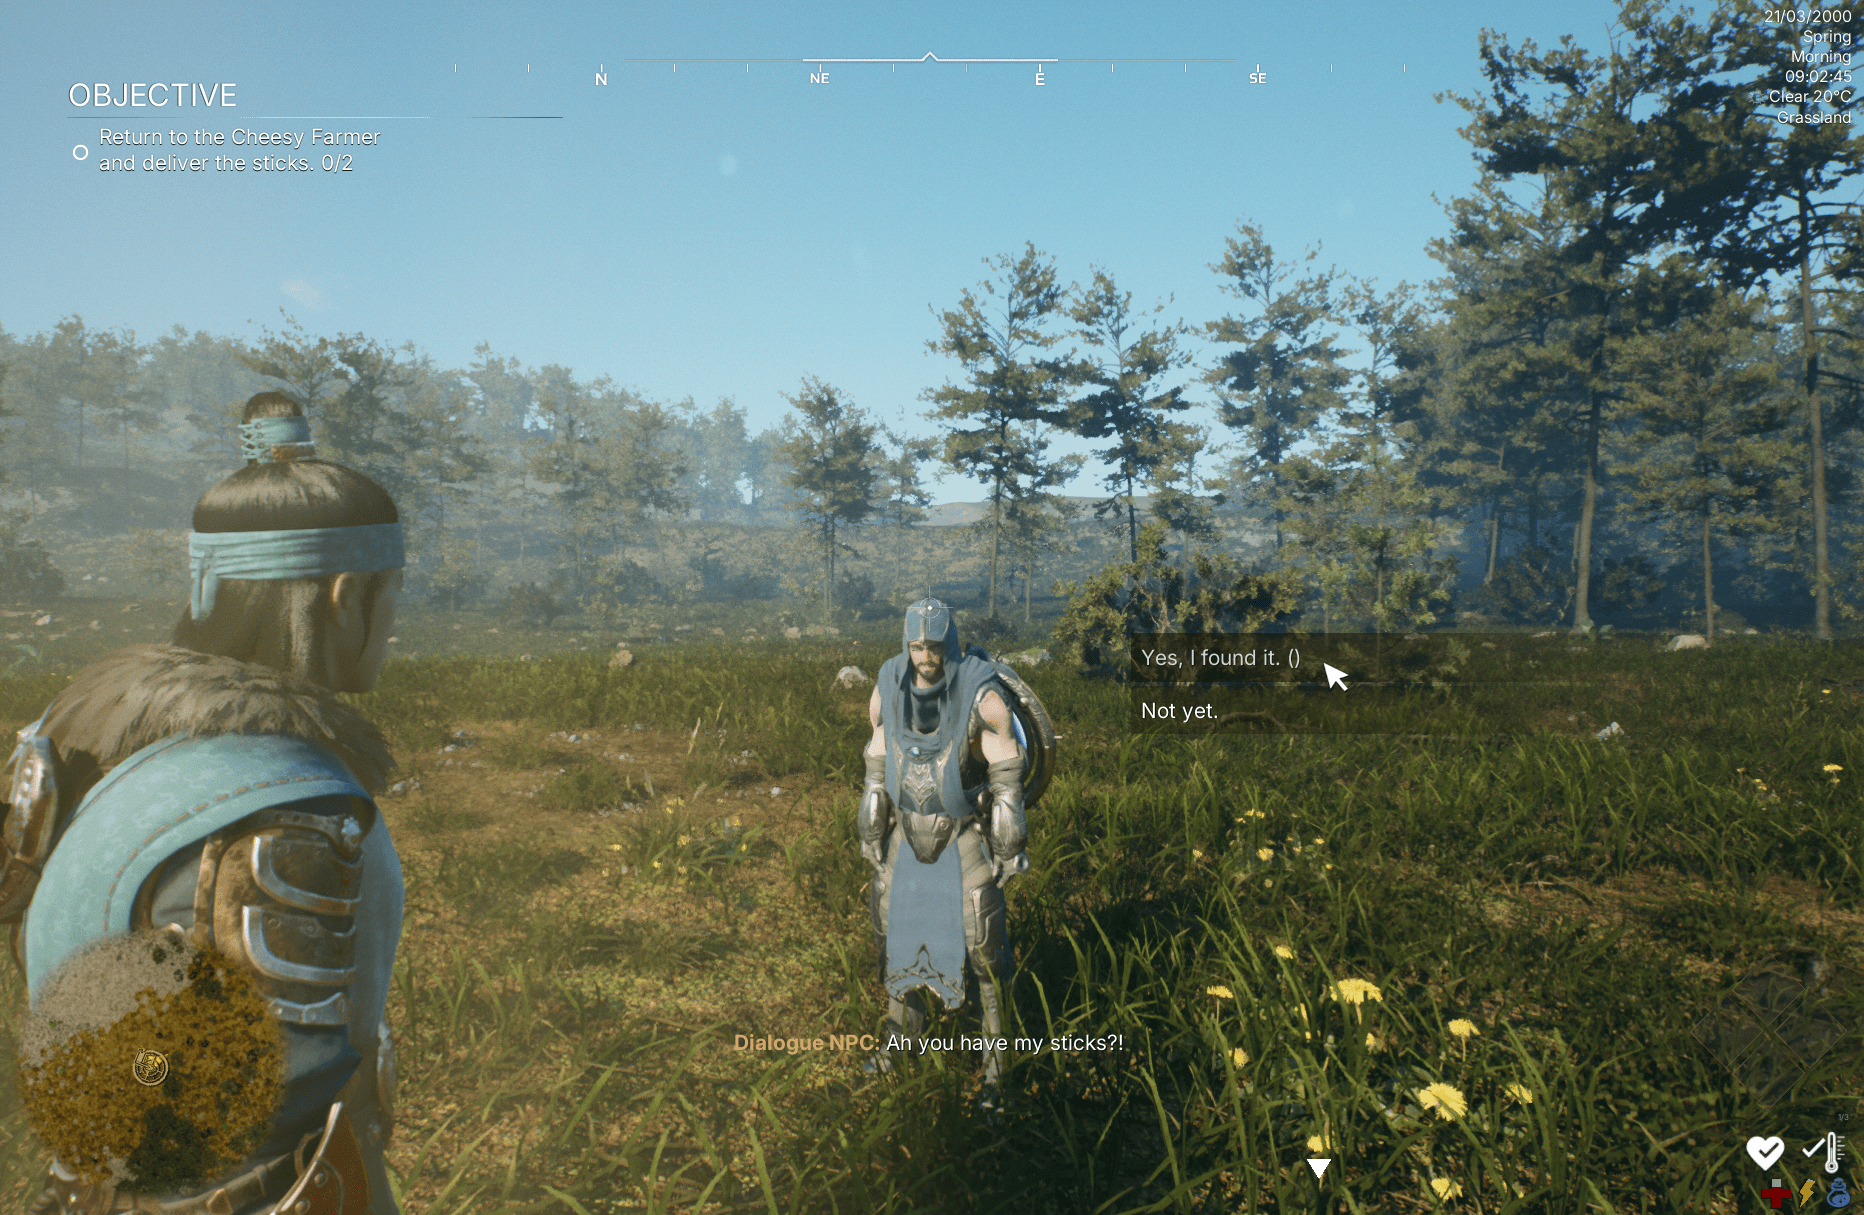
Make our delivery dialogue
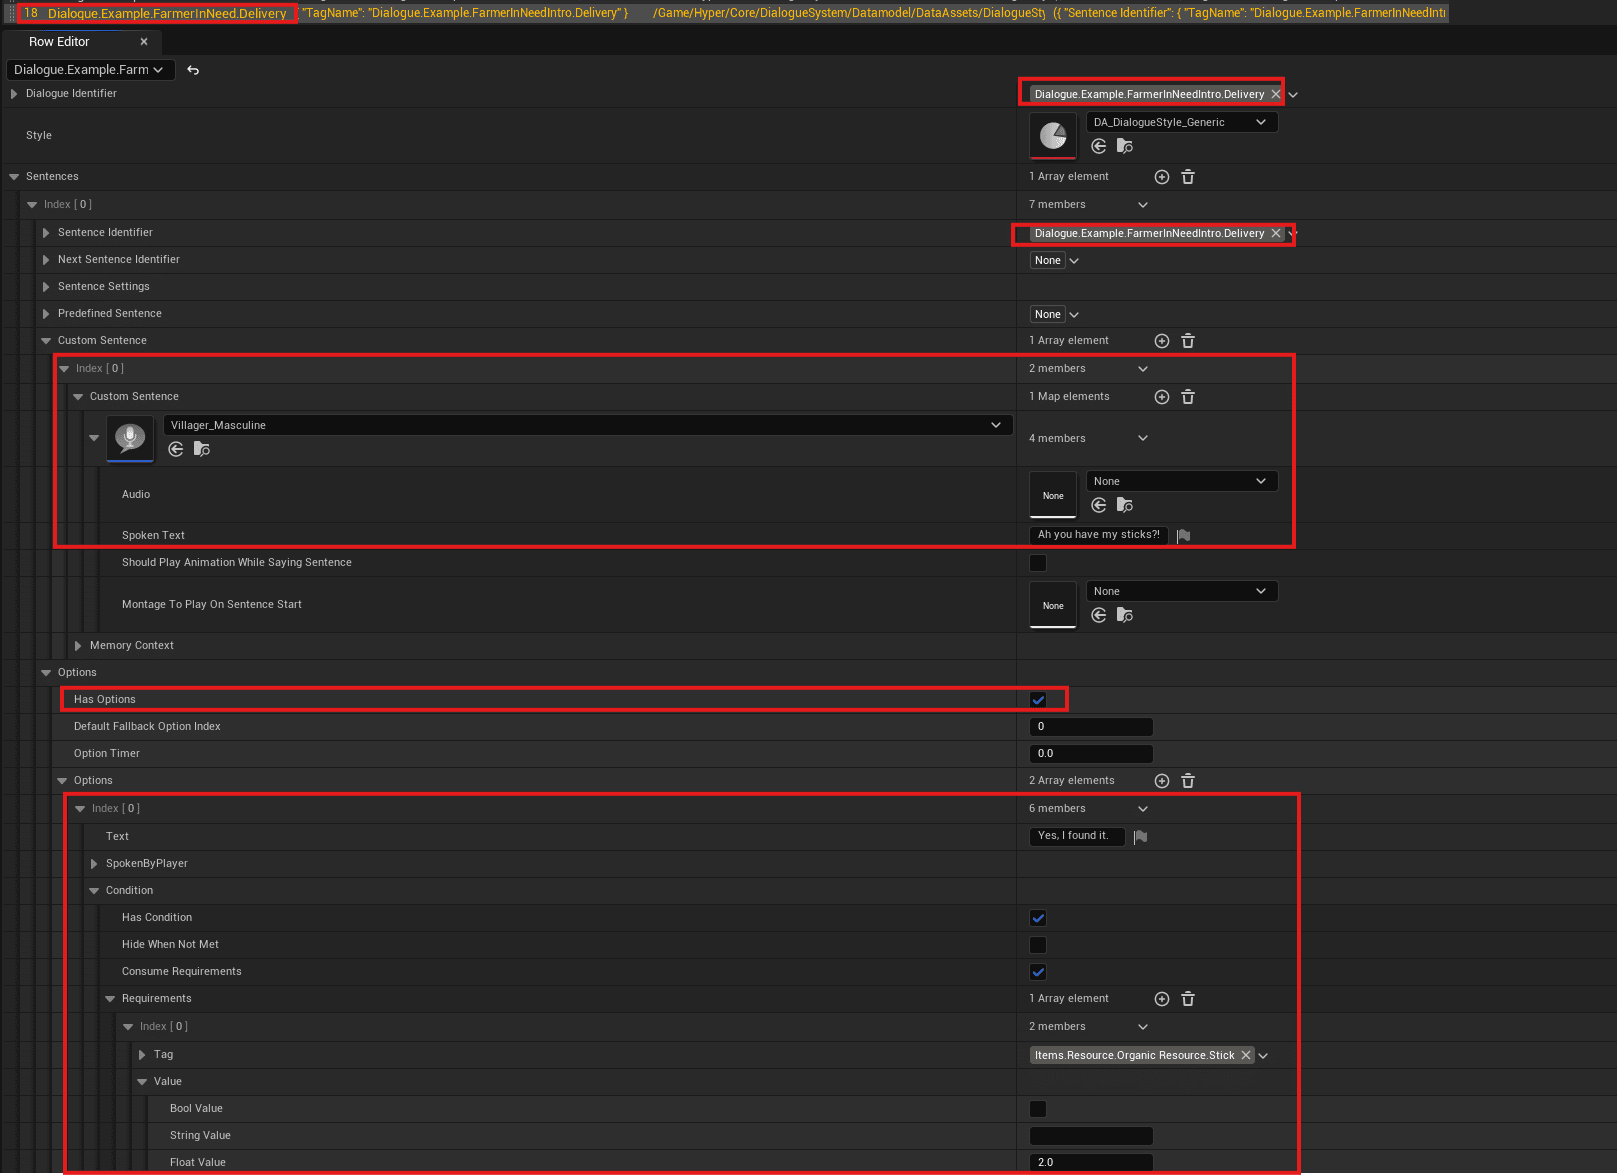
- Create a new dialogue in DT_Dialogues.
- Add the identifier Dialogue.Example.FarmerInNeedIntro.Delivery.
- Use a simple sentence without audio for this example.
- Set Has Options to true.
- Set Has Condition to true.
- Add a condition that checks whether the player has sticks, specifically 2 sticks.
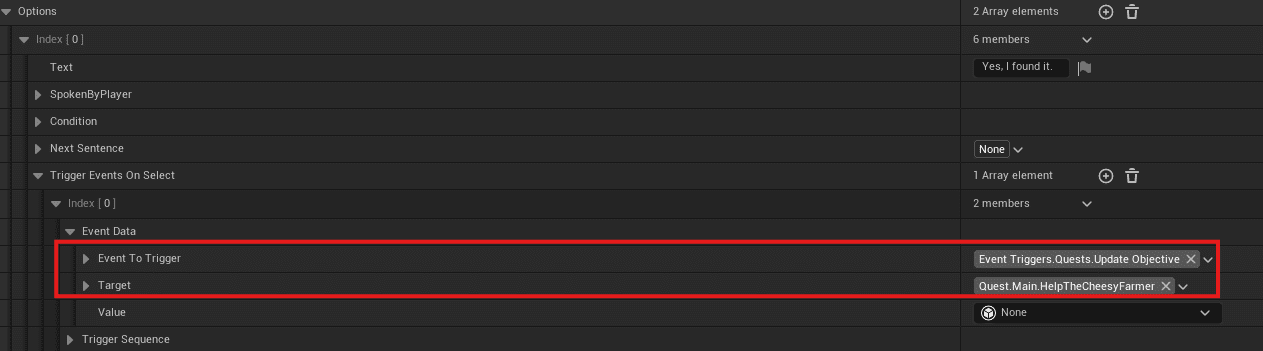
- Add an event to the option where the player says yes. The event should trigger Update Objective on the active quest.
- Add a second option for when the player does not have the sticks yet.
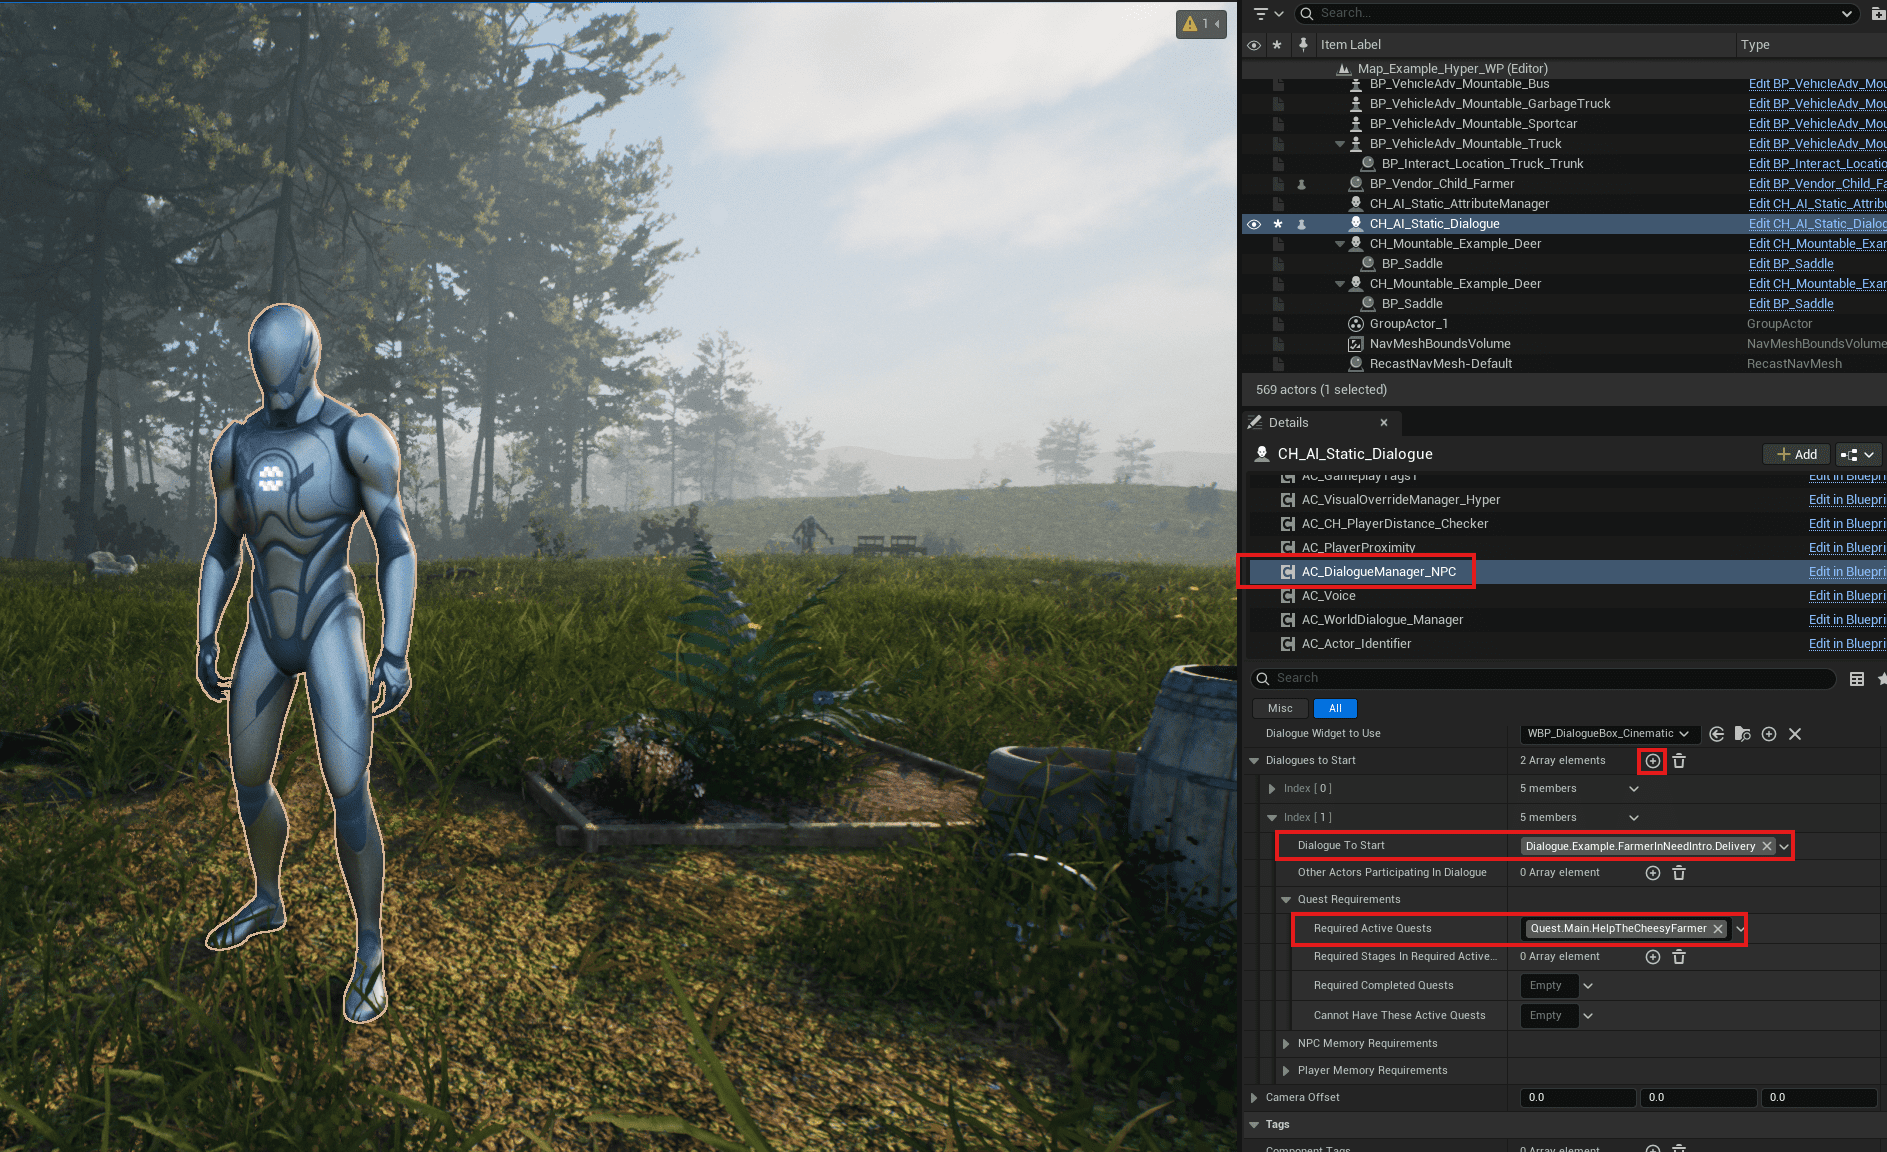
- Assign the delivery dialogue to the Cheesy Farmer.
- Select the dialogue to start.
- Combine it with the required active quest condition.
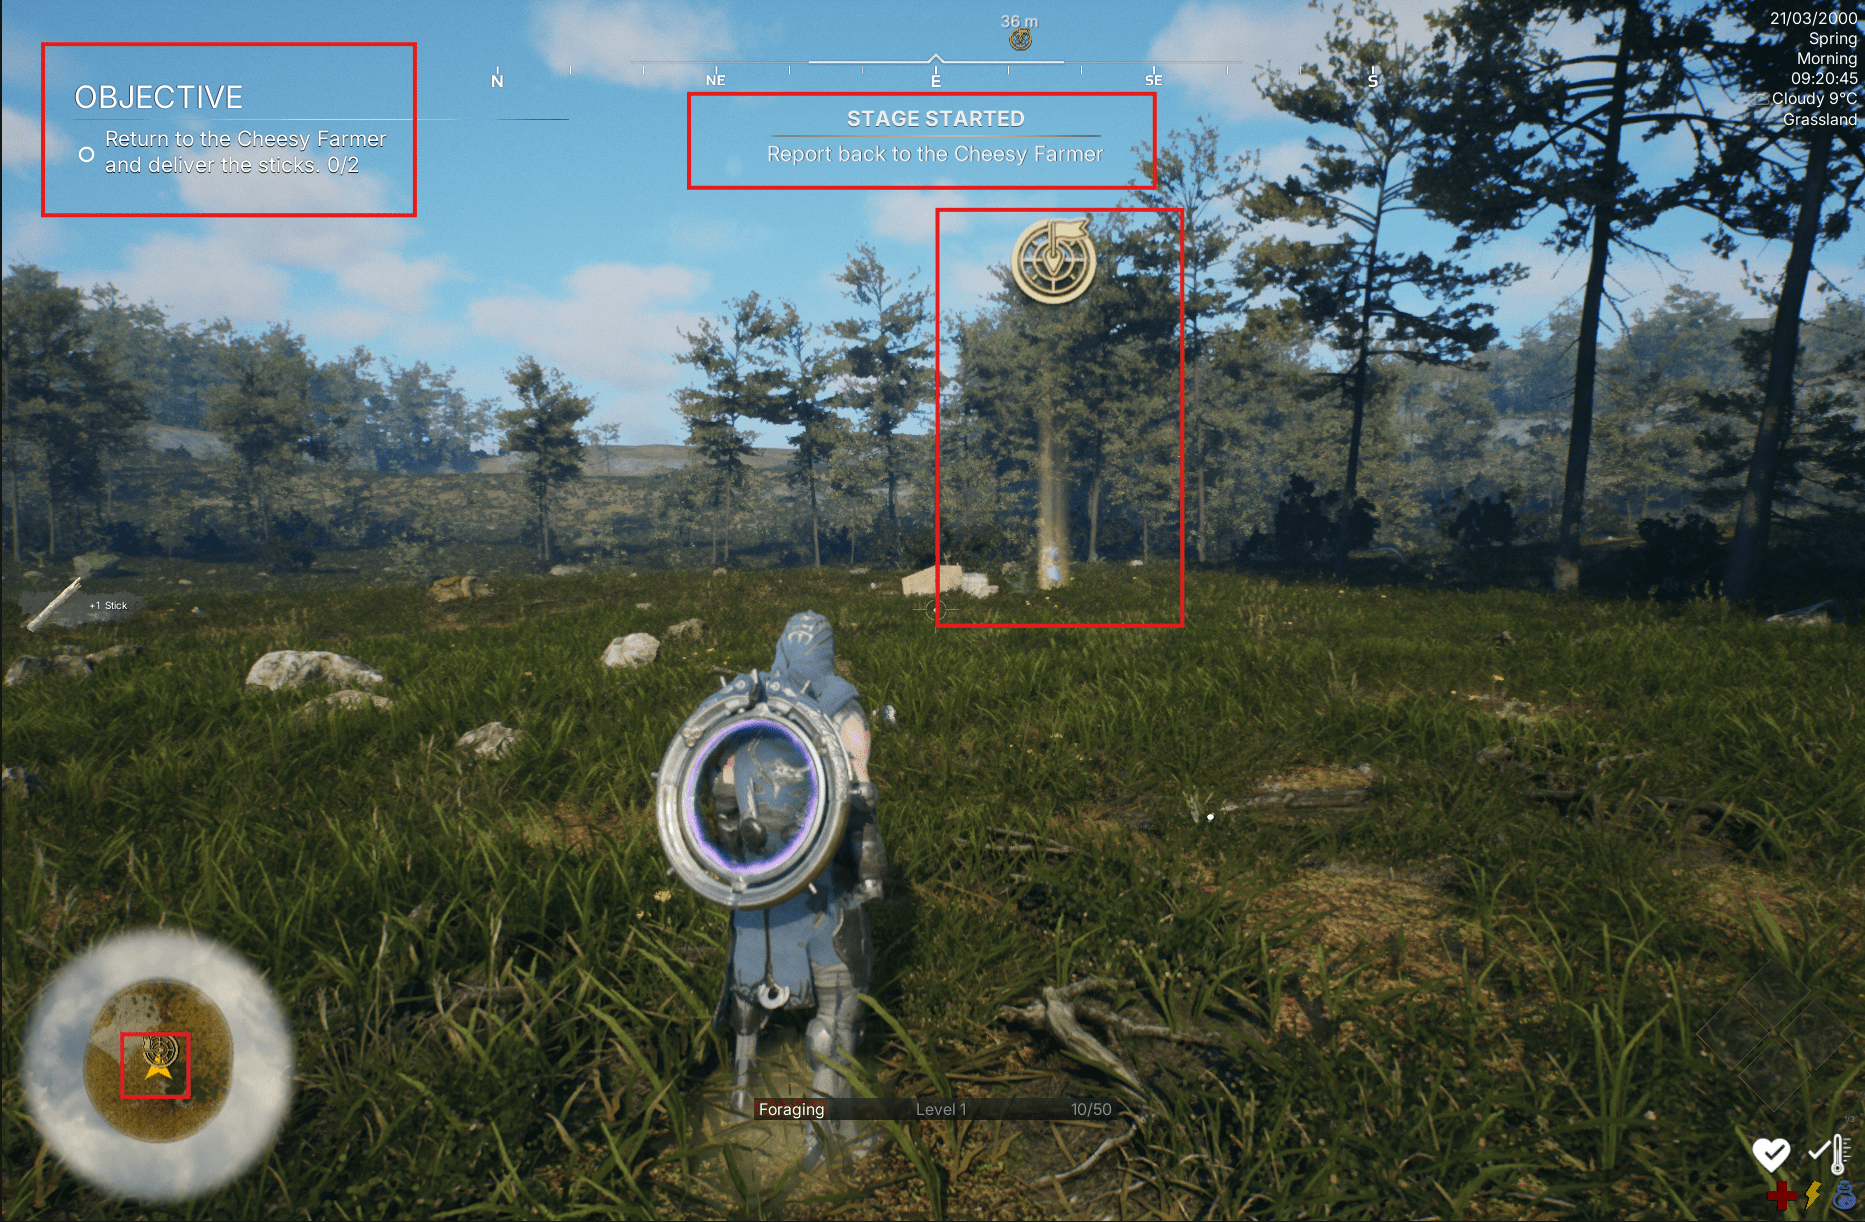
Test out the quest!
- On Play, check the first setup:
- The farmer is visible.
- The farmer has a ? marker.
- The farmer appears on the minimap and compass.
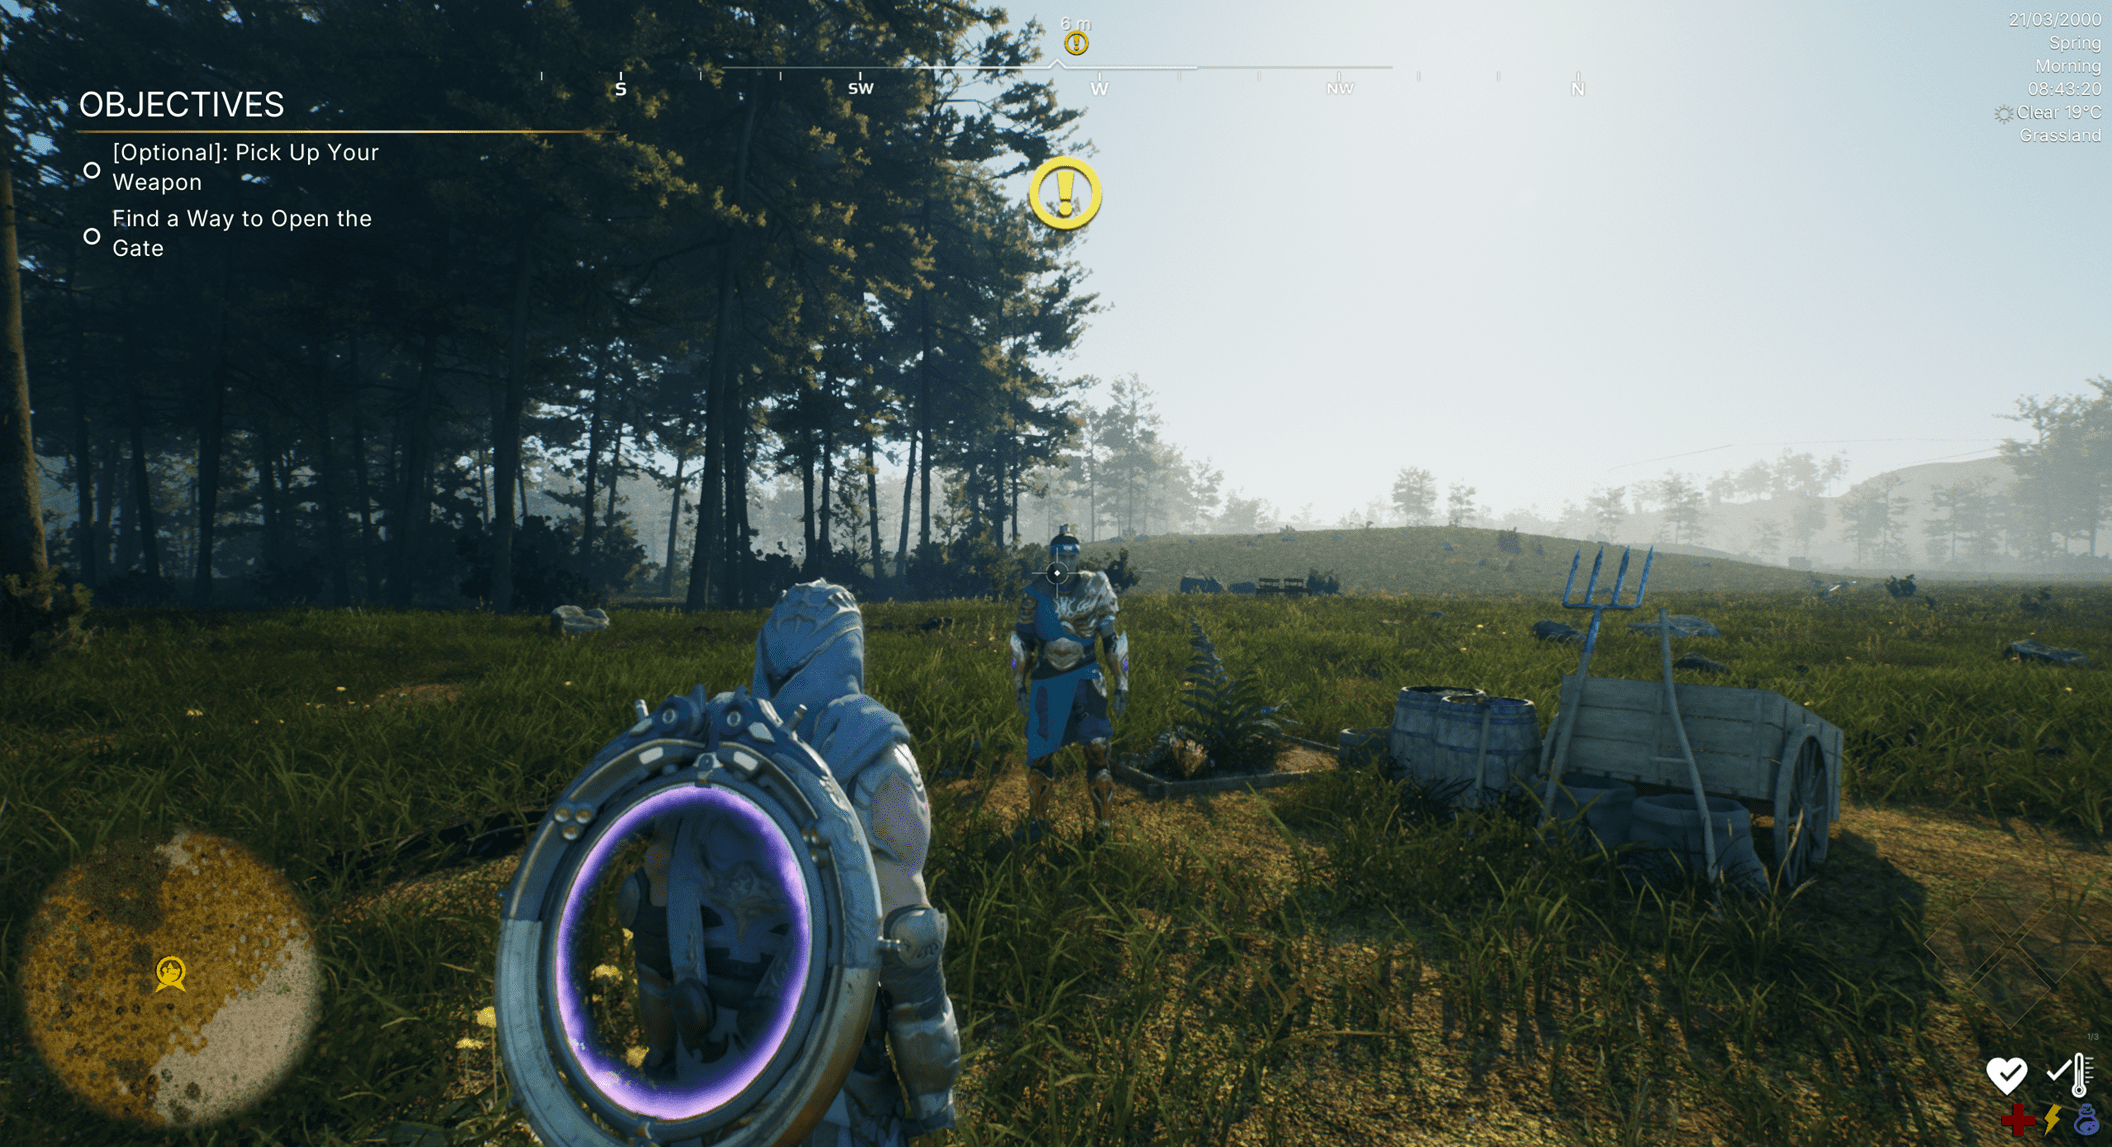
- Confirm the farmer also appears on the world map.
- Start the dialogue. No audio is expected in this test, and only one option should appear.
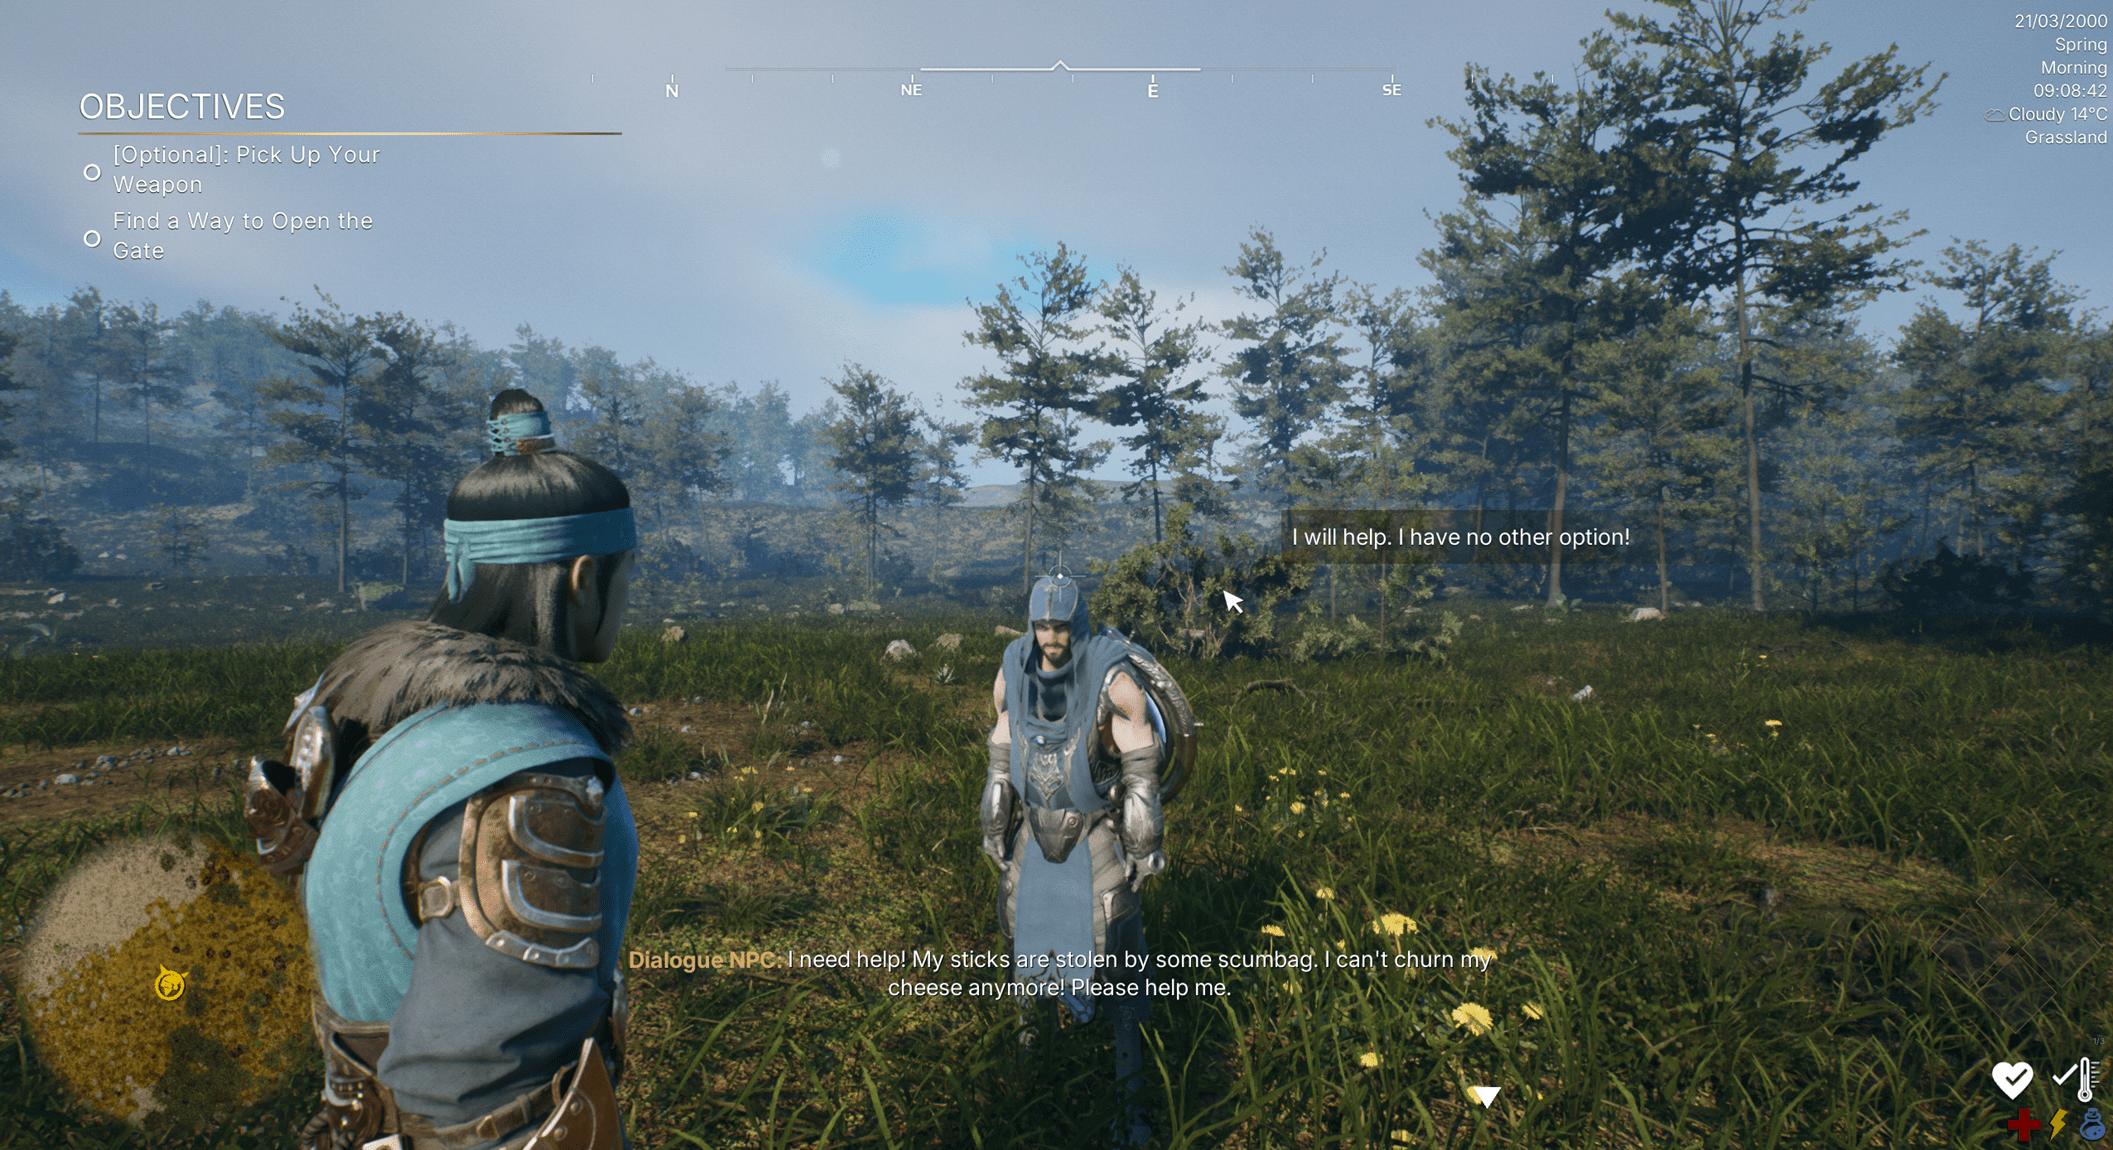
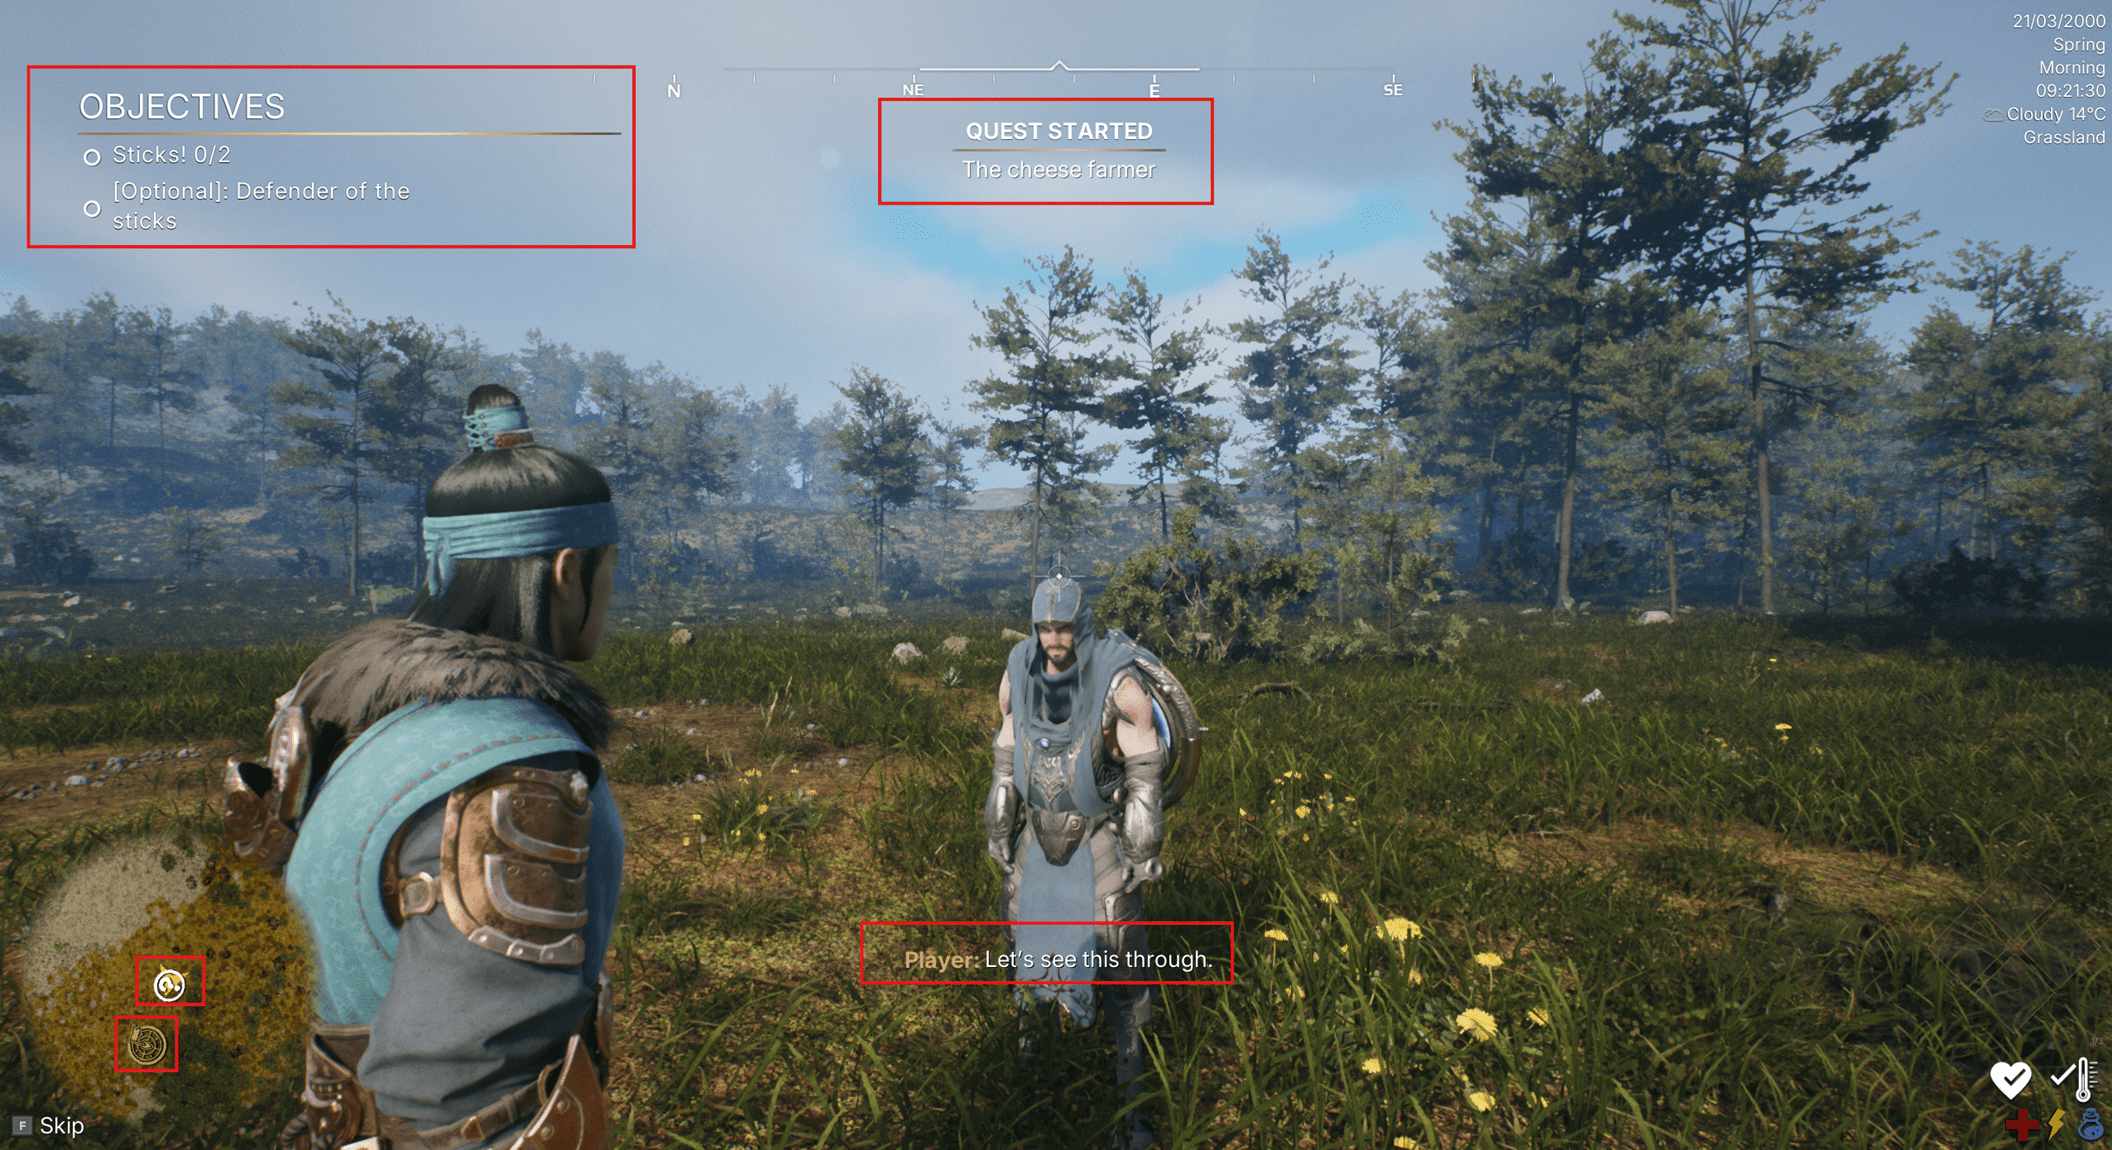
- Select the dialogue option and confirm:
- The quest starts.
- The objectives appear.
- The player response appears.
- The quest marker updates on the farmer as the target.
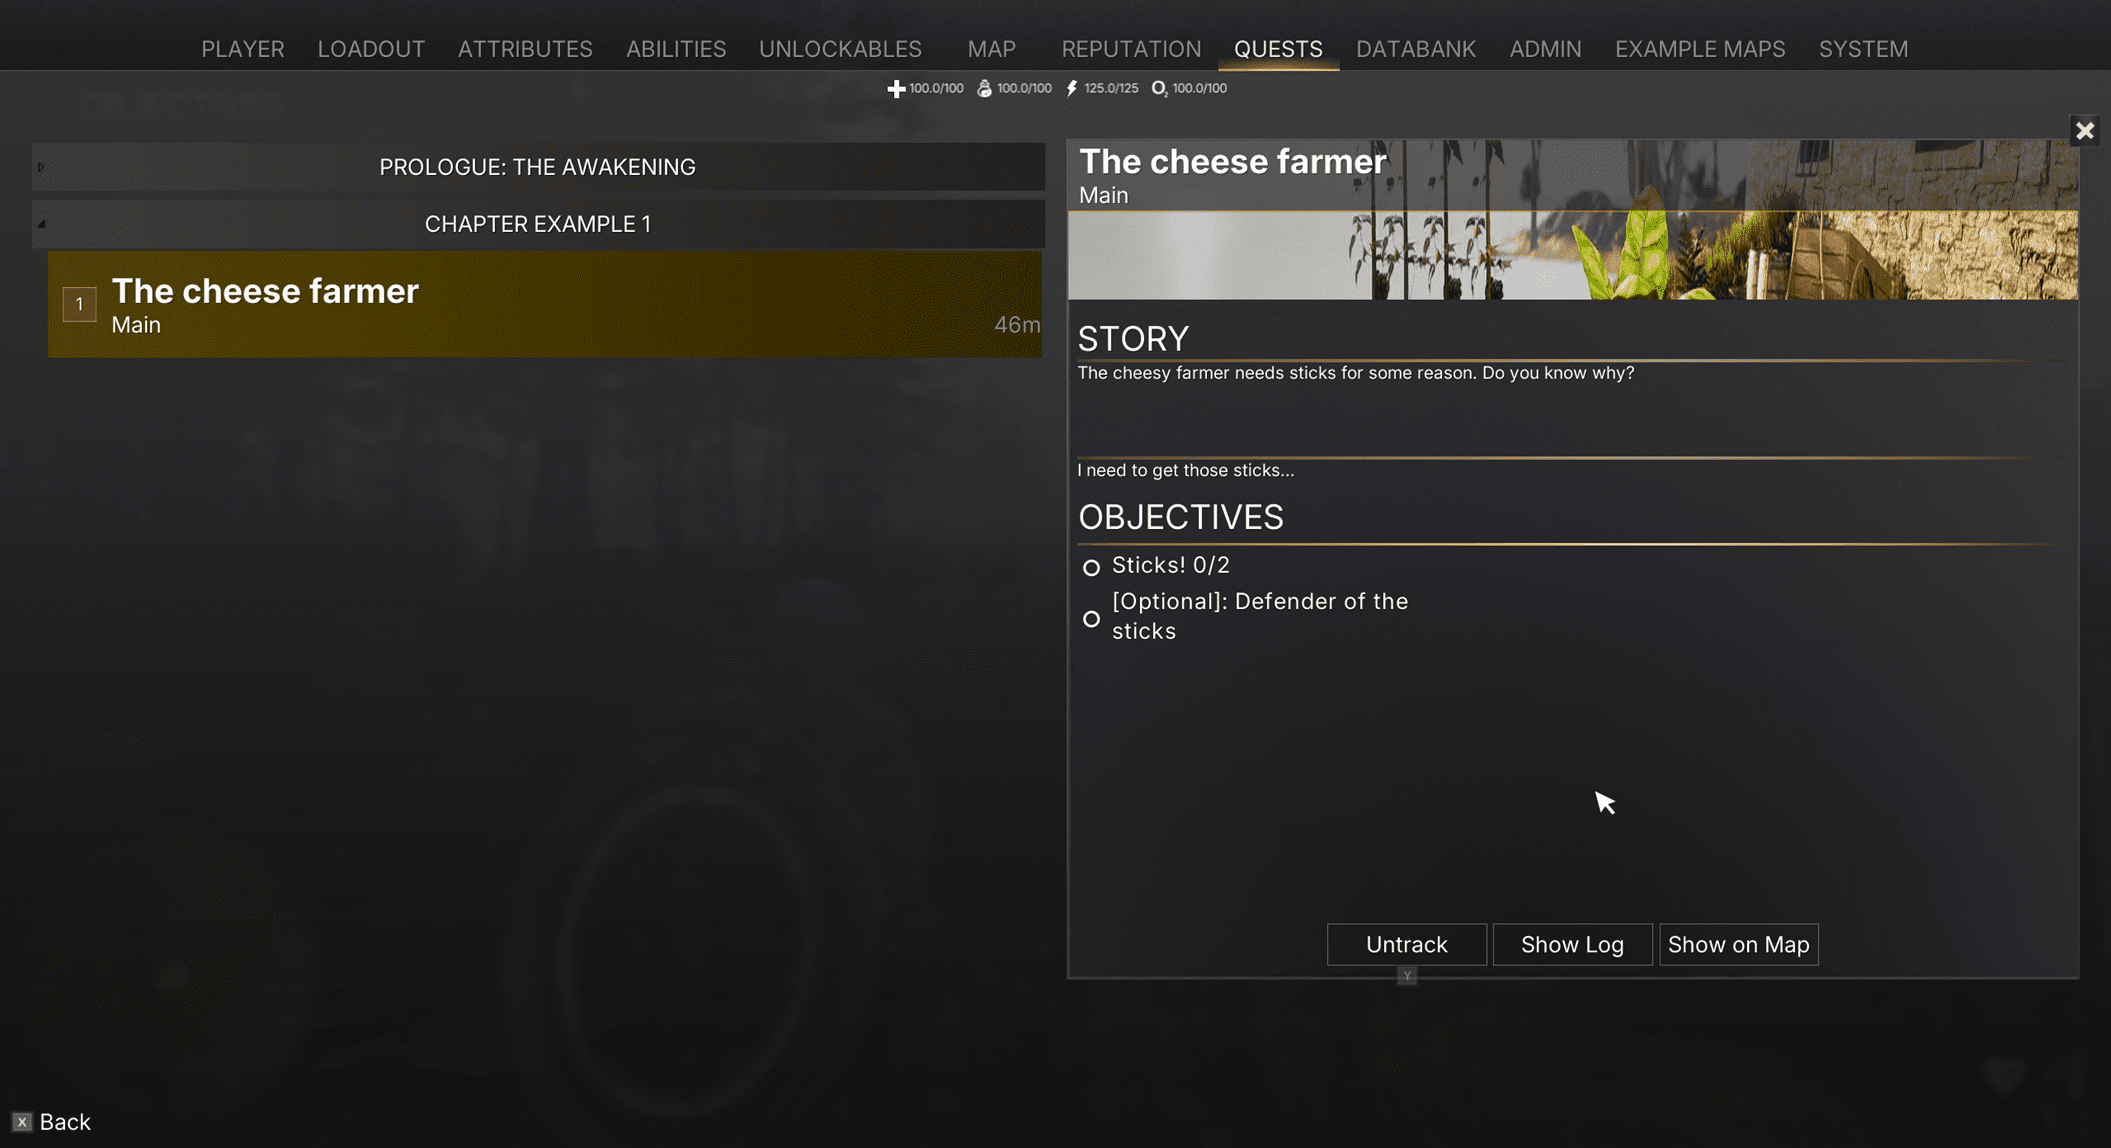
- Open the quest log and confirm the quest appears there.
- Press Show and confirm the target appears on the map and compass.
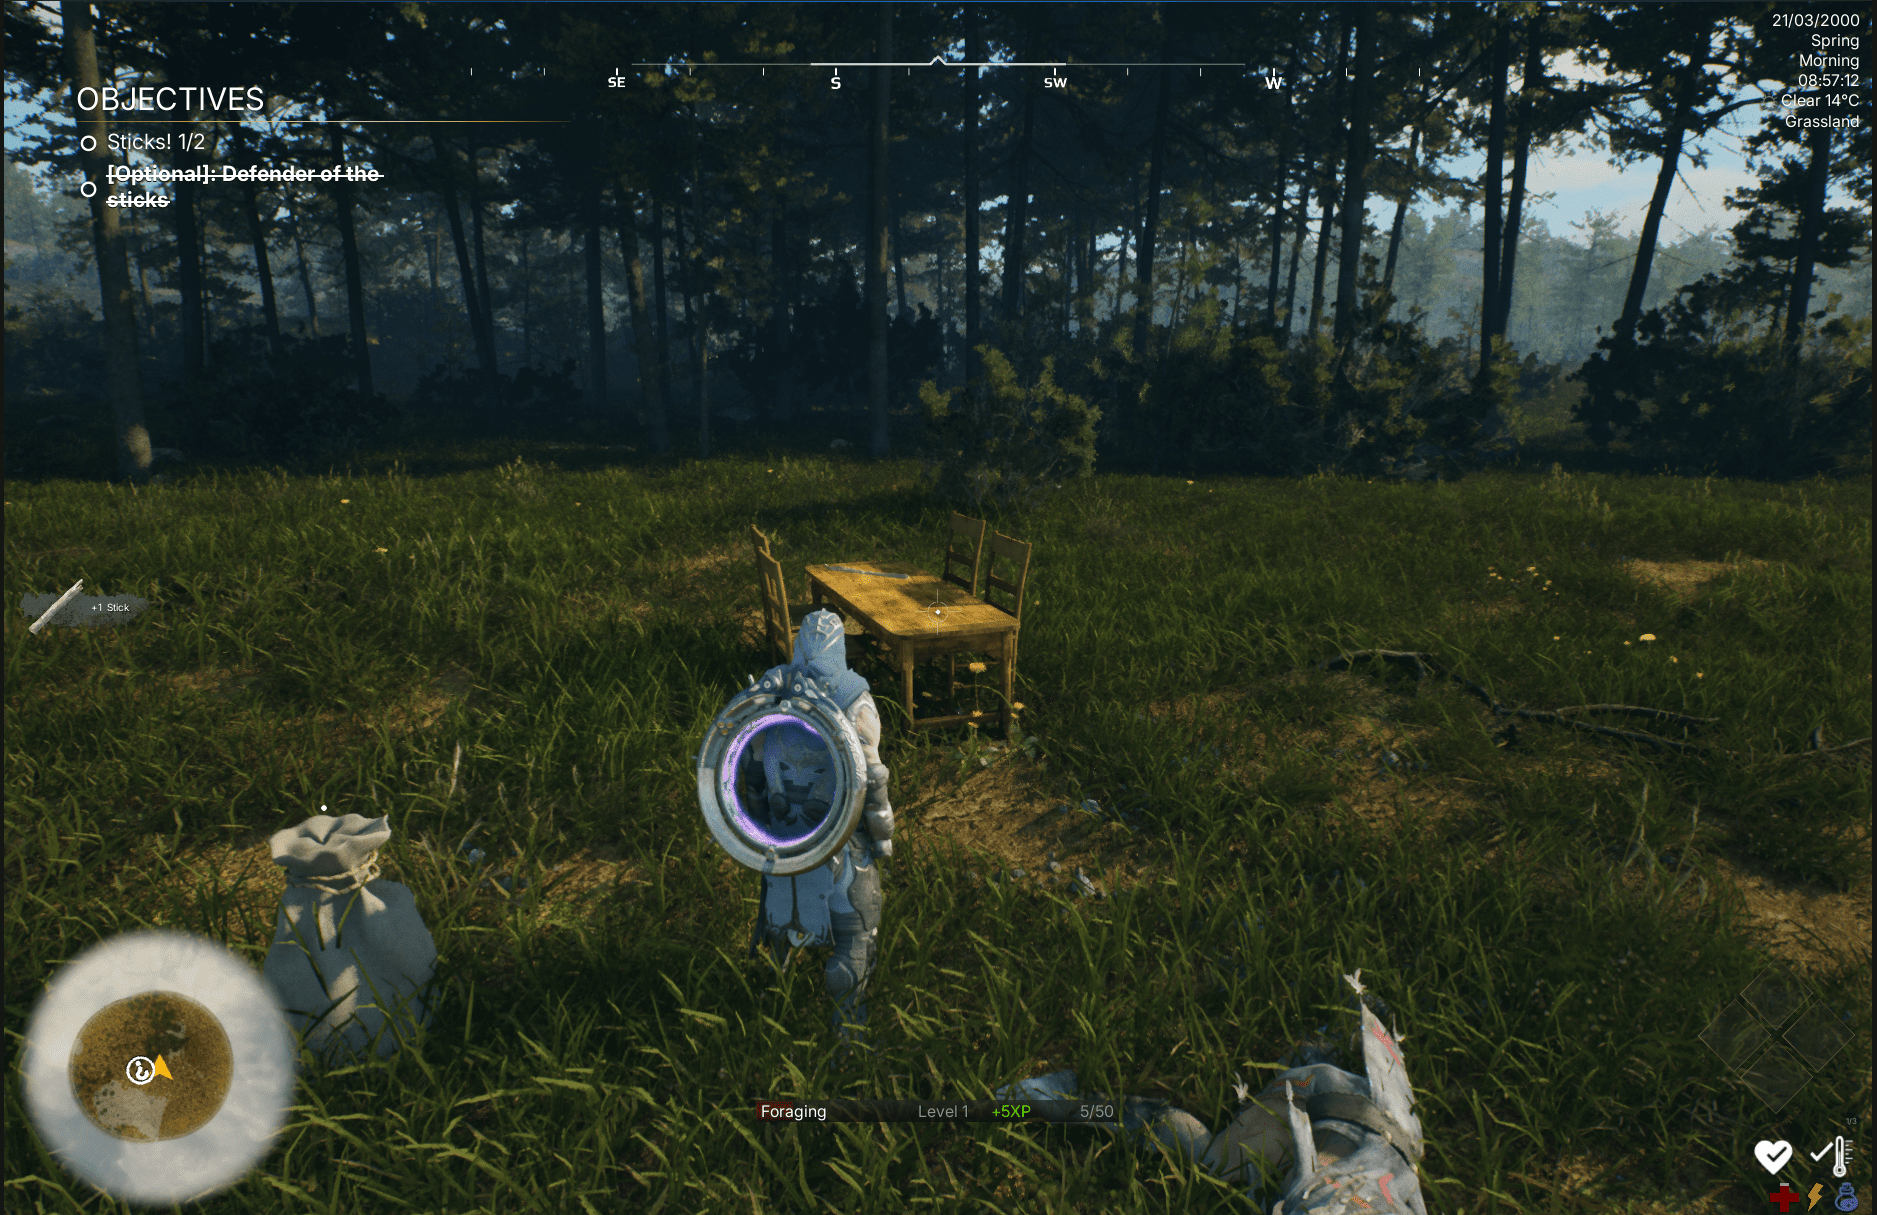
- Kill the defender and pick up a stick. The objectives should update.
- Save and load during the quest and confirm the progress remains saved.
- After collecting two sticks, confirm that a new stage starts.
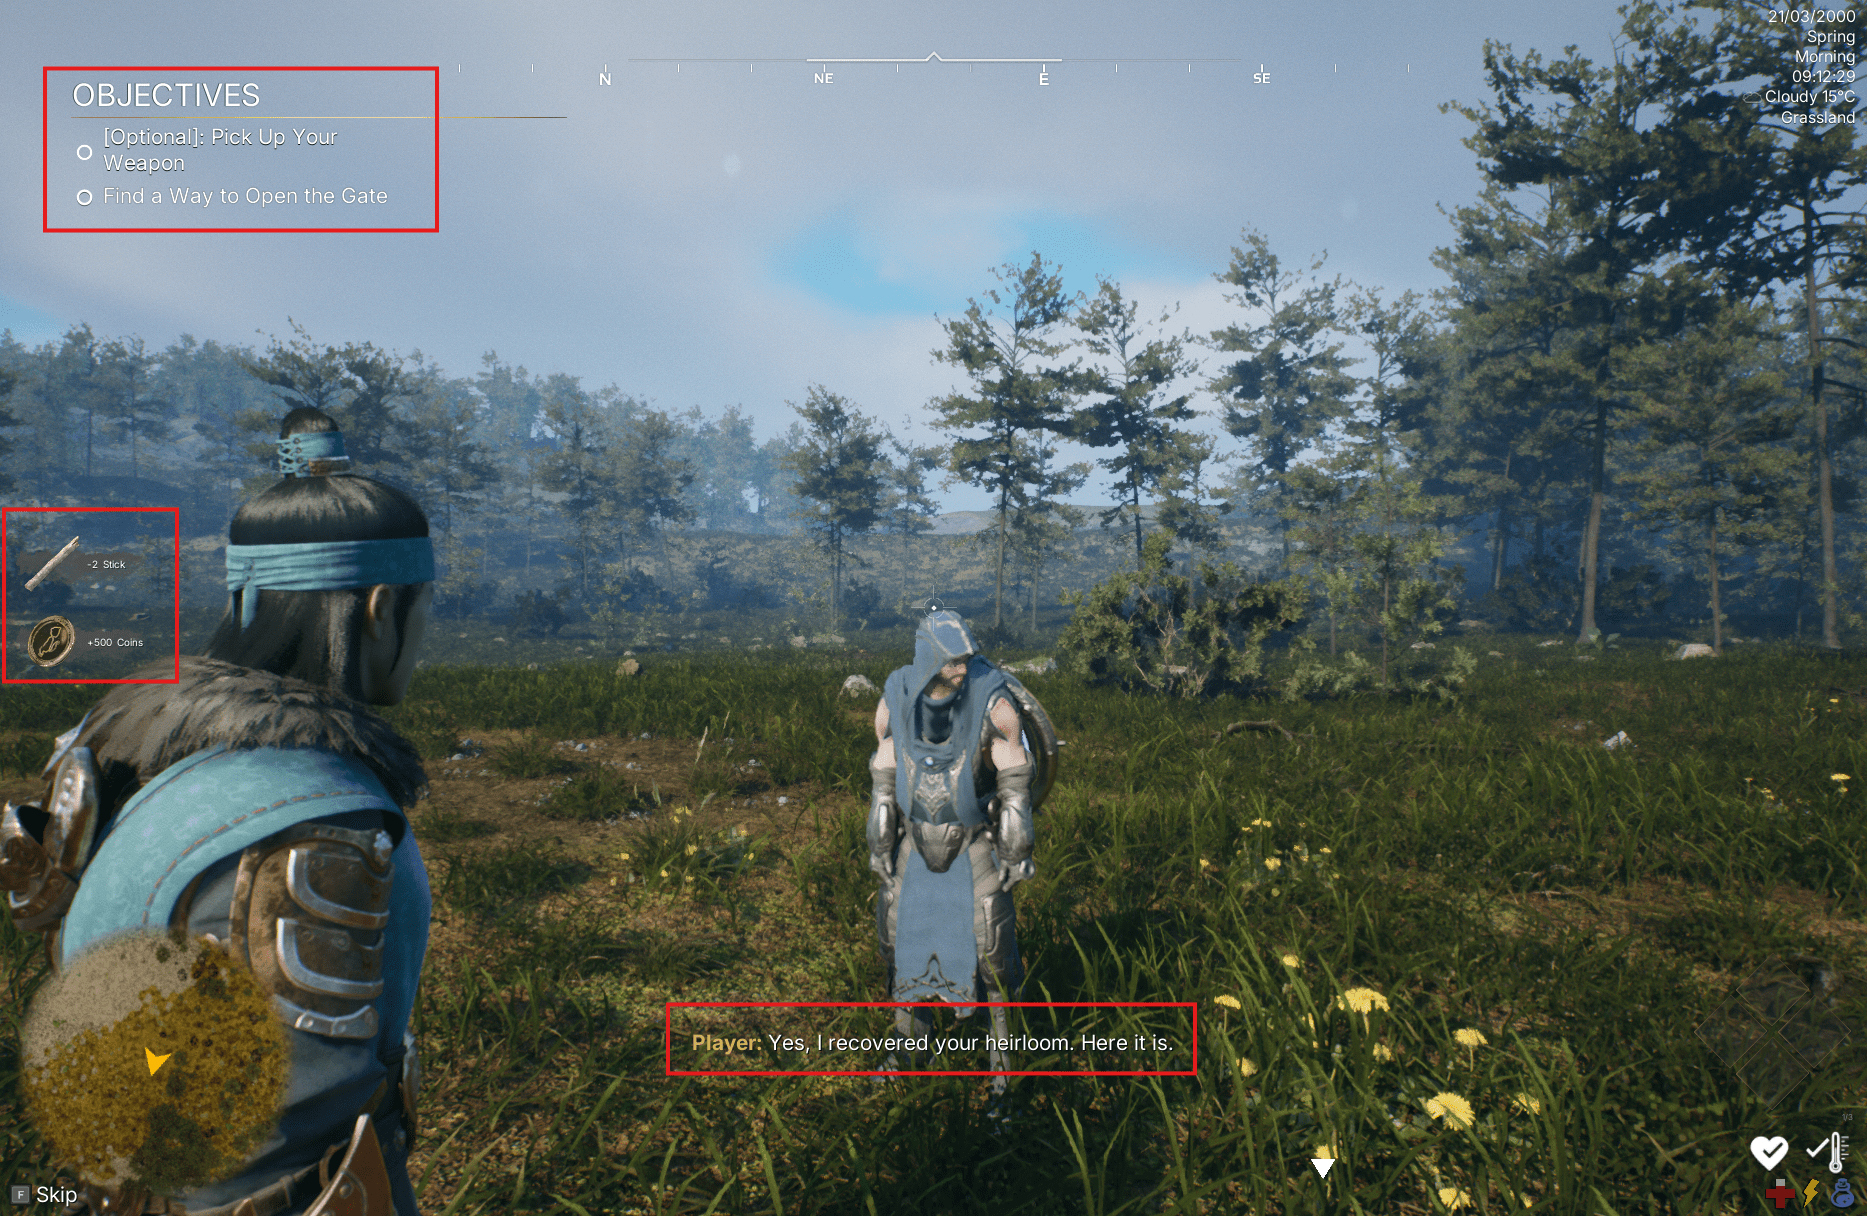
- Say yes in the delivery dialogue and confirm the quest completes.
- The quest rewards are applied.
- The sticks are removed.
- The first available quest in the list is auto-tracked.
Recap
This is a simple quest, but it already shows how the narrative systems connect: quests, dialogue, NPC identifiers, objective tags, inventory items, map markers, world actors, save/load progress, and rewards. Start with small loops like this, verify every step, and then add more systems as needed.