Change Inventory Type on Interact Locations
Updated May 25, 2026
Use this page when an interact location, such as a storage chest, loot chest, or crafting station, should use a different inventory component or inventory type than the default setup.
Related setup: Set Up Inventory for the Player.
Overriding an inventory type in the world
As described in the previous inventory setup guide, you can change inventory types. Interact locations can also override the inventory type dynamically in the world, even when they already have a default inventory assigned.
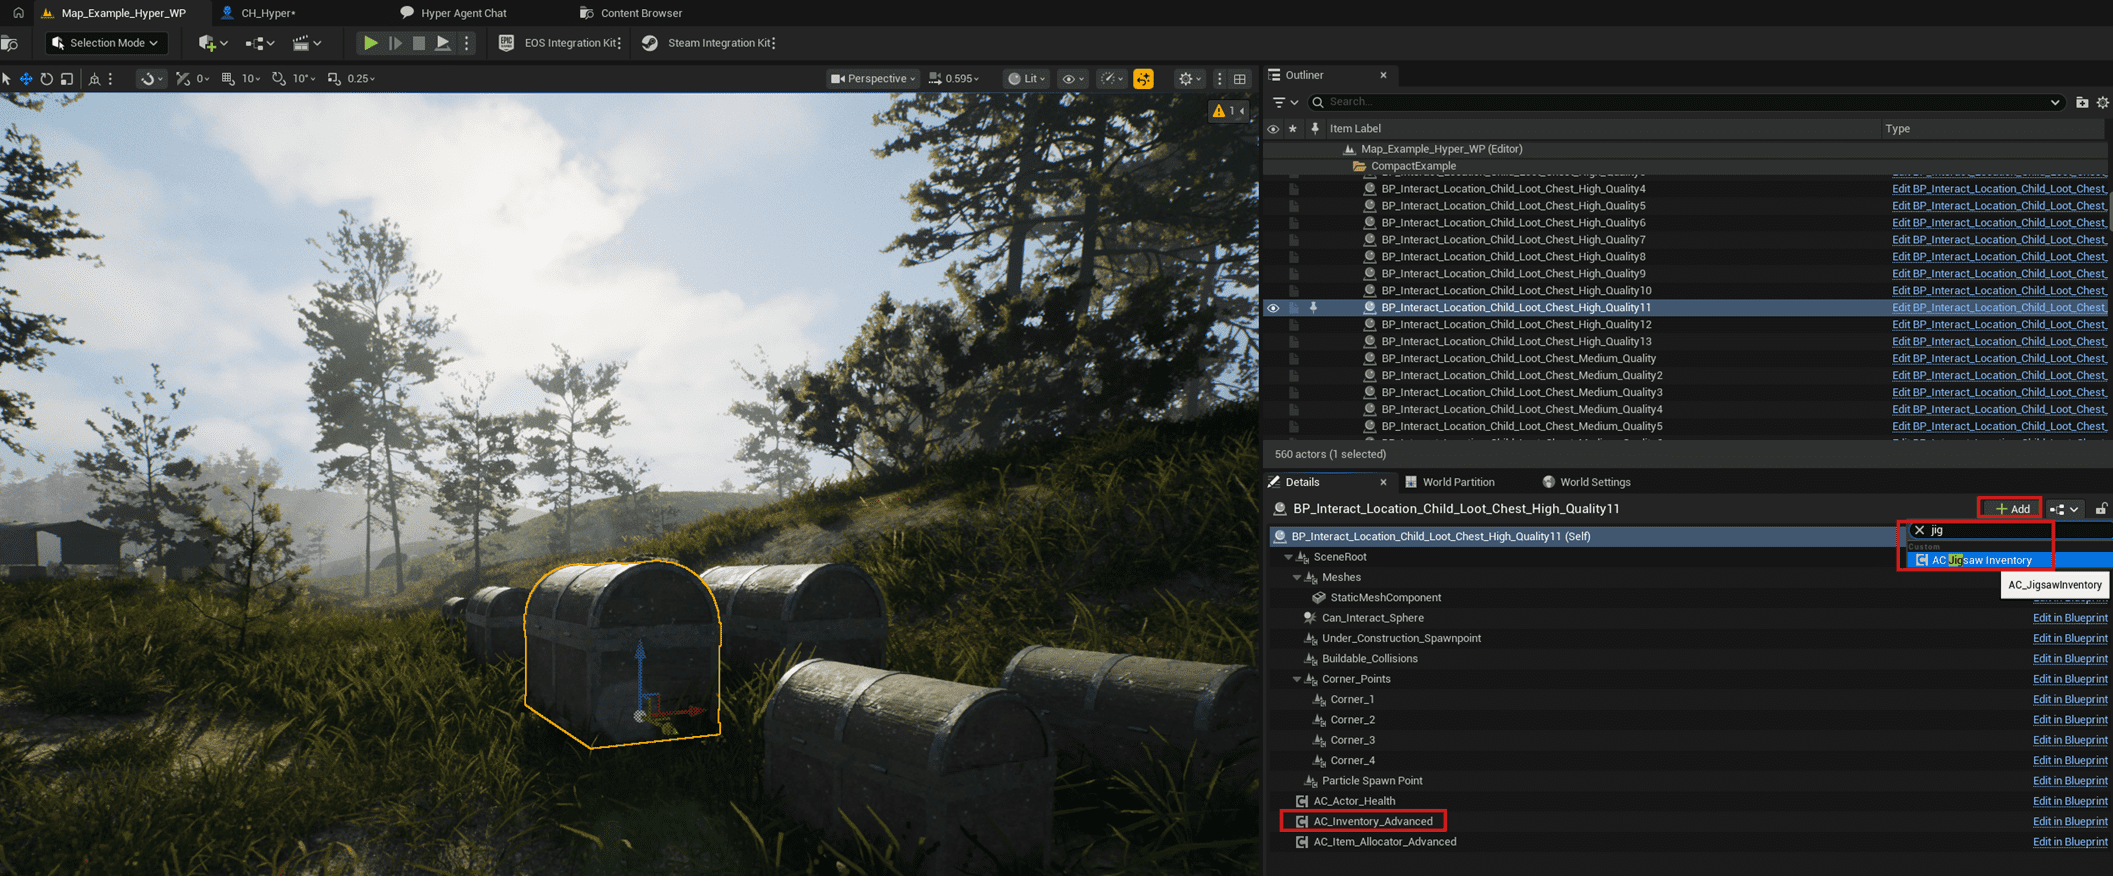
Most Hyper interact locations already have the slot-based inventory assigned, including common actors such as loot chests, crafting stations, and similar interaction actors. If only a few placed actors should use another inventory type, override those specific actors in the world.
- Select the interact location actor in the world.
- Assign the new inventory component shown in the screenshot.
- When BeginPlay runs, the actor uses the newly assigned component instead of the default inventory component.
Important: when you assign a new inventory component this way, the actor does not use the information from the default inventory component. It uses the newly assigned component instead.
Overriding inventory type on base class
If your whole game should use one inventory type for interact locations, you can change the base class instead of overriding individual actors. For example, if you want interact locations to use a jigsaw-based inventory instead of the slot-based inventory, update the base actor at /Game/Hyper/Inventory/Blueprints/Interaction_Locations/BP_Interact_Location_Base.
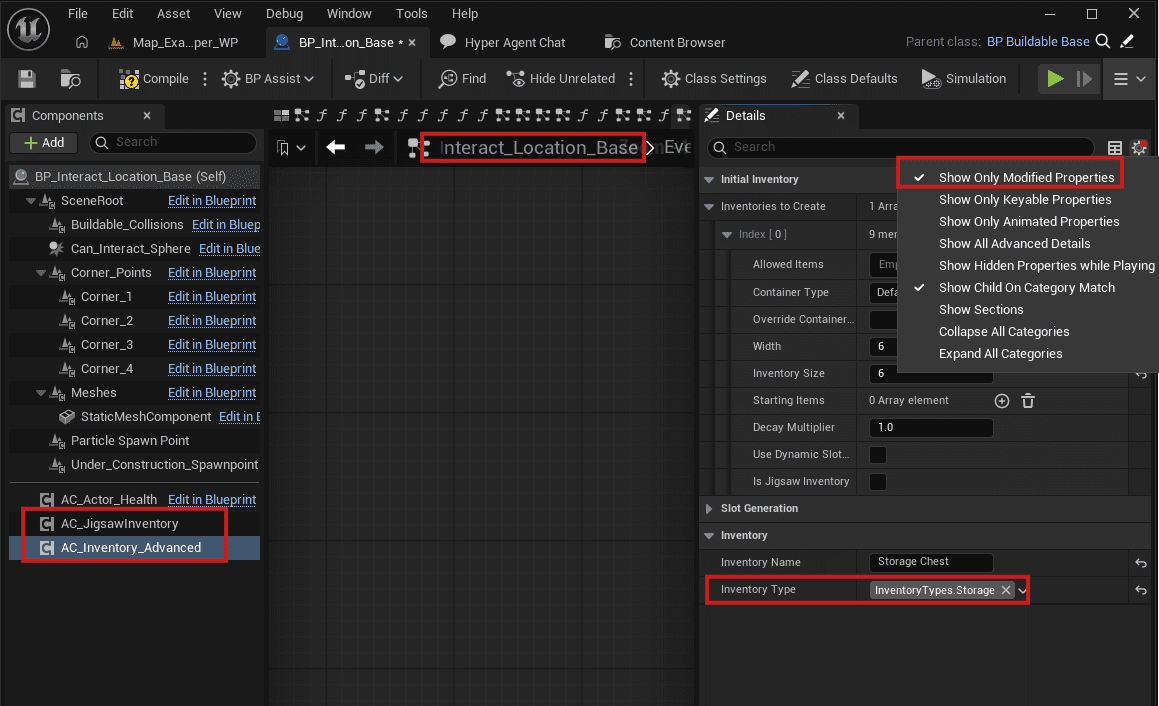
You can assign the jigsaw inventory component directly on that actor, but check the existing inventory component settings first. Inventory components often contain important modified values, such as the inventory type and other interact-location-specific settings.
- Open the base interact location class.
- Assign the new inventory component you want to use.
- Use Show Modified Values on the existing component.
- Review the modified values on the child classes.
- Recreate the relevant settings on the new inventory component.
Do not skip the modified values check. Child classes may rely on custom inventory component settings, and those settings need to be carried over to the new component.